background image

408-10390 

Rev

 T


of 25


2.2.


Applicator with air feed system 

With an air feed applicator (Figure 3), the terminals are fed by the action of an air feed module using a constant 
air supply that moves the feed pawl. The exhaust control valves control the speed of the feed and retract 
strokes. 

Two feed cams (Figure 10) can be used with the air feed applicator. 


The supplied 

pre-feed

 feed cam advances the lead terminal over the anvil on the upward stroke of the 

ram assembly, leaving a terminal over the anvil when the machine is at rest. 


An optional 

post-feed

 cam (part number 2391975-1) is available. It advances the lead terminal over the 

anvil on the downward stroke of the ram assembly, leaving the anvil clear when the machine is at rest. 

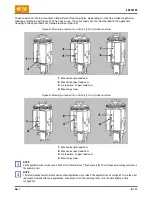
Figure 10: Air feed cams 


Pre-feed cam 

Post-feed cam (optional) 

These feed cams can be mounted in two different mounting holes, depending on machine stroke length and 
feed type (Figure 8 and Figure 9). 


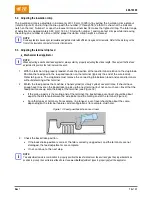
The air supply connection (Figure 3) must be connected to an air supply line providing continuous 
pressure of 5.00 to 6.00 bars [72 to 87 psi] at the applicator. 


No

 oil lubrication of air is required for the Ocean air feed module after receiving and use within a 

production environment. 


The ram collar must be installed when changing crimp tooling to prevent the ram from becoming 
captured. If this occurs, the air feed assembly must be removed to release the applicator ram. 

CAUTION 

The air feed housing has a vertical etched line that serves as a visual aid to ensure that the piston assembly is located within 
the limits of the air cylinder position (see Figure 3)
. The feed pawl holder must be positioned to the right of the line. Incorrect 
positioning of the feed pawl can cause the air feed module to fail prematurely.


Содержание Ocean 1.0

Страница 1: ...erminals identified on the applicator parts list and exploded view drawing applicator log to apply to pre stripped wires NOTE Dimensions in this instruction sheet are in millimeters with inches in bra...

Страница 2: ...height can be adjusted to accommodate different wire sizes and insulation ranges The applicator is also designed to accept modular feed packages Figure 2 Mechanical feed applicator 1 Indicator notch c...

Страница 3: ...he feeder assembly can be removed from the applicator and replaced with any different style mechanical air or servo feed depending on requirements Figure 4 To change to a different feed type use the a...

Страница 4: ...mechanism for precise crimp height adjustment increments of 0 01 mm 0004 in and a total adjustment range of 1 50 mm 059 in By rotating the wire crimp disc the ram interface raises and lowers relative...

Страница 5: ...storage location 4 Fine feed adjustment screw 9 Feed pawl 5 Fine feed adjustment lock screw far side 10 Applicator counter Two feed cams Figure 7 can be used with the mechanical feed applicator The p...

Страница 6: ...eed pre or post feed cam 4 Mounting screw Figure 9 Mounting a feed cam on 30 mm 1 in stroke machine 1 Mechanical pre feed cam 2 Mechanical post feed cam 3 Air feed pre or post feed cam 4 Mounting scre...

Страница 7: ...Post feed cam optional These feed cams can be mounted in two different mounting holes depending on machine stroke length and feed type Figure 8 and Figure 9 The air supply connection Figure 3 must be...

Страница 8: ...nce with local waste regulations Contact local authority for battery recycling locations The servo feed applicator works in conjunction with the AMPOMATOR III servo terminator or any machine that inco...

Страница 9: ...n performing maintenance or repair on this equipment DANGER To avoid personal injury use the applicator only in an appropriate terminating machine Do not connect the pressurized air supply until after...

Страница 10: ...atch pivots downward 4 Place the applicator on the quick change base plate 5 Slide it back until two notches engage the stops at the back of the plate while guiding the ram post into the ram post adap...

Страница 11: ...g by turning the drag release lever upward 7 Remove a length of the terminal strip left in the applicator by grasping the terminals at the strip guide entry raising the feed pawl and pulling the strip...

Страница 12: ...als or other defects caused by worn or broken tooling If necessary replace tooling as described in section 6 If the terminations appear normal measure the crimp height of each termination as described...

Страница 13: ...feed pawl in the required location on the terminal typically the end of the wire barrel Refer to Figure 6 The slug blade must remove the connecting tab between lead and second terminals without deform...

Страница 14: ...the feed pawl holder to allow the fine feed adjustment screw to turn Refer to Figure 6 CAUTION Do not remove the fine feed adjust lock screw A nylon plug is captured behind the lock screw Loss of this...

Страница 15: ...the mating end of the terminal the backstroke over travel should be about equal to the distance between the wire barrel and the mating end of the terminal Figure 3 For other types of terminals for exa...

Страница 16: ...is manually cycled the mechanism moves forward and backward once during each machine stroke unless the air is disconnected DANGER Moving parts can crush and cut Never insert hands into installed equip...

Страница 17: ...n the adjustment is correct continue with step 4 4 Watch the feed pawl as the machine is cycled several times It should have enough but not too much over travel on the retract stroke to pick up the ne...

Страница 18: ...from the applicator 6 Remove the two nuts holding the springs in place on the terminal drag plate Figure 14 Figure 14 Adjusting the strip guide 1 Terminal strip aligned with anvil 4 Terminal drag plat...

Страница 19: ...ke sure that the machine ram is in the raised position 4 Remove the applicator from the machine 5 For identification of parts refer to the exploded view drawing on the applicator log and the parts lis...

Страница 20: ...equired direction until the slug blade can pass freely between the shear plates With the slug blade between the shear plates retighten the four screws 10 Set the applicator upright Raise the ram assem...

Страница 21: ...ach applicator is properly aligned at the factory and the base plate bolts are sealed However it is possible to misalign the applicator housing from the base plate by mishandling or dropping the appli...

Страница 22: ...ominal crimp height from the average crimp height recorded under section 5 1 Adjusting the wire crimp This difference is the thickness of the shims part number 2119957 1 to be added under the spacer 2...

Страница 23: ...rew assembly into the ram and tighten it by hand until it bottoms in the ram NOTE Do not tighten the adjustment screw assembly Just turn it in the assembly until it stops 12 Reinstall the single revol...

Страница 24: ...sting crimper spacer must be at least 0 64 mm 025 in thick Figure 17 Wire depressor accessory parts 1 Existing crimper spacer 2 Replacement crimper spacer 3 Wire depressor select based on wire size ra...

Страница 25: ...0 2 41 095 2 455888 1 4 83 190 7 455888 2 1 40 055 1 455888 1 2 54 100 2 455888 2 3 Choose a wire depressor based on the wire size range Table 4 Table 4 Wire depressors by wire size range Wire size ra...

Отзывы: