B e f o r e r e co rd i n g , y o u sh o u l d p re p a r
neccessary settings including drum kit,
metronome, tempo, time signature etc. Press
the button to enter the record mode. The
indicator will blink. Now, it is ready for recording.
RECORD
1. Record
After one meature count-in, the record starts
immediately, no matter you strike drum pad or
not. If the metronome is turned on, you can hear
the metronome during the recording.
The record indicator will keep blinking.
The record measure count will appear on the
display.
Press the button again to stop the
recording. The display will go to the save
stage.
2. Play back your recording
After stop the recording, press the button
to playback your recording. Press button
again to stop the playback.
After you save the recording as User Song, In
the Song mode you can also select user song
to playback. Please refer to the <SONG> chap-
ter in this Manual for details.
3. Save as a User Song
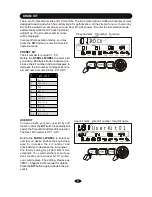
In the save operation, the User Song number
for saving your record will blink. You may ro-
tate the
SCROLL WHEEL
to choose song name.
Press the
ENTER
button to save recorded song,
press the
EXIT
button to turn to the Kit Selection
mode without saving.
If the song name was already used for the pre-
vious recording, it
’
ll ask you do you want to re-
place it with the new reco rding? Pre ss the
ENTER
button to replace it or press the
EXIT
button to select another song number.
21
4. Erase User Song
In the Kit selection mode, press the
DEMO
button twice to enter the User Song mode.
Select an User song then press the
ENTER
button.
“
Erase it?
”
will appear on the display.
Press the
ENTER
button to erase this song
or press the
EXIT
button to give up erasing.
Then, it
’
ll return to the User Song mode.
Measure
Record
Recording
User Song
Replace it
2
1
3
Erase it?
User Song


