
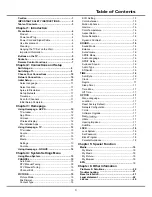


16
System Settings Menu
SPDIF Mode
Press
OK
to toggle between
Auto
and
PCM
.
Audio Language
Choose from the list of languages available for the pro-
gram you’re watching. The language chosen becomes
your preferred language for all digital channels until
you turn the TV off. If the language chosen is not being
broadcasted with a program, the TV plays the default
language for the program.
Note: The [Default Audio Language] option is only avail-
ablefor digital channels.
SPDIF Delay
This option is used to synchronize the sound with the
picture. If the sound is slower/quicker than the action
of the picture, you can press ◄/► to turn down/up the
numerical value.
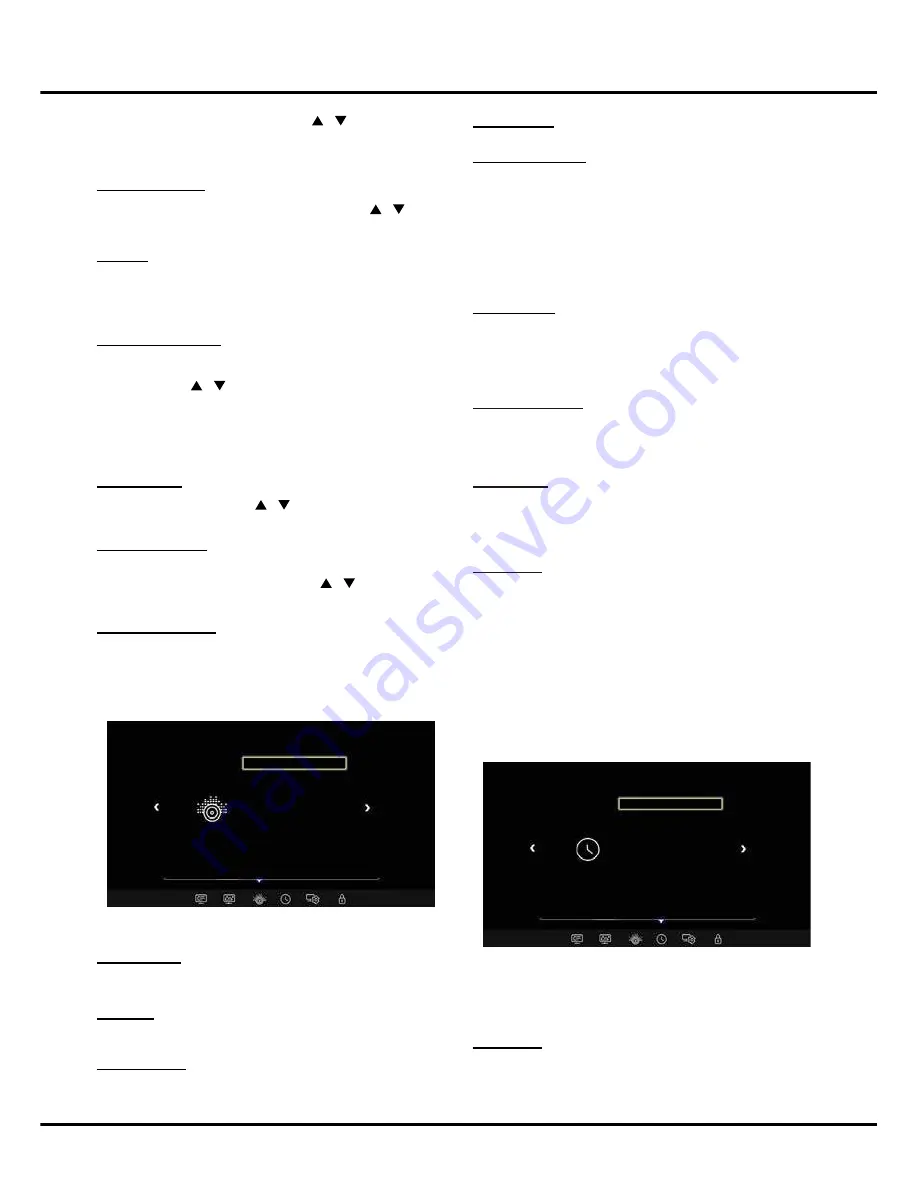
TIME
Press
setting
button and select
TIME.
The options are
as follows:
Note: Time Zone
is available only when
Auto
Synchronization
(submenu of
Clock
) is set to
ON
.
Press
OK
to enter, and then press
/
to select
Off
,
Low
,
High
, or
xvYCC
.
Note
: For some models, the options are Off, On, xvYCC.
Motion Enhance
Motion Enhance
:
Press
OK
to enter. Press
/
select
Off
,
Low
,
Middle
, or
High
.
Gamma
Sets the shape of the Gamma curve. Use lower Gamma
values for bright ambient lighting, and higher values
when it is dark.
Color Temperature
Adjusts the color temperature of the picture. Press
OK
to enter. Press / to select
the color settings:
Cold
for a more blue palette of picture colors;
medium
and
Warm
for a more red palette of picture colors.
Note
:
For some models, the
Color Temperature
option
is not available.
Aspect Ratio
Press
OK
to enter. Press
/
select the mode to
display the picture: Auto, 4:3, 16:9, Just Scan.
Noise Reduction
Improves the quality of the picture in the case of poor
reception. Press
OK
to enter. Press
/
to select
Off,
Low, Middle, High or Auto.
Dynamic Contrast
Press
OK
to select
On
or
Off.
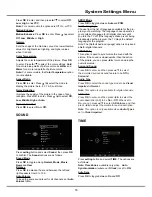
SOUND
Press
setting
button and select
Sound
, then press
OK
to confirm. The
Sound
options are as follows:
Sound Mode
Press
OK
to toggle among
Normal, Music, Movie,
News
and
User
.
Balance
Press
OK
to balance the sound between the left and
right speakers from 0 to 100.
Auto Volume
To keep the same sound level for all channels, set
Auto
Volume
to
On
.
SOUND
Sound Mode
Balance
Auto Volume
SPDIF Mode
Audio Language
SPDIF Delay
Surround Sound
Audio Type
AD Switch
Normal
TIME
Auto Sync
Clock
Region
Sleep Timer
Time Zone
Off Time
On
Surround Sound
Press
OK
to enter, and then press
▲/▼ to
select
the simulated surround sound feature to be
Off
or
Surround
.
Audio Type
Press
OK
to select the sound type mode to be
Visual
Impaired
or
Normal
.
Note
: This option is only available for digital channels.
AD Switch
Press
OK
to enter, and then press
◄/► to
select the
audio description (AD) to be
On
or
Off
. When set to
On
, you can press
▲/▼ to select
AD Volume
, and then
press ◄/► to adjust the volume for audio description.
Note
: This option is only available when
Audio Type
is
set to
Visual Impaired
.
Auto Sync
Press
OK
to toggle between
On
and
Off
.
Содержание 43P20US/50E17US
Страница 1: ...43P20US 50E17US...
Страница 6: ...5 Introduction...


