

●
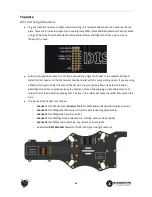
The OSD is enabled by default, to disable it completely hook up video and press the “ENTR” button on
the top plate for 4-5 seconds, toggle to the “OSD" menu and select "OSD OFF".
●
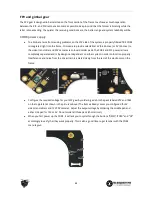
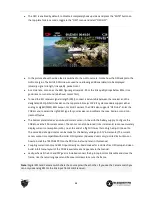
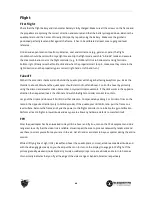
In the picture above the video feed is switched to the GoPro camera. Notice how the OSD adapts to the
GoPro margins. The EzUHF RSSI Link was used here, allowing additional details to be displayed
(diversity signal strength, link quality, packet loss.)
●
As a side note, as soon as the RSSI figures get towards -90 or the link quality drops below 80%, it is a
good time to turn around (whichever comes first.)
●
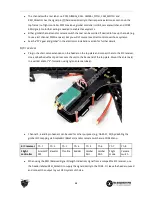
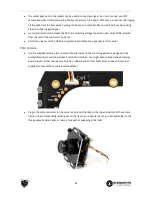
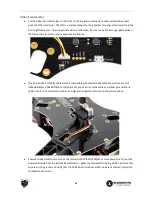
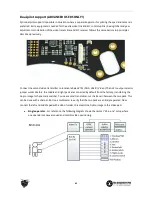
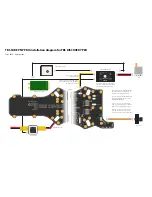
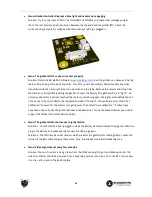
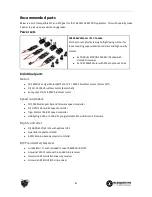
To read the R/C receiver signal strength (RSSI), connect a servo-cable between the receiver and the
designated RSSI_ANALOG header on the top plate. All major FPV R/C system vendors support either
analog or digital (PWM) RSSI output. For EzUHF owners, the CORE also supports “OSD Link”. Enter the
CORE menu to select the right RSSI type for your receiver and calibrate the max. (radio on) and min.
(radio off) value.
●
The bottom plate includes an on-board current sensor in-line with the battery supply. Configure the
CORE to use the 50A current sensor. The sensor can also be tuned (in % increments) to more accurately
display current consumption (mAh), i.e. at the end of a flight if it was 1% too high, adjust it down 1%.
The same kind of adjustments can be made for the battery voltage (in 0.1V increments.) The current
sensor output is compatible with similar OSD systems. (Advanced users only) Limited instructions on
how to install the TBS CORE PRO on the PRO can be found later in this manual.
●
Coupling current sensor and RSSI input directly on-board makes for a clutter-free OSD setup and clean
build. A full menu layout of the CORE is available as an appendix to the manual.
●
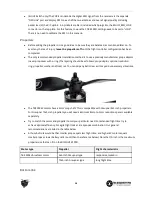
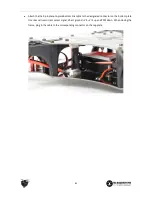
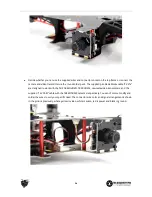
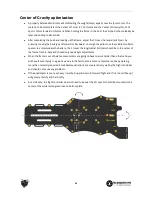
Lastly, when all the R/C and FPV gear is installed connect the 9-pin top-bottom link cable and close the
frame. Use the remaining spacer and frame arm screws to secure the frame.
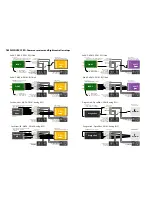
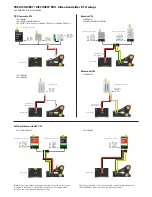
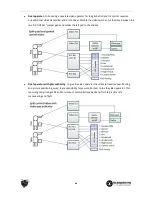
Note: Digital RSSI and Camera switch share the source pin with each other. If you use the Camera switch you
can only use analog RSSI or the link input from EzUHF receiver.
39
Содержание Quadrotor
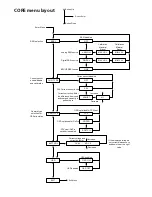
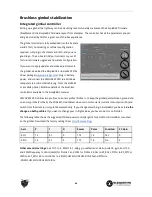
Страница 37: ... CORE menu layout Button Enter use up ...


