87
Figure 64
Event log via MMI
This screen (Figure 64
) is a default one in case “Lockout” is present. Pressing the “Event Log” button provides
transition to this screen from any menu.
To enter the EL via the MMI menu:
Main menu -> Indication data -> IDC -> Event log
The latest event is placed at the bottom of the list. Info about the number of the event in the list, time and date
of the event is displayed on the screen.
To navigate in the EL
, use arrow buttons. The “open door pictogram” marker in the top right corner of the
screen means that additional info is applicable. To see this additional info, press the ENTER button, to go back
to the EL menu press ESC button.
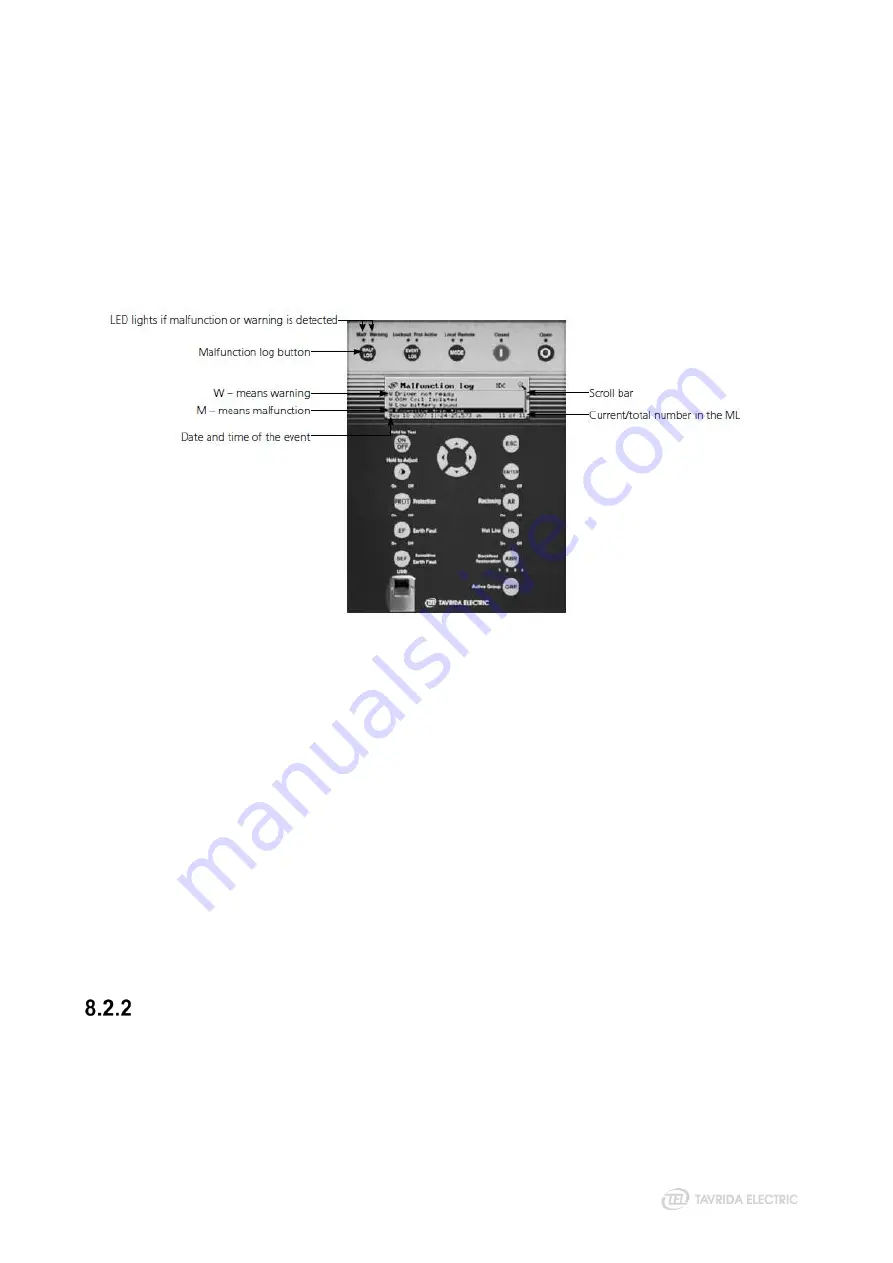
Figure 65
Malfunction log via MMI
This screen (Figure 65) is a default one in case LOCKOUT is absent and there are some unread events in the
Malfunction log. Pressing the “Malfunctioning log” pushbutton provides transition to this screen from any menu.
To enter the ML via the MMI menu:
Main menu -> Indication data -> IDC -> Malfunction log
Some events have characters that classify events: “M” – malfunction or “W” - warning. A character is shown
in the beginning of the event description string.
It is not possible to see the load profile via the MMI. Load profile step can be changed via the MMI.
To change Load profile step via the MMI:
Main menu -> Settings -> System -> IDC -> Load profile step
NOTE! It is only possible to erase all logs at once, single event removal is not possible.
To erase all readings in all logs, select corresponding function in the menu as shown below and confirm the
action:
Main menu -> Control data -> Erase logs
Counters
From the control panel the following counters can be read:
•
Protection counters
Main menu -> Indication data -> IDC -> Protection counters
•
Lifetime counters
Main menu -> Indication data -> IDC -> Lifetime counters
Содержание Rec15
Страница 1: ......
Страница 5: ...1 Introduction...
Страница 9: ...2 Technical Parameters...
Страница 14: ...3 Product Description...
Страница 26: ...26 Figure 25 Anti vandal housing...
Страница 27: ...4 Functionality...
Страница 56: ...5 Product Handling...
Страница 69: ...6 Installation...
Страница 81: ...7 Commissioning...
Страница 84: ...8 Operation...
Страница 99: ...99 Figure 76 Settings uploading wizard...
Страница 100: ...9 Maintenance and Troubleshooting...
Страница 114: ...114 Figure 90 Securing the trip hook shaft against rotation...
Страница 115: ...10 Product Coding...
Страница 122: ...11 Appendices...
Страница 128: ...128 Appendix 4 Recloser Control Drawings Figure 99 Dimensions of RC5_4...
Страница 131: ...131 Figure 103 Dimensions of substation recloser package Figure 104 Placement of substation recloser components in a box...
Страница 133: ...133 Figure 106 Dimensions of standard OSM mounting kit arrangement for lateral installation...
Страница 134: ...134 Figure 107 Dimensions of interface bracket...
Страница 135: ...135 Figure 108 Dimensions of OSM mounting kit with M16 pole interface front installation...
Страница 136: ...136 Figure 109 Dimensions of OSM mounting kit with M16 pole interface lateral installation...
Страница 137: ...137 Figure 110 Dimensions of OSM mounting kit with M20 pole interface front installation...
Страница 138: ...138 Figure 111 Dimensions of OSM mounting kit with M20 pole interface lateral installation...
Страница 139: ...139 Figure 112 Dimensions of OSM mounting kit for installation through the pole front installation...
Страница 140: ...140 Figure 113 Dimensions of OSM mounting kit for installation through the pole lateral installation...
Страница 149: ...149 Figure 122 Dimensions of OSM substation mounting kit...
Страница 150: ...150 Figure 123 Dimensions of RC mounting kit for around the pole installation 500 mm U profiles 450 mm M16 threaded rods...
Страница 152: ...152 Figure 125 Dimensions of RC mounting kit for through the pole installation...
Страница 153: ...153 Figure 126 Dimensions of RC substation mounting kit...
Страница 154: ...154 Figure 127 Dimensions of VT mounting kit One VT holder...
Страница 157: ...157 Figure 132 Dimensions of VT mounting kit Two VT holders two 500 mm U profiles and M16 threaded rods...
Страница 158: ...158 Figure 133 Dimensions of VT mounting kit Two VT holders two 700 mm U profiles and M20 threaded rods...
Страница 159: ...159 Figure 134 Dimensions of VT mounting kit Two VT holders four 500 mm U profiles and M16 threaded rods...
Страница 163: ...163 Appendix 8 Connectors Drawings Figure 141 Dimensions of aerial connector...
Страница 164: ...164 Figure 142 Dimensions of bird guards for aerial connector...
Страница 165: ...165 Figure 143 Dimensions of two hole NEMA connector...
Страница 166: ...166 Figure 144 Dimensions of bird guards for two hole NEMA connector...
Страница 167: ...167 Figure 145 Dimensions of four hole NEMA connector...
Страница 168: ...168 Figure 146 Dimensions of bird guards for four hole NEMA connector...
Страница 169: ...169 Figure 147 Dimensions of Burndy NEMA connector...
Страница 170: ...170 Appendix 9 Recloser Control Wiring Diagram Figure 148 RC5_4 wiring diagram...
Страница 172: ......


