background image

7 − Using the folder finder

TASCAM  SS-R1


Adding an entire folder to a playlist

You can add all the files in a folder to the desired playlist.

However, files in a sub-folder will not be added.

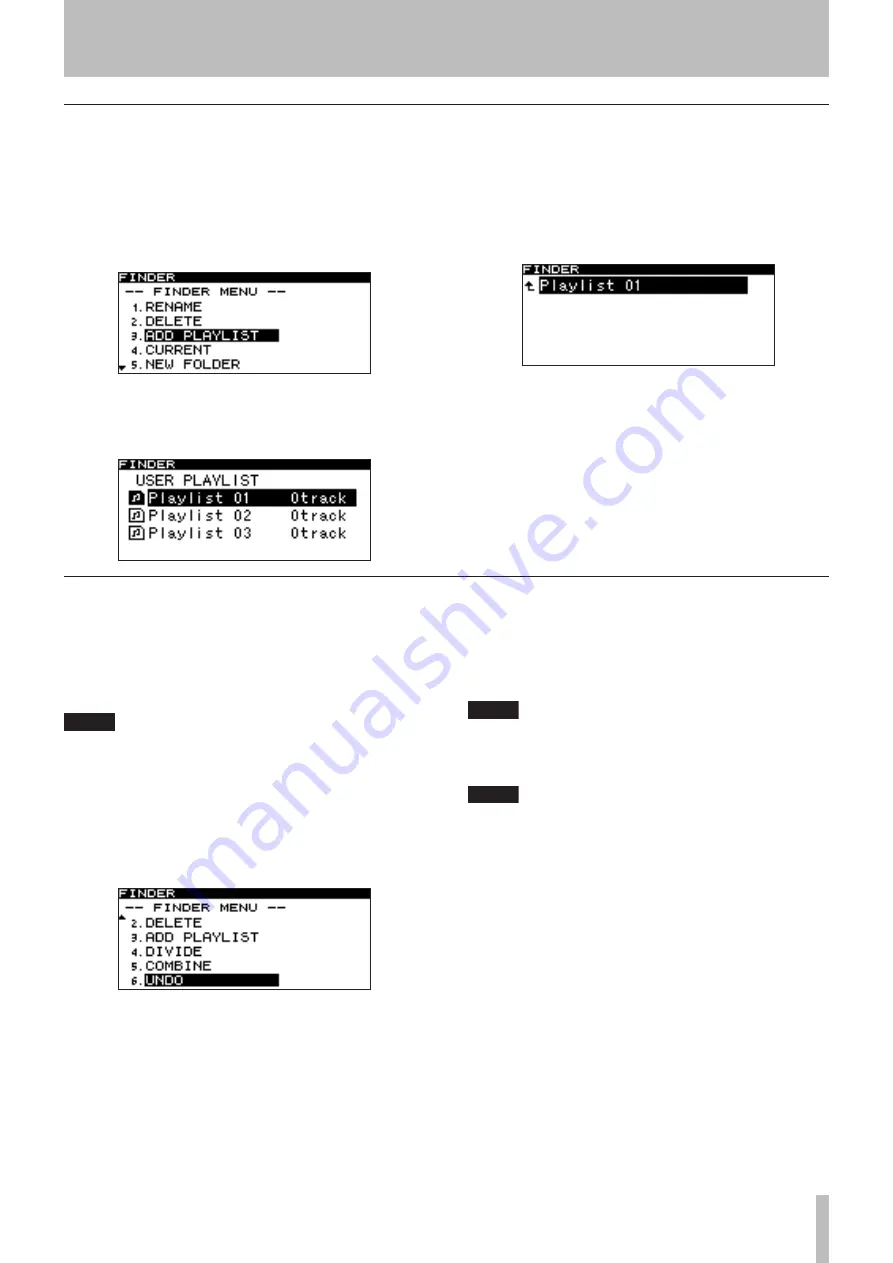
1  With the folder menu screen displayed, turn the 

front panel 

MULTI JOG

 dial (or use the remote’s 

CURSOR 

§


, ¶

 keys) to highlight ADD PLAYL-

IST.

2  Press the front panel 

MULTI JOG

 dial (or the 

remote’s 

ENTER

 key).

The playlist select screen will appear.

3  Turn the front panel 

MULTI JOG

 dial (or use the 

remote’s 

CURSOR 

§


, ¶

 keys) to highlight the 

playlist in which you want to register the files.

4  Press the front panel 

MULTI JOG

 dial or 

˚

 key 

(or the remote’s 

ENTER

 key or 

CURSOR


¥

 key).

The selected playlist will be displayed.

5  Turn the front panel 

MULTI JOG

 dial (or use the 

remote’s 

CURSOR 

§


, ¶

 keys) to select the posi-

tion within the playlist at which you want to add 
the files. 

The files will be added following the highlighted file.

6  Press and hold the front panel 

MULTI JOG

 dial (or 

the remote’s 

ENTER

 key).

The folder will be added to the playlist.

Undoing a folder menu operation (UNDO)

Some of the operations in the folder menu (folder name 
editing, adding a new folder, deleting a folder) can be 
undone immediately after they are executed.

This is possible only if the play mode is set to consecutive 
playback (CONTINUE).

NOTE

When executing an Undo, it does not matter which 
folder in the folder finder screen was selected before 
opening the folder menu screen.

1  Turn the front panel 

MULTI JOG

 dial (or use the 

remote’s 

CURSOR 

§


, ¶

 keys) to highlight 

UNDO.

A confirmation screen will appear.

In the example screen shown above, the folder delete 
operation (DELETE) can be undone.

2  Press the front panel 

MULTI JOG

 dial (or the 

remote’s 

ENTER

 key).

The Undo operation will be executed, and you will 
return to the folder finder screen. At this time, the file 
to which Undo applied will be highlighted.

NOTE

If you decide to cancel the Undo operation, press the 
front panel 

TIME (ESC)

 key (or the remote’s 

CLR/ESC


key).

NOTE

If there is no file to which the Undo operation can be 
applied, the display will indicate 

CAN

,

T UNDO


.

Содержание SS-R1

Страница 1: ...D01014120A SS R1 Solid State Stereo Audio Recorder OWNER S MANUAL...

Страница 2: ...asse A Dans un environnement domestique cet appareil peut provoquer des interf rences radio dans ce cas l utilisateur peut tre amen prendre des mesures appropri es F r Kunden in Europa Warnung Dies is...

Страница 3: ...facturer or sold with the apparatus When a cart is used use caution when moving the cart apparatus combination to avoid injury from tip over 13 Unplug this apparatus during lightning storms or when un...

Страница 4: ...on play 25 Repeat playback 26 Conventional repeat playback 26 A B Repeat playback 26 Pitch Control playback 26 Specifying the Pitch Step 27 Key Control playback 27 Using the remote s dedicated key to...

Страница 5: ...files COMBINE 52 Undoing a file menu operation UNDO 53 Moving or copying a file 53 Moving a file within a folder 53 Moving or copying a file between folders 54 8 Using the playlist finder Overview 55...

Страница 6: ...tion of the display shows a message inc pop up selectable value i e values of DB or ON OFF selection i e SRC ON this is shown in the following typeface MOVE Supplied accessories In addition to this ma...

Страница 7: ...unit may become hot during operation always leave sufficient space above the unit for ventilation Do not install this unit in a confined space such as a book case and do not put anything on top of th...

Страница 8: ...pen collector Indication signal maximum voltage 15 V maximum current 50 mA 1 Maximum supplied current is 50 mA 2 Pin 14 Remote Select When this pin is high the input pins for which the above table lis...

Страница 9: ...while outputting audio Review function While playing or paused momentarily pressing this key will perform the Time Skip function see Time skip on page 24 In menu mode this key returns to the previous...

Страница 10: ...etting appro priately for the type of keyboard you ve connected see Specifying the keyboard type on page 60 i PITCH knob Turn this knob to adjust the pitch play back speed You can press this knob to t...

Страница 11: ...r will change see Switching the playback time display mode on page 25 Switching the recording time display mode on page 38 5 P MODE key This switches the playback mode between CONTINUE normal consecut...

Страница 12: ...PITCH knob see Pitch Control play on page 26 a INPUT SEL key This selects the recording input source You can choose ANALOG RCA ANALOG XLR or COAXIAL see Selecting the input source on page 34 s Numeric...

Страница 13: ...the currently specified play area 2 Playback mode This shows the currently specified playback mode 3 Input source indicator This shows the currently selected input 4 Level meter During playback this...

Страница 14: ...f the Auto Ready function is active 7 INC_PLAY This will be lit if the Incremental Play function is active 8 FLASH This will be lit if Flash Load has been completed While recording or record ready 9 F...

Страница 15: ...ge 28 AUTO READY Auto Ready on off Page 29 REPEAT Repeat Play on off Page 26 KEY Key Control on of and setting Page 27 PREFERENCE Various playback preferences Page 31 REC INPUT SELECT Input source sel...

Страница 16: ...he list As a specific example we ll explain how to turn the PLAY menu item AUTO CUE on and then change the auto cue level 1 Press the MENU key to access the main menu list screen 2 Select the desired...

Страница 17: ...t volume use the REC menu item INPUT VOLUME Connecting audio devices outputs Connect an external monitor system or mixer to the SS R1 s ANALOG OUTPUTS BALANCED plugs ANALOG OUTPUTS UNBALANCED jacks or...

Страница 18: ...me are recorded in the audio file 1 Press the MENU key to access the menu list screen 2 Turn the front panel MULTI JOG dial or use the remote s CURSOR keys to highlight UTILITY and press the MULTI JOG...

Страница 19: ...item LCD BRIGHTNESS to adjust the brightness of the backlight 1 Press the MENU key to access the main menu list 2 Turn the front panel MULTI JOG dial or use the remote s CURSOR keys to highlight UTIL...

Страница 20: ...ly ejected 5 Grasp the card and pull it out Inserting a CompactFlash card In order to record or play back on the SS R1 a CompactFlash card must be inserted in the front panel CompactFlash card slot TI...

Страница 21: ...R1 is powered on 5 Playback Tracks and files The audio data on a CompactFlash card is saved as audio files These files are handled as tracks by the SS R1 s recorder For this reason this manual will r...

Страница 22: ...audio files is insert ed and that the display is showing the home screen Playback Press the PLAY key to begin playback NOTE If the CompactFlash card does not contain any audio files that the SS R1 is...

Страница 23: ...igits Elapsed time from the beginning of the track XXhours XXminutes XXseconds two digits each For example if you want to locate to 1 minute 30 seconds from the beginning of track 2 you would press th...

Страница 24: ...area will play back in order of their track numbers Single playback Only the currently selected track will play back and then playback will stop Program playback The tracks will be played back in the...

Страница 25: ...n in the home screen 1 Press the front panel TIME ESC key or the re mote s TIME key Each time you press this key you will cycle through four types of time display The currently selected dis play mode...

Страница 26: ...continue and when it reaches the end of the play area it will return to the beginning and continue playing If you turn on repeat playback while stopped repeat playback will begin when you press the P...

Страница 27: ...erations in the menu screen on page 16 1 Press the MENU key to access the main menu list screen 2 Select the PLAY menu 3 Select the KEY item In this state you can turn Key Control on off 4 Turn the KE...

Страница 28: ...to Operations in the menu screens on page 16 1 Press the MENU key to access the main menu list screen 2 Select the PLAY menu 3 Select the AUTO CUE item In this state you can turn the Auto Cue functio...

Страница 29: ...rom the front panel via the menu for details on operations in the menu screen refer to Operations in the menu screens on page 16 1 Press the MENU key to access the main menu screen 2 Select the PLAY m...

Страница 30: ...he Incremental Playback mode on off by pressing the remote s INC PLAY key INC PLAY key When the Incremental Playback mode is on I NC_PLAY will light in the home screen Call function The Call function...

Страница 31: ...en you ve finished making settings press the front panel TIME ESC key or the remote s CLR ESC key to return to the home screen NOTE This setting is remembered even when the power is turned off Using t...

Страница 32: ...tracks in the play area will be read successively in the same way as for the CONTINUE setting If twenty one or more tracks are registered data for the first twenty tracks from the beginning will be lo...

Страница 33: ...L connector con nect the device that will receive the EOM tally signal 2 Power on the SS R1 and the receiving device 3 Begin playback on the SS R1 When the remaining time of the current track or the p...

Страница 34: ...ng Using the dedicated remote key to select the source Each time you press the INPUT SEL key you will cycle through the three input source INPUT SEL key Using the menu to select the source For details...

Страница 35: ...if the sampling rate does not match see Using the sampling rate converter on page 36 Specifying the recording file format The SS R1 can record in MP3 or WAV format The file format setting is made via...

Страница 36: ...e screen NOTE If a digital signal whose sampling rate differs from the sampling rate specified in the REC FORMAT item is being received at the DIGITAL IN jack and you attempt to record with SRC off an...

Страница 37: ...y to highlight LEVEL 8 Turn the MULTI JOG dial or use the remote s CURSOR keys to highlight BALANCE and then press the front panel key or the remote s CURSOR key to highlight the balance value 9 Selec...

Страница 38: ...mode is remembered even when the power is turned off For details on the time display during playback refer to Switching the playback time display mode on page 25 The SS R1 is able to record a maximum...

Страница 39: ...d settings 6 Set the following items LEVEL Specify the sync level You can set this in a range of 72 dB 24 dB 6 dB steps The default setting is 54 dB DELAY Specify the time in steps of one frame from w...

Страница 40: ...stays below the sync level for the duration specified by STOP TIME default 5 seconds the SS R1 will auto matically switch to the record ready condition SYNC LEVEL STOP TIME REC ready Time Level NOTE...

Страница 41: ...detailed settings described below after having stayed below it for two seconds or longer Level Time A_TRACK LEVEL At least 2 sec Track increment DD When recording a digital source CD DAT MD via the DI...

Страница 42: ...el TIME ESC key or the remote s CLR ESC key to return to the home screen NOTE This setting is remembered even when you turn off the power Using the remote s dedicated key to switch modes Each time you...

Страница 43: ...the remote s CURSOR key to proceed to the REC PREF ERENCE screen 5 Select COMP 6 Turn the MULTI JOG dial or use the remote s CURSOR keys to select one of the follow ing as the compressor mode OFF The...

Страница 44: ...file name To edit and store a text string proceed as follows 1 With one of the choices USER0 1 USER03selected press the key The editing screen will appear 2 Edit the text string as follows To change...

Страница 45: ...ame or file name or delete files or folders If you perform this type of editing from your computer please be aware that the playback order of the files on the SS R1 may differ after editing on your co...

Страница 46: ...highlighted file Press the READY key The SS R1 will pause and you will return to the home screen If the play area is FOLDER the folder that contains the highlighted file will be the current folder To...

Страница 47: ...tch the type of character uppercase lower case Press the front panel DISPLAY INFO key or the remote s DISPLAY key To insert a space Press the CALL key To cancel editing Press the STOP key 4 When you v...

Страница 48: ...it does not matter which folder is selected in the folder finder screen when you open the folder menu screen 1 Turn the front panel MULTI JOG dial or use the remote s CURSOR keys to highlight UNDO 2 P...

Страница 49: ...nel MULTI JOG dial or the remote s ENTER key The folder will be added to the playlist Undoing a folder menu operation UNDO Some of the operations in the folder menu folder name editing adding a new fo...

Страница 50: ...yed turn the front panel MULTI JOG dial or use the remote s CURSOR keys to highlight RENAME 2 Turn the front panel MULTI JOG dial or the re mote s ENTER key The RENAME screen will appear 3 Edit the na...

Страница 51: ...can undo the Divide operation after executing it Undoing a file menu operation UNDO on page 53 You can t divide an MP3 file 1 Use the PLAY key keys time search function and time skip function etc to...

Страница 52: ...will play repeatedly NOTE If the file has been registered in a playlist the P L I ST ENTRYpopup will appear If a file you re editing was registered in a playlist it will no longer be possible to play...

Страница 53: ...ecide not to perform the Undo operation UNDO press the front panel TIME ESC key or the remote s CLR ESC key NOTE If there is no file operation that can be undone the display will indicate CAN T UNDO M...

Страница 54: ...nt panel MULTI JOG dial and keys or the remote s CURSOR keys to navigate within the folder finder to open the move destination folder When you move the cursor to where the file name is displayed the b...

Страница 55: ...then move to the file menu screen where you can add a file to the playlist delete a file from the playlist or move a file within the playlist 8 Using the playlist finder Opening the playlist finder s...

Страница 56: ...d Press the front panel DISPLAY INFO key or the remote s DISPLAY key once again the property dis play will disappear and you will return to the playl ist finder screen In the playlist menu you can del...

Страница 57: ...ylist Deleting all files from a playlist Here is how to delete all files from the playlist Deleting files from a playlist will not delete the files from the card 1 Turn the front panel MULTI JOG dial...

Страница 58: ...s and hold the front panel MULTI JOG dial or the remote s ENTER key The playlist screen will appear In the screen the file to be moved will be blinking 3 Turn the front panel MULTI JOG dial or use the...

Страница 59: ...e entire CompactFlash card to FAT format Before a CompactFlash card used by another device can be used with the SS R1 you must format it on the SS R1 NOTE When you format a card all folders and files...

Страница 60: ...he keyboard type Using the keyboard to enter names You can edit or enter a card name folder name or track name just as when typing text into a computer To access the name editing screen RENAME screen...

Страница 61: ...TCH dial same as the remote s PITCH key SHIFT F1 key To ERASE TRACK of edit mode SHIFT F2 key No assignment SHIFT F3 key To FORMAT of edit mode SHIFT F4 key To MOVE of edit mode SHIFT F5 key To DIVIDE...

Страница 62: ...n Backspace key Delete the character preceding the cursor location Insert key Inserts a character at the cursor location ESC key Cancels editing or title editing and exits menu mode Enter key The same...

Страница 63: ...ll appear 4 Make the appropriate setting for each item BAUD RATE Specify the baud rate communication speed Choose from 4800 9600 1 9200 and 38440bps default 1 9200 PARITY BIT Specify the communication...

Страница 64: ...was not possible because the track was protected 11 caut i on NAME FULL The name has reached the maximum number of characters 12 caut i on PROGRAM FULL Registration is not possible because you have r...

Страница 65: ...t the recording level A setting you changed is not remembered The SS R1 backs up the settings when you change them This backup may fail if you turn off the power at an inappropriate time so do not tur...

Страница 66: ...3 Consumer S PDIF Input sampling frequencies supported 32 kHz 48 kHz Input impedance 75 unbalanced Variable gain amount 10 dBFS Digital output COAXIAL Connector RCA pin jack Supported signal format I...

Страница 67: ...301 mm 19 x 1 8 x 11 9 in Weight 3 3 kg 7 3 lb 1 If you would like to change the maximum balanced output level please contact the service department Specifications and appearance are subject to change...

Страница 68: ...tascam com 5939 Wallace Street Mississauga Ontario L4Z 1Z8 Canada TEAC MEXICO S A De C V Phone 52 555 581 5500 www tascam com Campesinos No 184 Colonia Granjes Esmeralda Delegacion Iztapalapa CP 09810...

Отзывы: