20
TASCAM DR-100MKIII
4 – Recording
Recording
With this unit, you can record audio with even better quality
by changing the recording format and sampling frequency, as
well as setting the various functions, including the limiter, level
control and low-cut filter.
Here, we explain basic recording using the UNI MIC (built-in
directional mics).
1. Place the recorder.
Point the built-in directional mics (UNI MIC) at the sound
source and place the unit in a stable location where there is
little vibration. (See “Preparing the recording inputs” on page
2. Select the input source.
Set the input source to
UNI MIC
input sources” on page 21.)
To change where recording files are saved, see “Setting
where to save files” on page 21.
3. Start recording standby.
Press the REC button to start recording standby. The REC
indicator will blink.
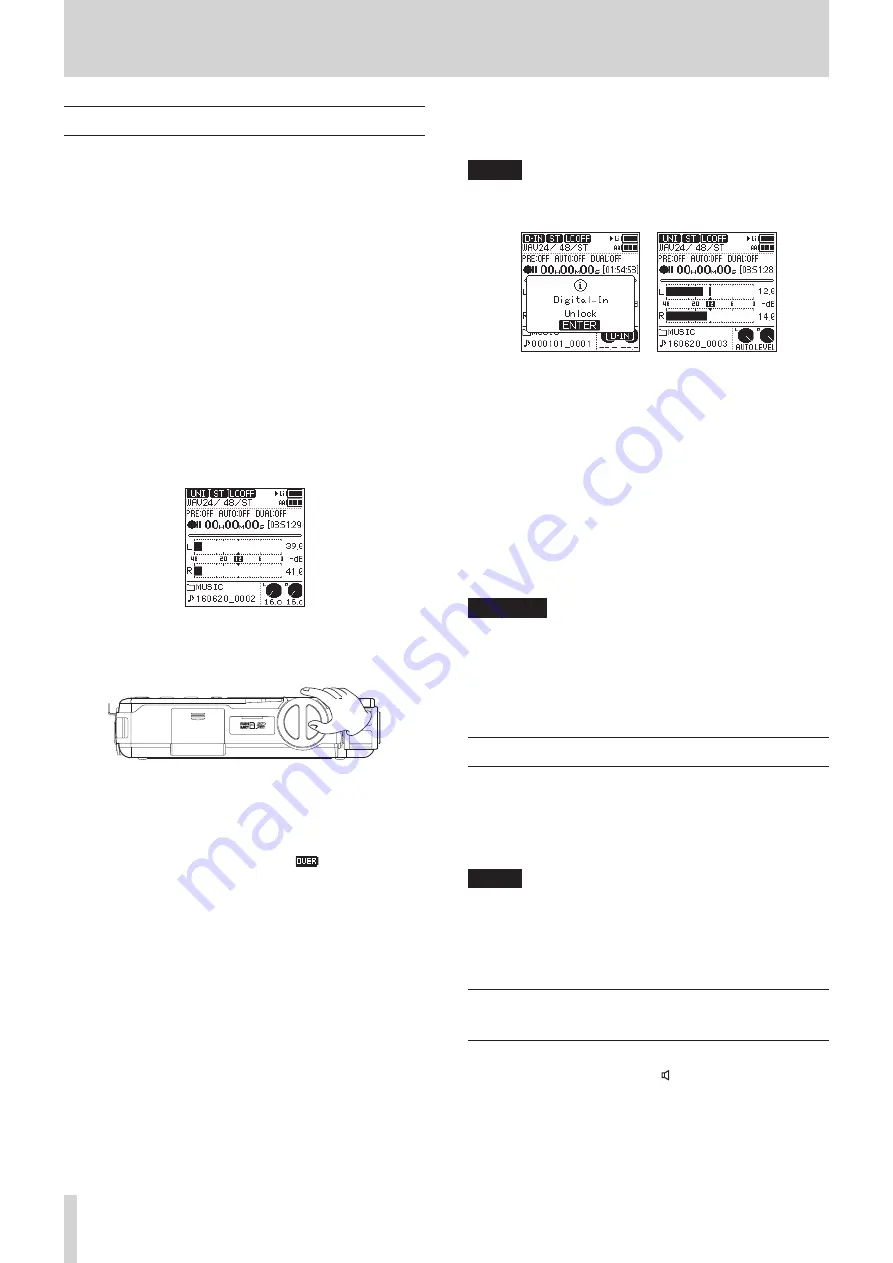
4. Adjust the recording level.
Watch the level meters and level indicators as you turn the
input level knob to adjust the recording level.
You can check the input level with both the level meters and
level indicators.
While watching the level meters, adjust the recording level
so that they do not peak with −12dB as a guideline.
Distortion could occur if the input level exceeds the peak
level. If the peak level is exceeded, an
icon appears in
the peak input level decibel (dB) display area and the PEAK
level indicator lights.
Selecting channels to adjust
o
Set the INPUT LEVEL switch to STEREO to adjust the
recording levels of both left and right (L/R) channels
simultaneously.
o
If you want to change the left-right balance, set the
INPUT LEVEL switch to L or R to adjust the recording
level of that channel independently.
o
If the right and left input levels are different, this
difference will be maintained when the INPUT LEVEL
switch is set to to STEREO so you can adjust them
together again.
Changing the mic input sensitivity.
If the peak level is exceeded even when the input level
knob is turned down as much as possible, set the MIC
PAD switch to ON.
If the peak level is still exceeded, lower the volume of
the sound source or increase the distance between the
mics and the sound source.
NOTE
•
Recording levels cannot be adjusted if the input source is set
to
DIGITAL
or the level control function is set to
AUTO LEVEL
.
Set to
DIGITAL
Set to
AUTO LEVEL
• MIC PAD
is disabled if the input source is set to
LINE
,
EXT
LINE
or
DIGITAL
.
5. Start recording.
Press the REC button when in recording standby to start
recording. The REC indicator will stop blinking and stay lit.
Pausing recording
Press the REC button during recording to pause
recording. The REC indicator will blink.
Press the REC button again to resume recording.
6. Stop recording.
Press the STOP button to stop recording.
CAUTION
This unit has a high-gain design to allow it to record even
sounds that are quiet. For this reason, if the recording level
is set high when using an AC adapter, touching the mic
might cause you to hear noise (humming or rumbling).
Be careful not to touch the built-in mic when recording with
it.
Remaining recording time display
When the remaining recording time (open card space) becomes
10 minutes or less when recording, the remaining recording
time will blink on the Home Screen.
When time runs out, a "
Card Full
" message will appear and
recording will stop.
NOTE
When the file size reaches 2 GB during recording, a new file
will be created automatically and recording will continue
without pause. Moreover, if the recording time exceeds
24 hours, a new file will be created automatically and
recording will continue without pause.
Listening while recording
(monitoring)
When in recording standby or during recording, the speaker
does not output sound even if the (speaker) switch is set to
ON.
If you use speakers for monitoring, particularly when recording
with mics, the sound output from the speakers could be picked
up, resulting in unwanted recording or feedback noise.
Use headphones to monitor the sound while adjusting the input
levels or recording.


