26
TASCAM DR-100MKIII
4 – Recording
8. Press the STOP [
8
] button to stop recording.
Recording in DIGITAL mode
In DIGITAL mode, recording starts automatically when the input
signal exceeds the fixed standard level (−54 dB).
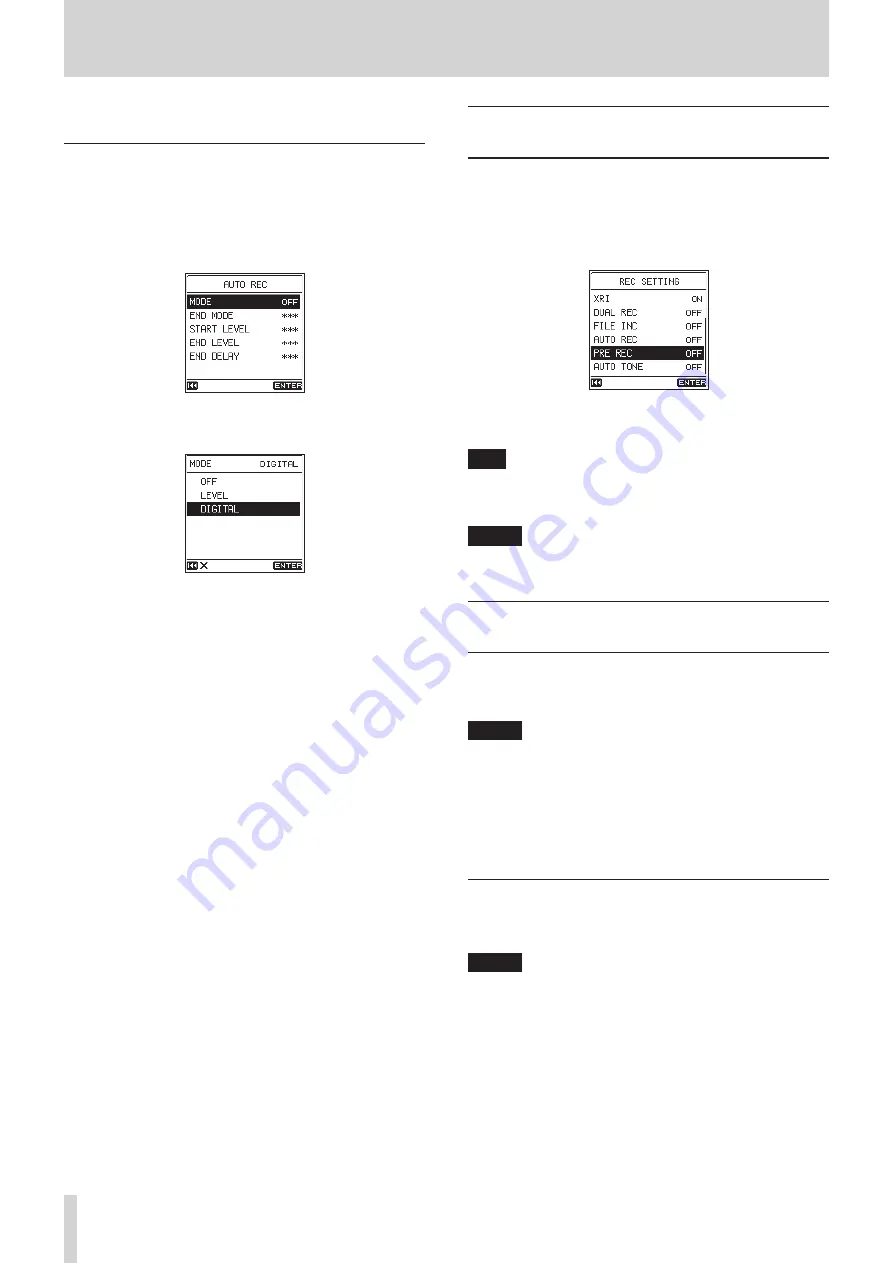
1. Select the
REC SETTING
screen
AUTO REC
item to open the
AUTO REC
screen. (See “Basic menu operation procedures” on
2. Use the
MODE
item to set the automatic recording function
mode to
DIGITAL
.
3. Press the REC [
0
] button to enter recording standby.
In DIGITAL mode, recording starts automatically when
the input signal exceeds the fixed standard level (−54 dB).
Moreover, after recording starts, track divisions from the
digital input (CD, DAT or MD) will be detected and new files
will be created automatically.
4. Press the STOP [
8
] button to stop recording.
Capturing the moment before
recording starts (PRE REC function)
By using prerecording when the unit is in recording standby,
you can capture up to two seconds of the signal input before
recording is started normally.
1. Select the
PRE REC
item on the
REC SETTING
screen. (See
“Basic menu operation procedures” on page 10.)
2. Turn the pre-recording function
ON
or
OFF
.
Options:
OFF
(default),
ON
TIP
By using this in combination with the AUTO REC function,
you can record events without losing the beginnings of
sounds.
NOTE
If the amount of time in record standby is less than two
seconds, the sound for that amount of time is recorded.
Create a new file while continuing to
record (file incrementing function)
With this function, you can stop recording of the current file and
continue recording in a new file. This can be done manually or
automatically after a set amount of time has elapsed.
NOTE
•
When new files are created, incremental numbers are added
to the end of each file name.
•
If the name of a file to be created would be the same as that
of an existing file, the number will be incremented until the
new file has a unique name.
•
A new file cannot be created if the total number of folders
and files would exceed 5000.
Create a new file manually while recording
During recording, press the
/
button to create a new file
while continuing to record.
NOTE
Files shorter than 2 seconds cannot be created (4 seconds if
the sampling frequency is 88.2kHz).