TASCAM SERIES 102i / SERIES 208i
13
Making settings on the ROUTING screen
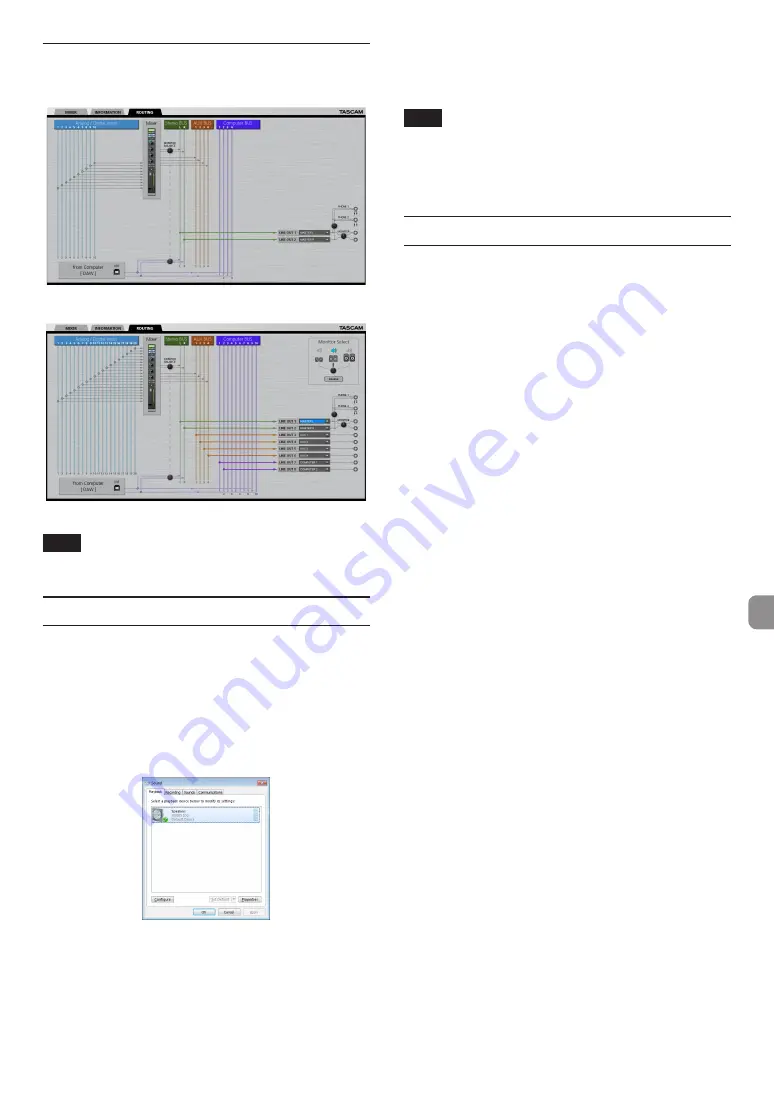
Click the
ROUTING
tab on the Settings Panel to open the
ROUTING
page as shown below.
SERIES 102i Settings Panel
ROUTING
screen
SERIES 208i Settings Panel
ROUTING
screen
NOTE
For details about other settings, see “ROUTING page” in “5 - Us-
ing the Settings Panel” of the Reference Manual.
Changing sampling frequency
The sampling frequency (44.1kHz by default) can be set using
DAW software or with the following procedure.
Windows
Change using:
Control Panel
w
Sound window
w
Playback tab
w
Speakers SERIES 102i
or
Speakers SERIES 208i
w
Properties
w
Advanced
tab
w
Default For-
mat
. Then, on the Recording tab, use “
Set Default
”
for “
Mic SERIES 102i
” or “
Mic SERIES 208i
” to set the
same sampling frequency in the same manner.
Mac
Change using:
Applications folder
w
Utilities folder
w
Audio MIDI Setup
w
Audio Devices window
w
SERIES 102i or SERIES 208i w Format
.
NOTE
When shipped new from the factory, the
MONITOR
knob is set
to its minimum value, so no signals will be output from the
LINE
OUT 1-2 (MONITOR)
jacks.
Adjust the
MONITOR
knob as desired when using the
LINE OUT
1-2 (MONITOR)
jacks.
Troubleshooting
Please read this chapter if you are unable to use the unit properly
even after setting it up following the procedures in this manual.
If you are still unable to resolve your problems please contact TAS-
CAM customer support (see the end of this manual) with the fol-
lowing information about the operating environment and details
about the trouble.
Operating environment
0
Computer manufacturer :
0
Model:
0
CPU:
0
Memory (RAM) :
0
Operating system:
0
Applications used:
0
Antivirus software:
0
Wireless LAN use:
If these measures do not resolve the issue, please contact the re-
tailer where you purchased this unit or a TEAC service center.
See the end of this document for contact information.
The dedicated software cannot be installed.
1.
Check the operating system
The operating system being used might not be compatible
with the software that you are trying to install.
Check the compatible operating system of the software you
are trying to install again.
2.
Stop software running in the background
Antivirus software and other software that runs in the back-
ground can prevent installation.
Quit software that runs in the background and try installation
again.
The unit is connected, but the computer
does not recognize it.
1.
Install the dedicated software
o
If you have not done so, install the dedicated software. (See
“Installing the dedicated software” on page 8.)
2.
Change the USB port
o
This unit cannot be used with USB 1.1. Use a port that sup-
ports at least USB 2.0 or USB 3.0.
o
Do not use a USB hub with this unit. Always connect the
unit directly to a USB port on the computer.
o
If the above methods do not resolve the problem, connect
the unit to a different USB port on the computer.


