


3-8
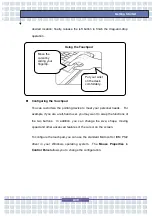
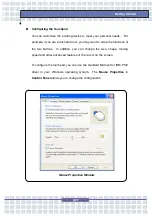
Customizing this Notebook
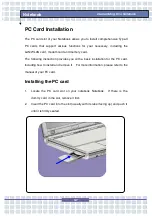
Notebook
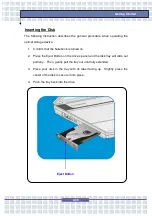
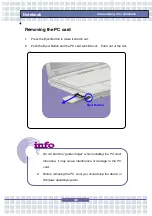
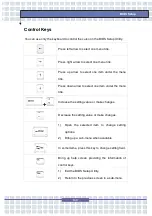
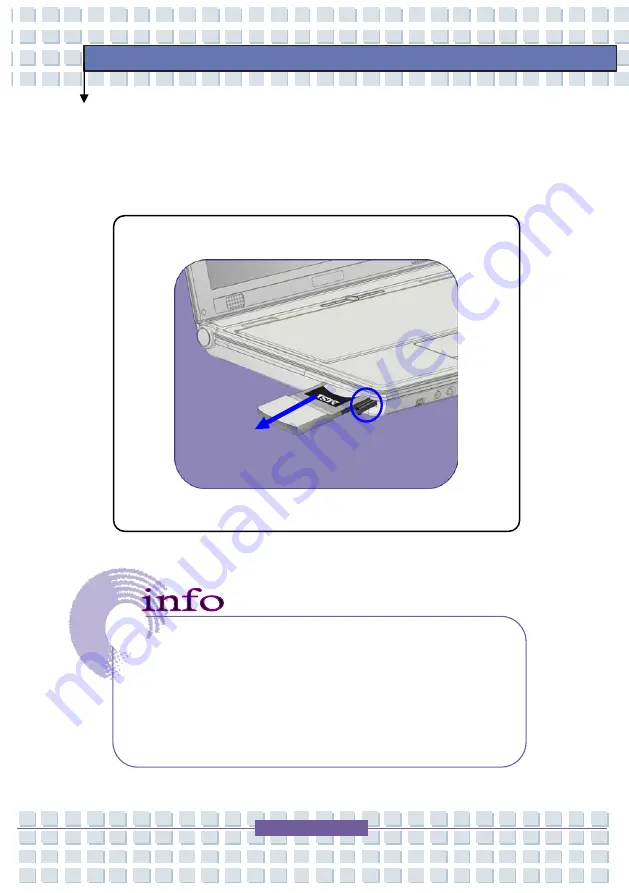
Removing the PC card
1. Press the Eject Button to make it stretch out.
2. Push the Eject Button and the PC card will slide out. Pull it out of the slot.
1. Do not hold the “golden finger” when installing the PC card;
otherwise, it may cause interference or damage to the PC
card.
2.
Before removing the PC card, you should stop the device in
Windows operating system.
Eject Button
Содержание 1561 ML
Страница 58: ...2 36 Getting Started...
Страница 68: ...3 10 Customizing this Notebook Notebook...
Страница 103: ...Notebook 2 In the next step you can choose between the four options mentioned above 8 3...
Страница 107: ...Notebook 10 After the recovery has finished click Restart Computer to restart your computer 8 7...
Страница 108: ...Notebook 8 8...
Страница 180: ...3 10 Personnalisation de votre notebook...
Страница 214: ...7 8 Notebook...
Страница 217: ...8 3 Notebook 2 Lors de l tape suivante vous pouvez choisir entre les quatre options mentionn es ci dessus...
Страница 221: ...8 7 Notebook 10 Une fois la restauration termin e cliquez sur Red marrer l ordinateur...
Страница 222: ...8 8 Notebook...
Страница 242: ...XX Voorwoord Notebook...
Страница 251: ...2 5 De eerste stappen DOS BIOS Fast boot ondersteuning Ja Andere Kensington slot Ja Norm WHQL...
Страница 294: ...3 10 Dit notebook personaliseren Notebook...
Страница 320: ...5 14 Notebook...
Страница 329: ...7 7 Notebook Voltooien kunt u de assistent sluiten U keert automatisch terug naar de hoofdpagina van het Media Center...
Страница 330: ...7 8 Notebook...
Страница 333: ...8 3 Notebook 2 In de volgende stap kunt u tussen de vier hiervoor vermelde opties kiezen...
Страница 338: ...8 8 Notebook...
Страница 356: ...XVIII Forord...
Страница 437: ...8 3 Notebook 2 I det neste trinnet kan du velge mellom de fire alternativene ovenfor...
Страница 439: ...8 5 Notebook Klikk p OK for bekrefte at du har lest advarselen i neste vindu...
Страница 442: ...8 8 Notebook...


