2-29
Getting Started
Using the Touchpad
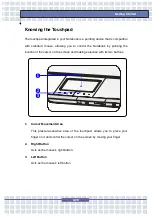
Read the following description to learn how to use the touchpad:
Positioning and Moving
Place your finger on the touchpad (usually using the forefinger), and the
rectangular pad will act as a miniature duplicate of your display. When
you move your fingertip across the pad, the cursor on the screen will move
simultaneously in the same direction. When your finger reaches the edge
of the pad, lift your finger and replace it on a proper location of the
touchpad.
Point and Click
When you have moved and placed the cursor over an icon, a menu item or
a command that you want to execute, simply tap slightly on the touchpad or
press the left button to select. This procedure, called as point and click is
the basics of operating your Notebook. Unlike the traditional pointing
device such as the mouse, the whole touchpad can act as a left button, so
that your each tap on the touchpad is equivalent to pressing the left button.
Tapping twice more rapidly on the touchpad is to execute a double-click.
Drag and Drop
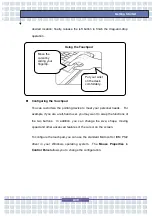
You can move files or objects in your Notebook by using drag-and-drop.
To do so, place the cursor on the desired item and slightly tap twice on the
touchpad, and then keep your fingertip in contact with the touchpad on the
second tap. Now, you can drag the selected item to the desired location
by moving your finger on the touchpad, and then lift your finger from the
touchpad to drop the item into place. Alternately, you can press and hold
the left button when you select an item, and then move your finger to the
Содержание 1561 ML
Страница 58: ...2 36 Getting Started...
Страница 68: ...3 10 Customizing this Notebook Notebook...
Страница 103: ...Notebook 2 In the next step you can choose between the four options mentioned above 8 3...
Страница 107: ...Notebook 10 After the recovery has finished click Restart Computer to restart your computer 8 7...
Страница 108: ...Notebook 8 8...
Страница 180: ...3 10 Personnalisation de votre notebook...
Страница 214: ...7 8 Notebook...
Страница 217: ...8 3 Notebook 2 Lors de l tape suivante vous pouvez choisir entre les quatre options mentionn es ci dessus...
Страница 221: ...8 7 Notebook 10 Une fois la restauration termin e cliquez sur Red marrer l ordinateur...
Страница 222: ...8 8 Notebook...
Страница 242: ...XX Voorwoord Notebook...
Страница 251: ...2 5 De eerste stappen DOS BIOS Fast boot ondersteuning Ja Andere Kensington slot Ja Norm WHQL...
Страница 294: ...3 10 Dit notebook personaliseren Notebook...
Страница 320: ...5 14 Notebook...
Страница 329: ...7 7 Notebook Voltooien kunt u de assistent sluiten U keert automatisch terug naar de hoofdpagina van het Media Center...
Страница 330: ...7 8 Notebook...
Страница 333: ...8 3 Notebook 2 In de volgende stap kunt u tussen de vier hiervoor vermelde opties kiezen...
Страница 338: ...8 8 Notebook...
Страница 356: ...XVIII Forord...
Страница 437: ...8 3 Notebook 2 I det neste trinnet kan du velge mellom de fire alternativene ovenfor...
Страница 439: ...8 5 Notebook Klikk p OK for bekrefte at du har lest advarselen i neste vindu...
Страница 442: ...8 8 Notebook...

