Administrator Settings
177
4.5.1 Inputs
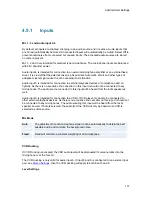
Mic 1- 3 and Audio input 4-6
By default, all inputs are enabled. Just plug in an audio source and it is active. Audio inputs that
are On will automatically be mixed. Unconnected inputs will automatically be muted. Select Off to
prevent audio/noise from connected but unused inputs. The activated audio sources are stored
on camera presets.
Mic 1, 2 and 3 are intended for electrets type microphones. The microphone inputs are balanced
with 24V phantom power.
Audio input 4 is intended for connection to an external microphone amplifier or an external fixed
mixer. It is crucial that the external mixer is a fixed mixer. Automatic, smart and other types of
adaptive mixers might cause the echo canceller to malfunction.
Audio input 5 is intended for connection to external playback devices or to telephone add-on
hybrids. As there is no acoustic echo canceller on this input it should not be connected to any
microphones. The audio source connected to this input will be heard from the local speaker as
well.
Audio input 6 is intended for connection to a VCR or DVD player. It can also be connected to
other external playback devices. As there is no acoustic echo canceller on this input it should not
be connected to any microphones. The audio entering this input will be heard from the local
speaker as well. If Auto is selected, the audio from the VCR will only be heard when VCR is
selected as video source.
Mix Mode
Auto
The adjustment of each microphone signal is done automatically to obtain the best
possible audio and minimize the background noise.
Fixed
Fixed will maintain a constant weighting of all microphones.
VCR Ducking
If VCR Ducking is activated, the VCR audio level will be attenuated if someone talks into the
microphone or at the far end.
The VCR ducking is only valid for audio input 6. If input 5 and 6 is configured to one stereo input
pair, see
Stereo Settings
, then the VCR ducking will apply to both input 5 and 6.
Level Settings
Содержание Maestro MXP
Страница 24: ...TANDBERG Maestro MXP 24 Figure 3 ...
Страница 26: ...TANDBERG Maestro MXP 26 6 PC Connect cable from DVI I in PC from the Codec to PC ...
Страница 53: ...General Use 53 ...
Страница 138: ...TANDBERG Maestro MXP 138 PC Presentation shown in Wide stretched mode ...
Страница 194: ...TANDBERG Maestro MXP 194 Voice Switched mode ...
Страница 196: ...TANDBERG Maestro MXP 196 4 7 Security Security contains the settings Encryption Encryption Mode Passwords ...
Страница 240: ...TANDBERG Maestro MXP 240 All signals are electrically according to RS232 Cable length max 5 meter X21 ...
Страница 247: ...Peripheral Equipment 247 ...
Страница 253: ...Peripheral Equipment 253 ...
Страница 280: ...TANDBERG Maestro MXP 280 Dimensions Front view Side view Rear view Underside view ...
Страница 287: ...Glossary 287 Figure 1 3 Enter the Release key in the Release Key field and press the Install Software button ...
Страница 291: ...Glossary 291 6 16 Appendix 16 Declaration of Conformity ...


