—
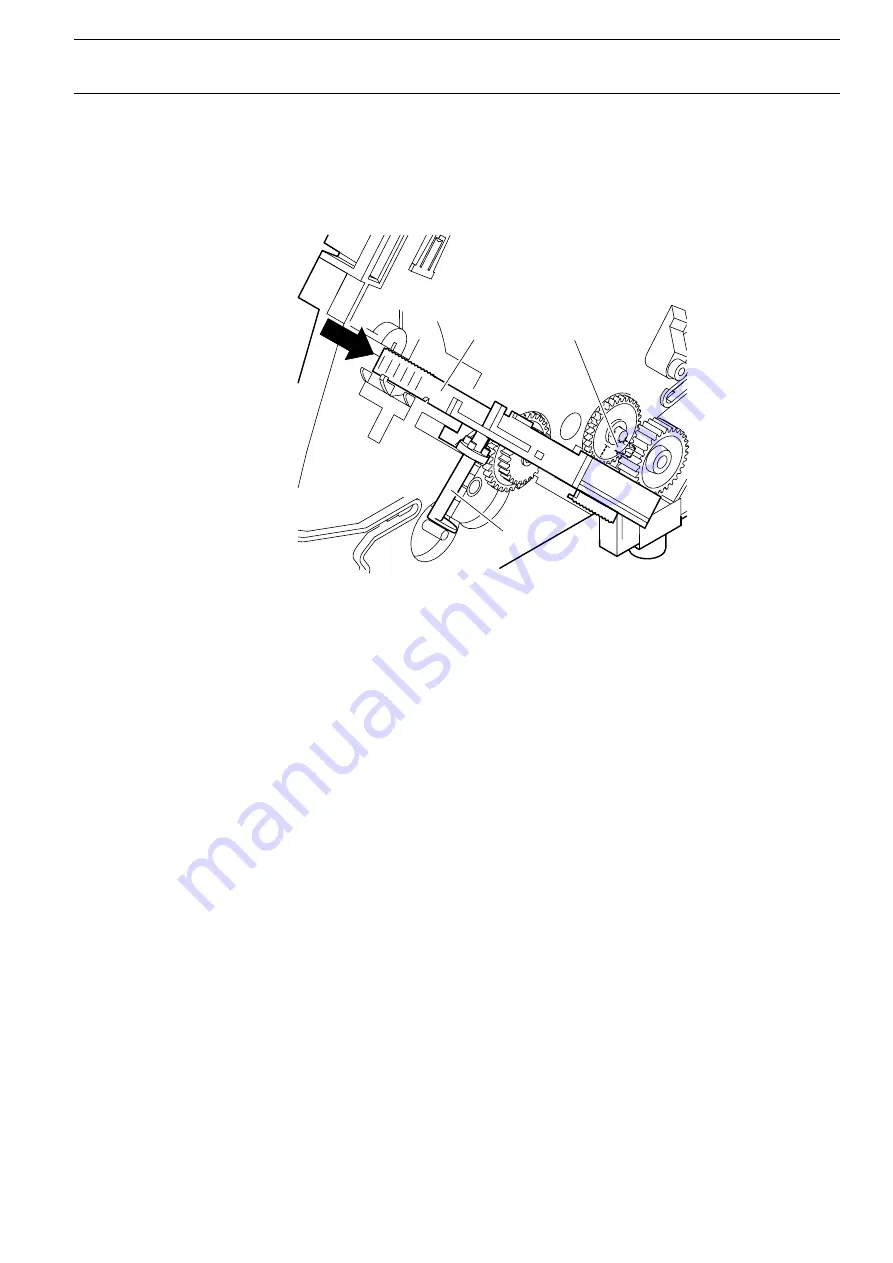
Press the gear shaft front F down and slide the push bar D into position 6. This will
fasten the gear shaft rear E and the gear shaft front F. Make sure that the straight
sides of the semidiscs of both shafts point to the same direction and continue to be
at an angle of 90 to the side plate.
—
Finally, mount the transverse connection plate (item 52a) and complete the left side
plate.
D
F
E
Instructions for disassembly and assembly
Assembling the FAW
5-39
Содержание T2150 SprintPro
Страница 2: ...This page intentionally left blank manuals4you com manuals4you com ...
Страница 8: ...This page intentionally left blank manuals4you com manuals4you com ...
Страница 24: ...This page intentionally left blank manuals4you com manuals4you com ...
Страница 50: ...This page intentionally left blank manuals4you com manuals4you com ...
Страница 59: ... Pull out the printhead carefully Instructions for disassembly and assembly Replacing the print head 5 9 ...
Страница 90: ...This page intentionally left blank manuals4you com manuals4you com ...
Страница 92: ...6 1 1 Housing Panel a Printer Spare parts and schematics 6 2 manuals4you com manuals4you com ...
Страница 94: ...6 1 2 General Arrangement sheet 1 Printer Spare parts and schematics 6 4 manuals4you com manuals4you com ...
Страница 98: ...6 1 4 Power supply 120 230 V 448 473 Printer Spare parts and schematics 6 8 manuals4you com manuals4you com ...
Страница 115: ...This page intentionally left blank Spare parts and schematics Optional automatic sheet feeder rear ASF R 6 25 ...
Страница 121: ...STOP Spare parts and schematics Interface adapter cpl 6 31 ...
Страница 122: ...This page intentionally left blank manuals4you com manuals4you com ...


