


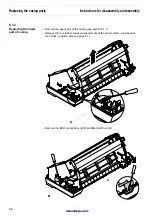

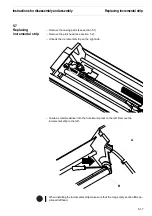


5.1.2
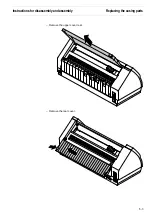
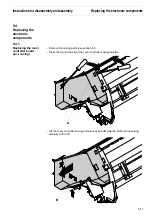
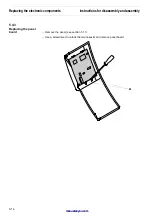
Replacing the lower
part of casing
—
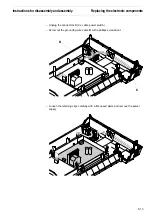
Remove the upper part of the casing (see section 5.1.1).
—
Release the four rubber snaps (suspension) A of the print module, using special
tool “Hook” (position also see page 5-7).
—
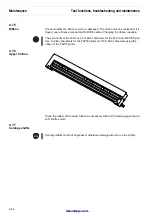
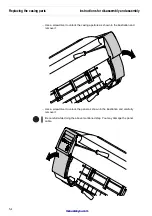
Remove the ESD connections right hand B and left hand C.
A
C
B
Replacing the casing parts
Instructions for disassembly and assembly
5-6
manuals4you.com
manuals4you.com
Содержание T2150 SprintPro
Страница 2: ...This page intentionally left blank manuals4you com manuals4you com ...
Страница 8: ...This page intentionally left blank manuals4you com manuals4you com ...
Страница 24: ...This page intentionally left blank manuals4you com manuals4you com ...
Страница 50: ...This page intentionally left blank manuals4you com manuals4you com ...
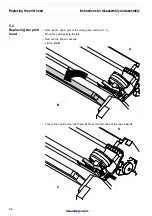
Страница 59: ... Pull out the printhead carefully Instructions for disassembly and assembly Replacing the print head 5 9 ...
Страница 90: ...This page intentionally left blank manuals4you com manuals4you com ...
Страница 92: ...6 1 1 Housing Panel a Printer Spare parts and schematics 6 2 manuals4you com manuals4you com ...
Страница 94: ...6 1 2 General Arrangement sheet 1 Printer Spare parts and schematics 6 4 manuals4you com manuals4you com ...
Страница 98: ...6 1 4 Power supply 120 230 V 448 473 Printer Spare parts and schematics 6 8 manuals4you com manuals4you com ...
Страница 115: ...This page intentionally left blank Spare parts and schematics Optional automatic sheet feeder rear ASF R 6 25 ...
Страница 121: ...STOP Spare parts and schematics Interface adapter cpl 6 31 ...
Страница 122: ...This page intentionally left blank manuals4you com manuals4you com ...