


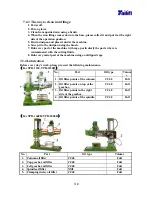


6-4
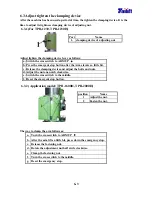
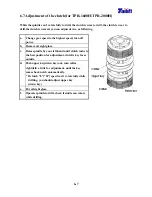
6.4 Adjust tighten the clamping device
After the machine has been used a period of time, the tighten the clamping device. It is the
time to adjust its tightness clamping device of adjusting nut.
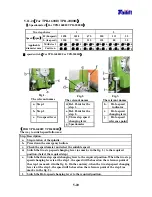
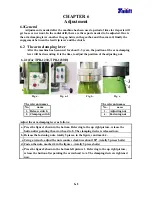
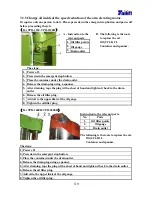
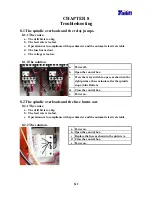
6.4.1(For TPR-1230, TPR-1230H)
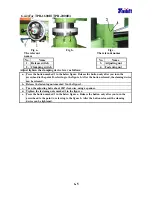
Fig a-1
Fig a-2
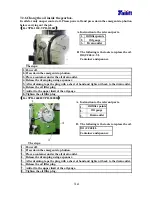
Fig b
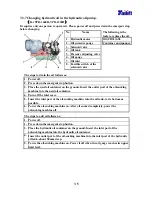
Fig c.
The relevant
names
The relevant names
No. Name
No.
Name
1. Release
switch
3.
Adjusting
nut
2. Clamping switch
4.
Fastening nut
Adjust tighten the clamping device lever as follows:
a. Press the button marked 1 in the below figure. Release the button only after you turn the
arrowhead to the point B, referring to the figure b. After the button released, the claming device
can be released.
b. Release the fastening nuts marked 3 in the figure 3.
c. Turn the adjusting bolts about 180° clockwise, using a spanner.
d. Tighten the fastening nuts marked 3 in the figure c.
e. Press the button marked 2 in the below figure a. Release the button only after you turn the
arrowhead to the point A, referring to the figure b. After the button released, the claming
device can be tightened.
Содержание TPR1230
Страница 1: ...D E C 0 0 5 0 4 TAILIFT LTD 2006 RADIAL DRILLS TPR1230 TPR1230H TPR1600H TPR2000H Operation Manual...
Страница 11: ...1 6 z Gearbox For TPR 1230 TPR 1230H For TPR 1600H TPR 2000H z Hydraulic oil pump...
Страница 32: ...5 3 5 1 2 For TPR 1600H For TPR 2000H The front view of the machine The rear view of the machine...
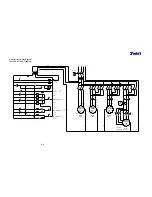
Страница 74: ...9 4 9 4 Electrical circuit diagram For TPR 2000H CE Standard...
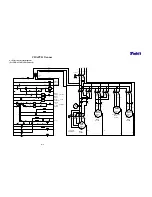
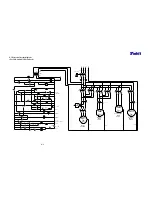
Страница 83: ...9 13 9 9 Electrical circuit diagram For TPR 1230 Standard...
Страница 84: ...9 14 9 10 Electrical circuit diagram For TPR 1230H Standard...
Страница 85: ...9 15 9 11 Electrical circuit diagram For TPR 1600H TPR 2000H Standard...


