


18
7.2. Smart Camera Setup
Setting up the Smart camera.
7.2.1.
Install the (AutoVision) software
Install the (AutoVision) software application used for setting up the Smart camera. For more
details on installing the AutoVision software, please refer to the “AutoVISION Quick Start
Guide” (Z434).
7.2.2.
Set Parameters
Set the parameters for the Smart camera.
Set the IP address of your computer to "192.168.188.100" and its subnet mask to
"255.255.0.0".
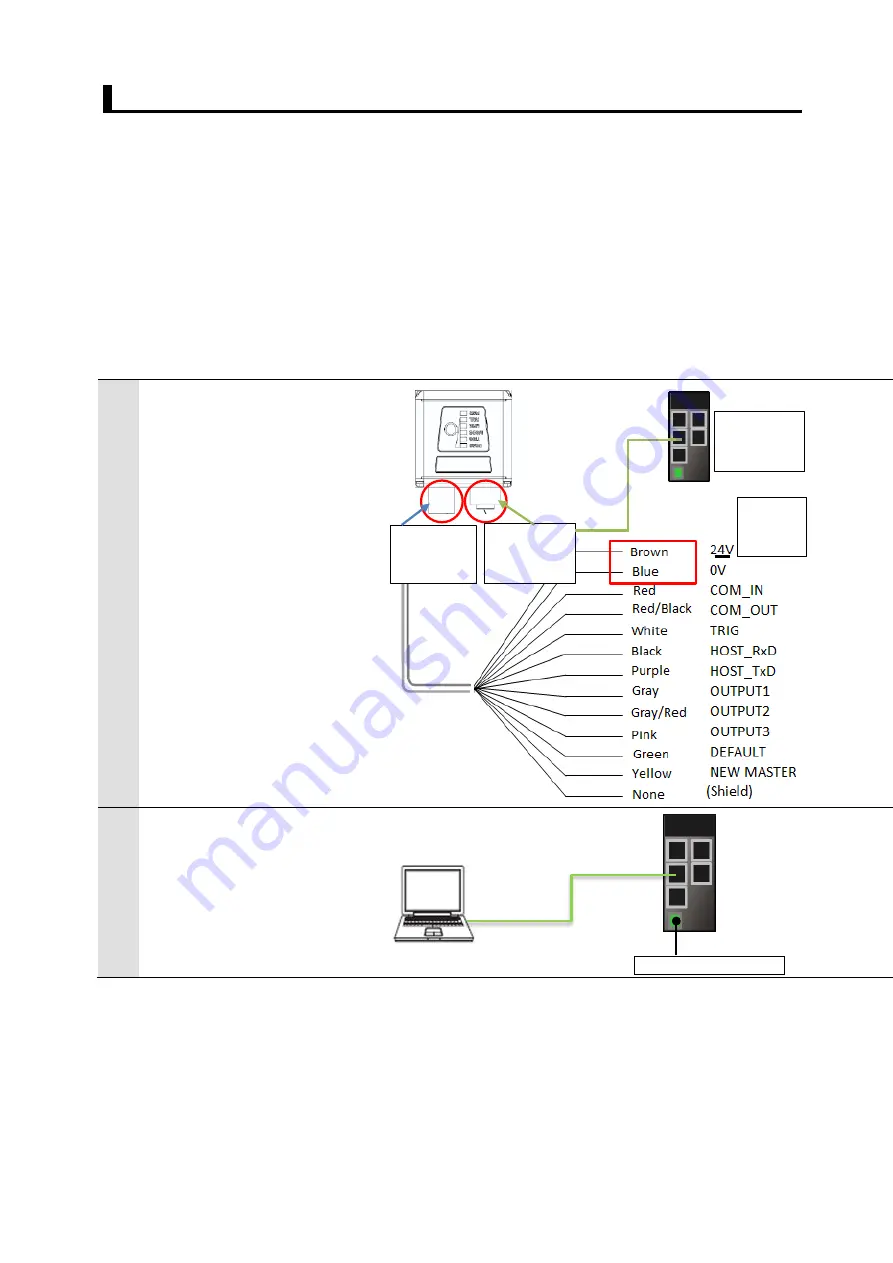
1
Connect the [Ethernet
connector] of the smart camera
to the switching hub with the
[Ethernet cable].
Connect the [I/O cable] to [I/O
connector] and turn on the
24VDC power supply.
*
This document is only for
verification of the power
supply wiring of the I/O cable
connection. Be careful not to
short-circuit any other wires.
*
Ground the shielded wire as
needed. For more information
on Grounding, please refer to
the "Smart Camera F430-F
Series User Manual” (Z433) -
"2-7 Grounding and Power"
2
Connect the computer to the
switching hub with the LAN
cable.
Connect 24 VDC power supply
(for Switching hub) to Switching
hub.
DC24V Power supply
DC24V
Power
I/O
Connector
Switching
hub
Ethernet
Connector
I/O cable
V430-W8-3M
Ethernet cable
V430-WE-3M
LAN Cable


