


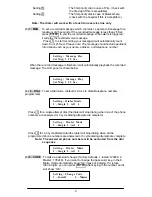


5
Connecting the Telephone Line
To connect the Main Console to the telephone line, Please follow these steps:
1.
Locate the two phone jacks at the top of the main console. These phone jacks are
marked “ Phone “ and “ Line “.
2.
Connect one end of the telephone cord that came with the system into the
connector, labeled” Line”. Connect the other end of that cord into the wall jack.
3.
Connect a telephone to the Main Console through the phone jack.
Note: The system will only work with “Touch Tone” service
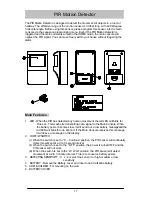
Setting the Antenna
Carefully extend the antenna upward in order to maximize the range of communication
between the sensors and the Main console. Remember, that the maximum distance from
an sensor back to the main console is 100 ft
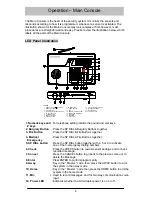
Mounting the Main Console
The Main Console may be set on a table top, or mounted on a wall. To mount the
console on a wall, follow these steps.
1. Remove the two top black rubber pads and store them away for future use.
2. Measure and fix screws into the wall so that the two screws fit into the grooves left
under the removed pads. (You may use the Installation Template on the last page
of this Manual)
3. Connect all wire connections to the jacks at the top of the console
4. Set the console onto the screws and carefully allow the console to drop into the
groove securely.
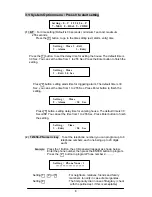
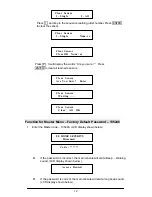
About Passwords
This system provides two sets of password for setting the system. ”Install ”, ”Master ”
”Install ” : You can use this password to set the system, such as telephone numbers
or record message…etc
”Master ” : This passw ord is used for setting “ Arm” ( Arm away or Arm home),
“Disarming” the system….etc
When the system installation is finished, family members will only need to “ Arm” or
“Disarm” the system.
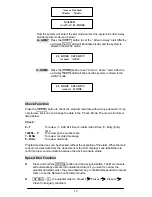
Others
We recommend that you install the console after programming the other wireless devices
(sensors) into the main console. This is to ensure that all of the wireless devices are
working together properly.
Содержание SY4100
Страница 28: ...27...