


16
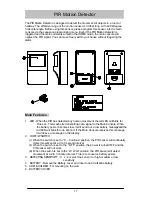
The key chain Remote Control Handset is a convenient way to arm (Home / Away mode)
or disarm this system. Before using this device, please program it into the main console
via the sequence programming menu.
1.
TRANSMIT LED : The LED will light when the device is transmitting
2.
DISARM : Press this button to disarm the system or clear the message
3.
AWAY : Press this button to set the system in the AWAY Arm mode
4.
HOME : Press this button to set the system in the HOME Arm mode
5.
PANIC : Press this button to trigger the alarm and activate auto-dialer
6.
BATTERY COMPARTMENT : For 12V alkaline battery
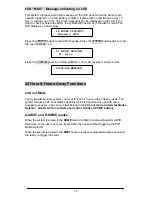
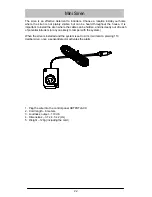
Zone Address Setting
Enter the Installer code and press ‘1’to activate the “Sequencing Programming
Menu”. Press the PANIC button for 1 sec, the red LED will also light for 1 sec. The
main console will emit a long ‘Beep’, and the LCD panel will show ‘Sensor Added’.
The sensor has been set successfully.
To Arm or Disarm with the Remote Control Handset
•
Press the “AWAY” button to arm the system in the AWAY mode.
•
Press the “HOME” button to arm the system in the HOME mode.
•
Press the PANIC button, to activate the “PANIC” function. The activation of the
“PANIC” function will immediately trigger the alarm and auto dialer.
Remote Control Handset
LEGEND
1. TRANSMIT LED
2. DISARM KEY
3. AWAY KEY
4. HOME KEY
5. PANIC KEY
6. BATTERY
63 REMOTE SENSOR
Armed AWAY
63
REMOTE SENSOR
Armed HOME
63 REMOTE SENSOR
01 Panic
Содержание SY4100
Страница 28: ...27...