


18
Replace the Battery
l
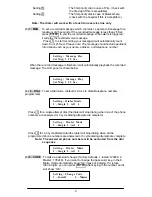
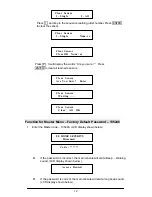
When the sensor sends a low battery message to main console, remove
the old battery and replace it with a fresh alkaline battery. The LCD is
shown below
Zone Address Setting
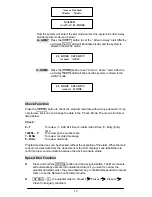
Enter the Installer password and press “1” to activate the “Sequence Programming
Menu” after installing the battery for the PIR sensor. Set the power switch from “ OFF ” to
“ C ” position. The red LED will blink for 1 sec ond and activate the PIR sensor by moving
in front of the PIR Sensor. The Main Console will emit one ‘Beep’ and the LCD will
display, ‘Sensor Added’. The PIR sensor has been programmed into the main console
successfully.
When the main console is in the armed mode, the PIR detects movement of
human or animals (cat, dog). A message will be displayed on the LCD as shown
below.
Notes on the Position when Installed
The PIR Motion sensor detects the movement of humans and animals within their range.
In order to prevent false alarms , we recommend that you do not install any motion
sensor in the following areas:
Do not install any PIR motion sensor in the following areas :
l
Where there is a device that causes rapid temperature change or rapid
heat transfer. For instance, near an air conditioner, fire place, heater or
other intermittent heat sources.
l
Where the sensor will be exposed to direct sunlight.
l
Near large electrical devices and/or high output radio frequency sources,
like a refrigerator, microwave, computer, or light dimmer.
l
Where the effective range of the sensor is covered or blocked by furniture.
l
Where pets enter and exit freely, for instance - a cat or dog door.
l
Directly opposite any large object with flat reflecting properties, like large
windows or mirrors.
l
In a bathroom or other area that is exposed to moisture and extreme
temperature change.
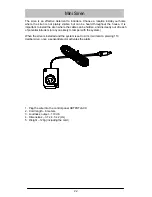
Installing the PIR Motion Sensor
Before installing the sensor, consider the following points:
l
Mount the sensor two meters (6-1/2’) high for best coverage.
l
Mount the sensor with a 14 degree downward incline angle against the wall for
optimum range.
63 PIR SENSOR
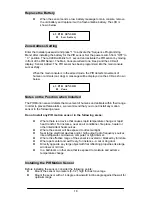
01 Low battery
63 PIR SENSOR
01 Zone
Содержание SY4100
Страница 28: ...27...