


13
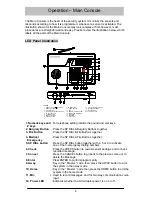
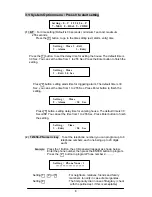
Now the system will select the arm mode and set the system in either Aw ay
arm/Home Arm mode (see below ):
A - AWAY
: Press the AWAY button to set the “ Armed - Away “ alert. After the
exit delay the Arm LED will illuminate steady and the system is
armed in the AWAY mode.
H - HOME
: Press the HOME button to set “ Armed - Home “ alert. After the
exit delay the Arm LED will blink and the system is armed in the
AWAY mode.
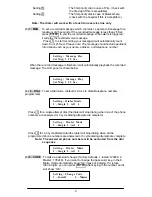
Check Function
Press the CHECK button to check the programmed data without any password. It can
only review, but it can not change the data in the ‘Check’ Mode. The menu structure is
listed below.
Check :
0 – T
: To review (1- Exit) Exit time, (2-Alarm) Alarm time, (3- Entry) Entry
time.
123456 – P
: To review phone number sets.
7 – MSG
: To review recorded message
8 – DIAL
: To review dial mode.
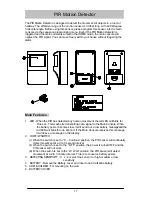
Programmed devices can be checked without the activation of the alarm. When the main
console receives data from the device/sensor the LCD displays zone label/status to
confirm proper communication between the device/console status.
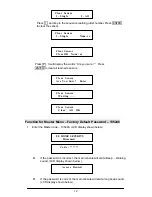
Speed Dial Function
l
Press and hold the SP DIAL button and the assigned button. The Main console
will automatically execute the autodial and alarm. If you want to cancel the
autodial and alarm when they are activated, key-in the Master password to cancel
them or use the Remote Control disarm button.
l
SP DIAL + 4 , the autodial order is: Preset 4 : Preset 1 : Preset 2 :
Preset 3 (Burglary condition)
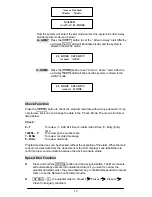
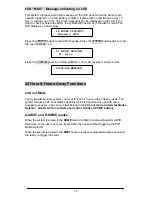
MASTER
A-AWAY H-HOME
00 HOME SECURITY
Armed AWAY
Access Granted
Master Mode :
00 HOME SECURITY
Armed HOME
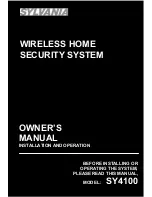
Содержание SY4100
Страница 28: ...27...