background image

37

36

HD Sports

HD Sports

Transferring files to your computer

You can connect the HD Sports camera to your computer to view or edit the files 

you have recorded or remove the micro-SD card and insert it into a card reader 

attached to your computer.

PC with Windows operating system

• 

Connect the mini-USB side of the USB cable to the camera and the USB 

connector on the other end to a USB port on your computer.

• 

Turn on the camera by sliding the POWER SWITCH to ON. The LCD display will 

show the USB icon 

.

• 

In Windows, click on the START button and click MY COMPUTER (Win XP) or 

COMPUTER (Vista/Win7). A folder should open showing the drives connected 

to your computer. One of these will be a removable drive that is the storage 

card on your camera.

• 

Click on the REMOVABLE DRIVE icon and it will reveal a folder called “DCIM.” 

Click on “DCIM” and it will reveal the files recorded by your camera.

• 

Drag your PHOTOS, VIDEOS or AUDIO files to your computer or double click on 

any of them to view them directly from the storage card. Note, you will need 

appropriate software to view or listen to the files but these come with most 

versions of Windows.

Mac operating system (10.4 or later)

• 

Connect the mini-USB side of the USB cable to the camera and the USB 

connector on the other end to a USB port on your computer.

• 

Turn on the camera by sliding the POWER SWITCH to ON. The LCD display will 

show the USB icon 

.

• 

The storage card on the camera will appear in the drive list in Finder.

• 

Click on the REMOVABLE DRIVE icon and it will reveal a folder called “DCIM.” 

Click on “DCIM” and it will reveal the files recorded by your camera.

• 

Drag your PHOTOS, VIDEOS or AUDIO files to your computer or double click on 

any of them to view them directly from the storage card. Note, you will need 

appropriate software to view or listen to the files that come with most versions 

of the Mac operating system.

Note

: If you are having issues achieving smooth playback on your computer, 

the HD Sports camera can play back everything it records and display it on the 

attachable LCD screen or to an external TV or monitor. See “Playback and Live 

viewing” on page 27 for more information.

Mounting the camera

The camera comes with versatile mounting options that you can use in whatever 

configuration suits your needs.
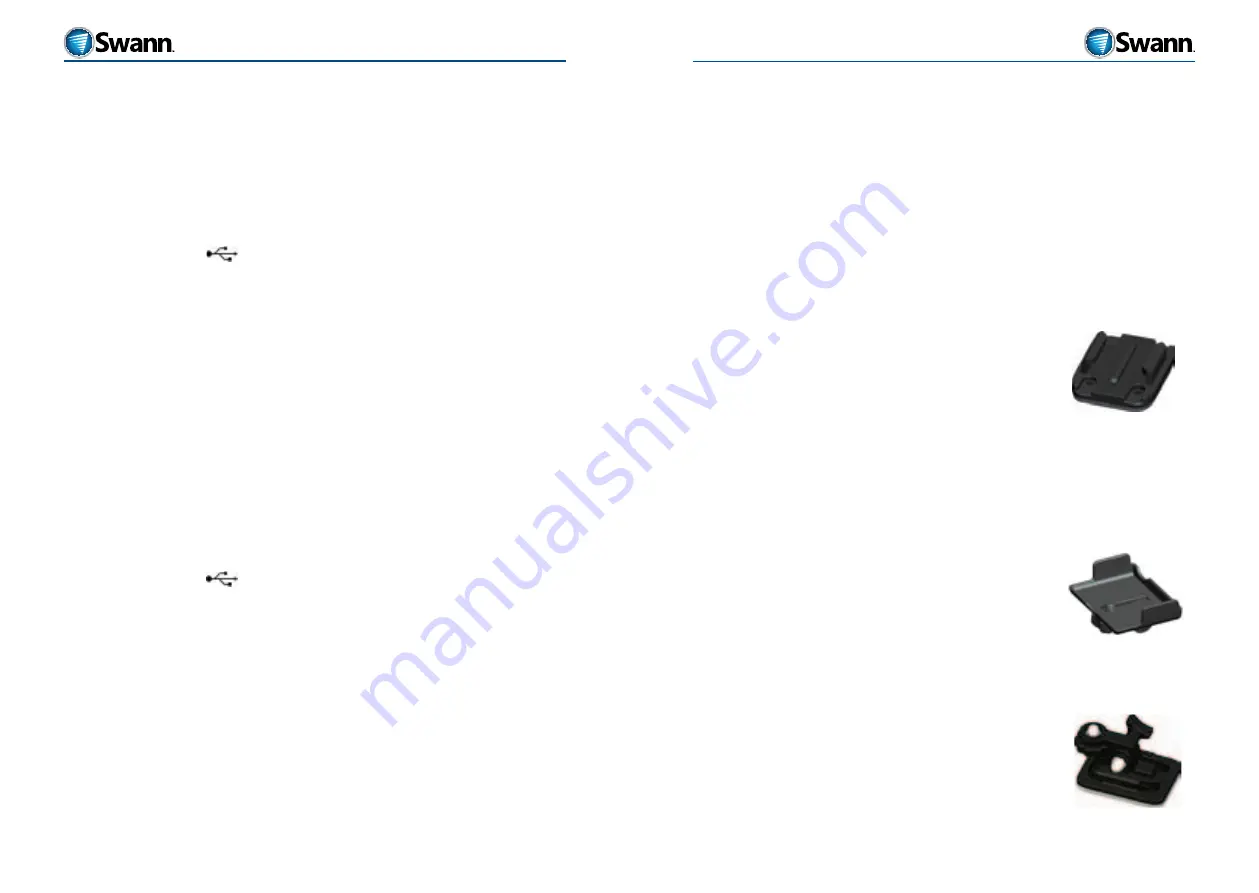
There are two main components to mounting your camera; the bases and the 

joints.  The bases are attached to a surface using an adhesive. The joints clip into 

the base and can be unclipped and moved to another mounting location.

Bases

There are two sizes of bases which come with an adhesive 

backing. Use these to stick them to any clean, dry surface 

where you want a secure mount. The tape used is a high 

strength bonding tape that when stuck forms a virtually 

indestructible weld. Therefore, choose carefully since once 

it’s on, it’s on for good!
The tape is able to be mounted to glass, metal, plastics and 

painted or sealed surfaces such as wood or concrete. It is 

resistant to harsh outdoor and environmental extremes.

Warning

: Since the tape provides a strong adhesive, 

expect that it cannot be removed. Attempts to remove 

it will very likely damage the mount AND the surface to 

which it is attached.

Mount and Joints

There are two joints provided. A single joint and a double 

joint.

Mount

: The mount is what you use to secure the joint to 

the camera or to the waterproof case by simply screwing in 

the nut into the mounting holes under the camera. Simply 

fit the screw to the mounting hole underneath the camera 

or waterproof case.

Single joint

: The single joint as it implies has only one 

join which you can adjust by turning the thumb screw 

protruding out the side. Loosen the joint slightly, reposition 

the angle you want the joint to sit and then tighten the 

thumb screw.
The single joint also includes the screw nut that is used to 

attach to the camera or waterproof case. You can attach the 

mount to either of these by inserting it into the mounting 

hole underneath.

Содержание HD Sports

Страница 1: ...HD Sports HD Sports Video Camera with LCD Viewer MSPORTL190711E SWVID SPORTL...

Страница 2: ...13 Removing the Li On Lithium Ion battery 14 Charging the battery 14 Low Battery 14 Caring for the battery 14 Micro SD Storage 15 Installing a micro SD storage card 15 Formatting a micro SD storage ca...

Страница 3: ...utdoors and then download them when back at home Features Video recording up to 720p and 1080p HD High Definition SNAPSHOT function with self timer time lapse and multi shot VOX function for automatic...

Страница 4: ...e of your Sports camera and the other end plugs into any standard USB 2 0 port on your computer The camera is able to recharge as well as transfer data file through this connection Power Adaptor For r...

Страница 5: ...DEO preview mode by default To take photos press the SNAPSHOT button A shutter sound will be heard when the photo is taken and the camera will then return to preview mode The default photo resolution...

Страница 6: ...port The mini USB port You can use this port to connect the camera to a mains power outlet for charging using the supplied USB to power adaptor or for transferring files to your computer using the US...

Страница 7: ...lens is seeing without the need for live viewing on the LCD screen attachment or external TV or monitor The laser pointer only fires when the unit is recording VIDEO and switches off when recording i...

Страница 8: ...creen Caring for the battery If you aren t going to use the HD Sports for a while we recommend you still charge it every couple of months to keep the battery healthy Micro SD Storage Installing a micr...

Страница 9: ...picture The screen only attaches ONE WAY Align the connector on the LCD screen with the socket on the camera and seat it inside making sure it fits properly When it is seated correctly push both ends...

Страница 10: ...e black lines means more capacity remaining RECORD mode icon SNAPSHOT icon The HD Sports camera is so feature packed it comes with two LCD displays We call the one built into the top of the unit the L...

Страница 11: ...on Use the or button to move to the value you want to select for that feature Press the OK button to select and save that feature If you enter editing mode and want to cancel without making a selectio...

Страница 12: ...r Once the SNAPSHOT button is pressed a timer on the LCD screen will count up to the set number of seconds and then take a PHOTO The timer will then restart This cycle will continue until you press th...

Страница 13: ...battery energy when the camera is not in use for an extended period The camera can be bought back to life by pressing the RECORD or SNAPSHOT button which will also reset the Auto Standby timer The def...

Страница 14: ...dio from one device to another It provides good video and audio quality but HDMI provides a better quality experience To connect the HD Sports camera to an external TV or monitor follow these steps Li...

Страница 15: ...again Video playback controls While playing video the following buttons control the playback button Increases the volume button Decreases the volume button Fast rewinds at 2X normal speed Press again...

Страница 16: ...e OK button to select the option Delete One Deletes the currently selected PHOTO file Delete All Deletes ALL the PHOTOS that have not been tagged with Protect see next option To delete all files selec...

Страница 17: ...ach other To pair the remote Turn off the HD Sports Camera Press and hold the RECORD button on the camera while powering ON the camera Release the RECORD button You now have 3 seconds to press both th...

Страница 18: ...vironment make sure the seals are in good condition and properly fitted Also make sure there s no grit or moisture aroundthesealspreventingthemforminggoodcontactwhenthecaseisproperly buckled Before he...

Страница 19: ...tem Note If you are having issues achieving smooth playback on your computer the HD Sports camera can play back everything it records and display it on the attachable LCD screen or to an external TV o...

Страница 20: ...mini HDMI USB Interface USB 2 0 for recharging and data transfer Microphone 2 built in microphones Power Consumption 400mA 3 7V MAX Lithium Battery 1000mAh Record Time 2 5 hours Laser power 1MW Stora...

Страница 21: ...9am 5pm US PT AUSTRALIA toll free 1300 138 324 M 9am 5pm AUS ET Tu F 1am 5pm AUS ET Sa 1am 9am AUS ET NEW ZEALAND toll free 0800 479 266 UK 0203 027 0979 Swann Communications 2011 Helpdesk Technical S...

Отзывы: