


13
16. Area Set
Move the cursor to Alarm Set, then push the
ENTER
button
and the alarm setup window will
appear. Push the
UP
,
DOWN
,
LEFT
and
RIGHT
button to move the cursor and push the
ENTER
button to change
from detection
ON
to
OFF
. Push
and hold
ENTER
to change all
values to the same as
the area you have selected.
If the area marker icon is set to yellow this area is
monitored for motion detection, and if the icon is
grey Motion sensing is disabled for that area.
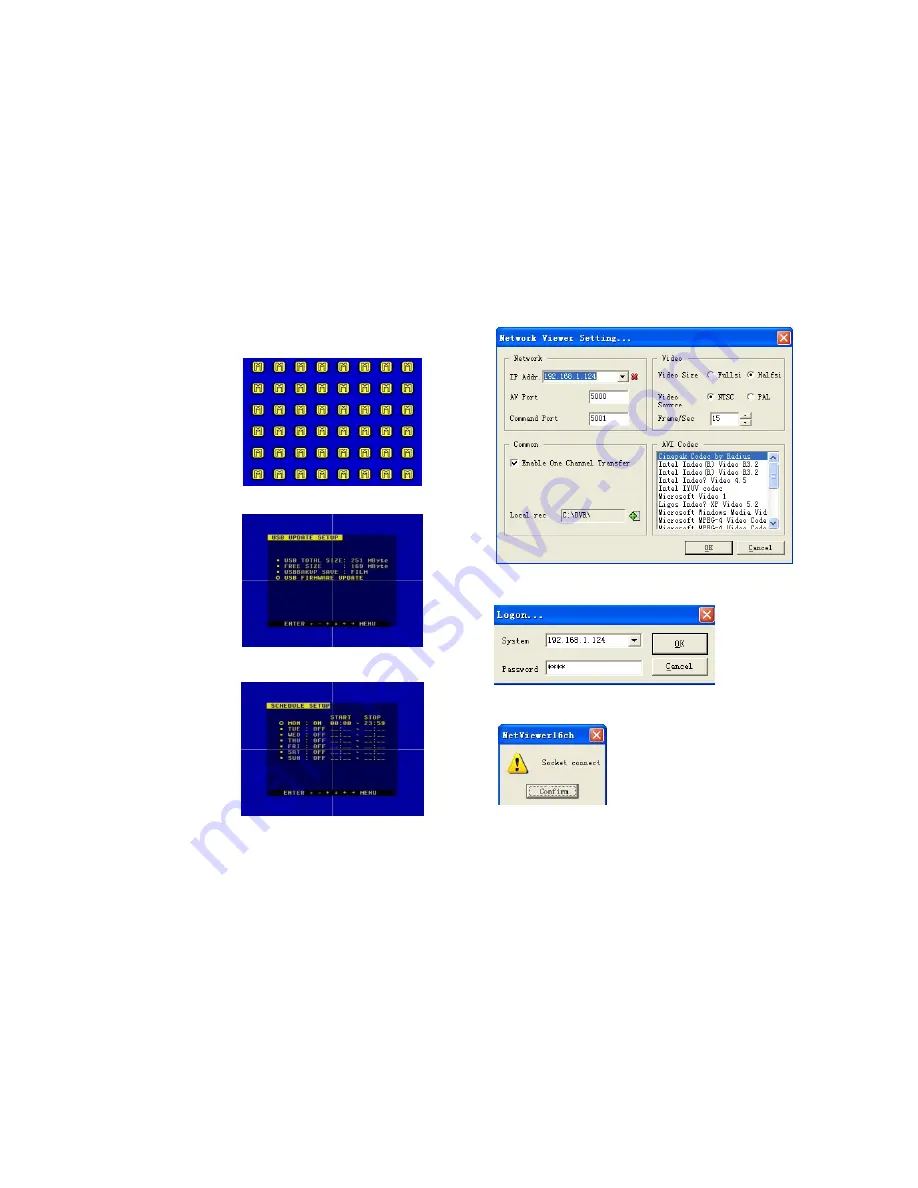
17. USB
Set
If you have plugged a USB device into the DVR, and the USB Set is highlighted, push the enter
button to view the USB setup window.
USBBAKUP SAVE: There are two types of backup
Modes: PICTURE and FILM.
In PICTURE mode, you can backup individual
pictures.
In FILM mode, you can backup video.
18. Schedule Set
When the cursor moves to Schedule Set, please push enter button, the schedule set window
will appear.
You change the recording schedule for a week by
using this setup window.
Please note: Military time must be used.
START:
Start recording time
STOP:
Stop recording time
Note: Manual record mode and schedule record mode (including motion detection
record mode, sensor record mode and time schedule record mode) cannot be used at
the same time. Once the user selects Schedule record mode, manual record mode will
be disabled. If the user selects manual record mode, schedule record mode will be
disabled.
30
Click “Setting” button, you will see the window below: Enter the IP address and click “OK”
button.
Click connect button, then enter ID admin and password, the password is the same as the
DVR password.
Click the OK button, if a successful connection is made to the DVR, you will see the window
below.
To access the DVR via the Internet, you should firstly open default ports 5000, 5001, 5002 on
your router. Please refer to your router manual for instructions on how to open the ports on
your router.


