15
28
1.Record:
This is manual recording button. Push this button to record video on to the hard disk, Re-push
this button or push stop button to stop recording (enter the password to confirm). Recording
and stop will work simultaneously on all four channel’s images. This button doesn't work when
schedule mode is enabled.
2.Play:
Push this button to start playing the video stored in hard disk, Re-push this button or push stop
button, to stop playing . Playing and stop will work simultaneously on all four channel’s images.
This button doesn't work while Time recording and Alarming recording are enabled.
3.Pause:
Push this button to stop playing temporarily; push the play button to continue to play.
4.Rew:
Fast backward button. Push this button to start fast backward playing. Push play button to start
normal playing from the present position.
5.Forward:
Fast forward button. Push this button to start fast forward playing. Push play button to start
normal playing from the present position. The fast forward has five speeds; every time you
push the button the play speed will increase from slow to fast (2, 4, 8, 16 and 32x) and then
back to slow.
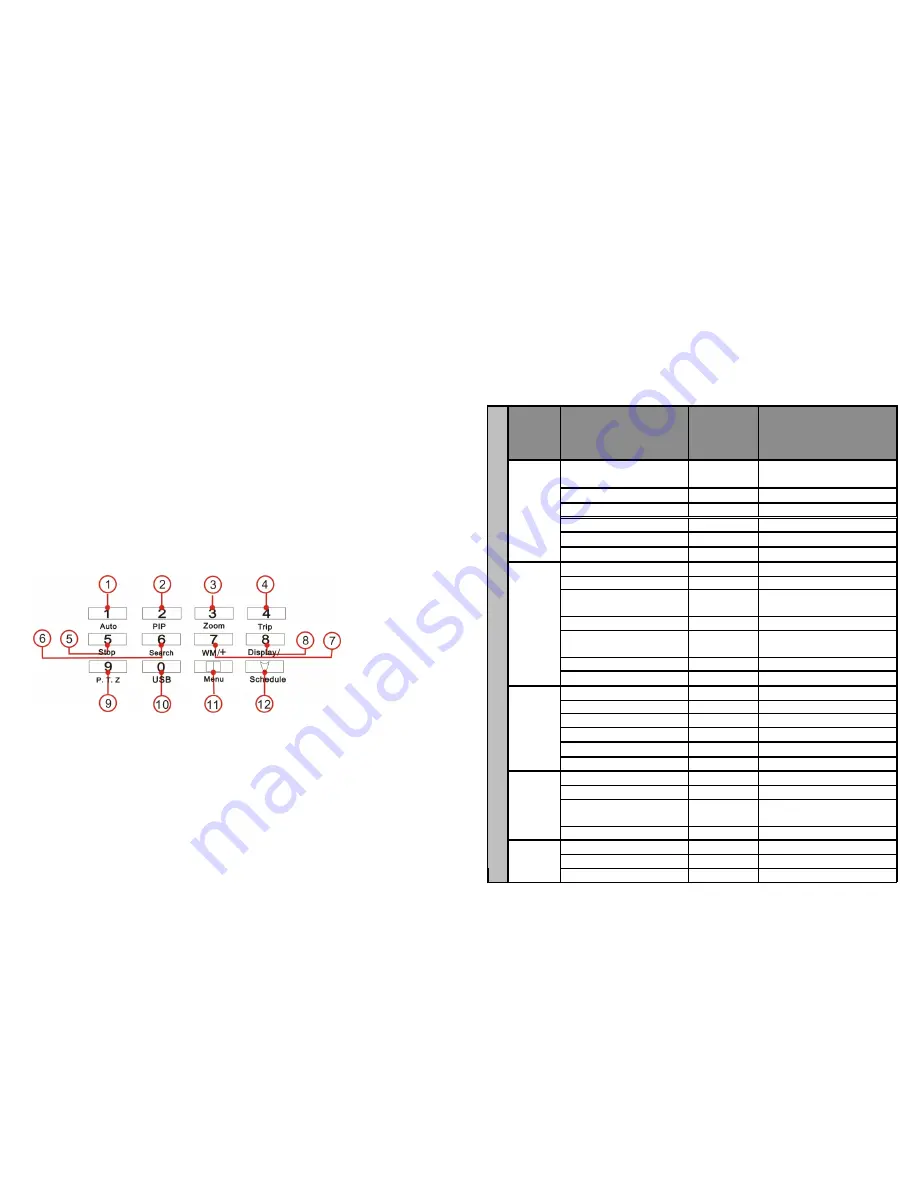
2.Function Control Area
1.Auto/1
: Auto key; push this button to set the DVR to auto dwell state which will show the
different channels independently according to the time set in auto sequence set menu, you
can set the dwell time of each channel. Push the channel select button to quit this mode.
While inputting numbers, this button is used as number key of “1”.
2.PIP/2:
PIP key, push this button, to set the DVR to PIP (Picture in Picture) mode, please
refer to PIP operation in user guide for details, push the channel select button to quit PIP
mode. While inputting numbers, this button is used as number key of “2”.
3.Zoom/3
: Zoom key, push this button, to set the DVR to zoom mode, please refer to zoom
operation in user guideline for details, push the zoom button again to cancel zoom operation.
While inputting numbers, this button is used as number key of “3”.
4.Trip/4
: Trip key, push this button, to set the DVR to trip mode, please refer to trip operation
in user guide for details. While inputting numbers, this button is used as number key of “4”.
Setup
window
for each
item
Setup items
Default setup
Selectable setup
Year/Month/Day/
Hour/Minute
2005/01//01
12/00/00
2000
~
2099/Common sense
rules
Auto Time
1 second
0~99second
Buzzer Sound
ON
ON/OFF
Password
1111
N/A
Play Repeat
YES
YES/NO
General
setting
Video Input
NTSC format
NTSC/PAL
Quality
Normal
Very high/High/Normal/Low
Overwrite Enable
YES
YES/NO
Rec Speed
30f/s(NTSC)
25f/s(PAL)
60f/s~1f/2s(NTSC)
50f/s~1f/2s(PAL)
Resolution
360
360/720
PB Speed
NO use
60f/s~no use(NTSC)
50f/s~no use(PAL)
Audio Enable
CAM 1
CAM1~CAM4/OFF
Recording
Para
A/M REC Time
1 Minute
0~99minute
Sub Net
255.255.255.0
N/A
Gate Way
192.168.1.1
N/A
IP Address
192.168.1.167
N/A
Net Work State
LOCAL_LAN LOCAL_LAN / EXTER_LAN
N/W Enable
ON
ON/OFF
Net Work
Setting
Mac Address
0a0b0c0d0e0f
N/A
Alarm Enable
OFF
ON/OFF
Motion Enable
OFF
ON/OFF
Motion Level
Normal
Very low/Low/
Normal/High/Very high
Alarm
setting
Buzzer Sound
No Use
0~99 second
Baud Rate
2400
2400/4800/9600/19200/38400
Protocol
PTC1
PTC1/ PTC2/ PTC3/ PTC4
S
Y
S
T
E
M
S
E
T
U
P
Protocol
Setting
Address
01
0~0xff
16.Default Setting
The default setting for each item is shown in the chart on the next page.
“
Defaults
” is the initial setup by the manufacturer. The user can change the setup according to
the actual environment and demands. If there is any confusion or unexpected effect, choose
“
Defaults
” and reset all settings to original.
You can choose “
FACTORY RESET
” in “
SYSTEM SET
” menu, and reset all settings to default.
17. Menu Option Table


