


19
2.Video and Audio Connection
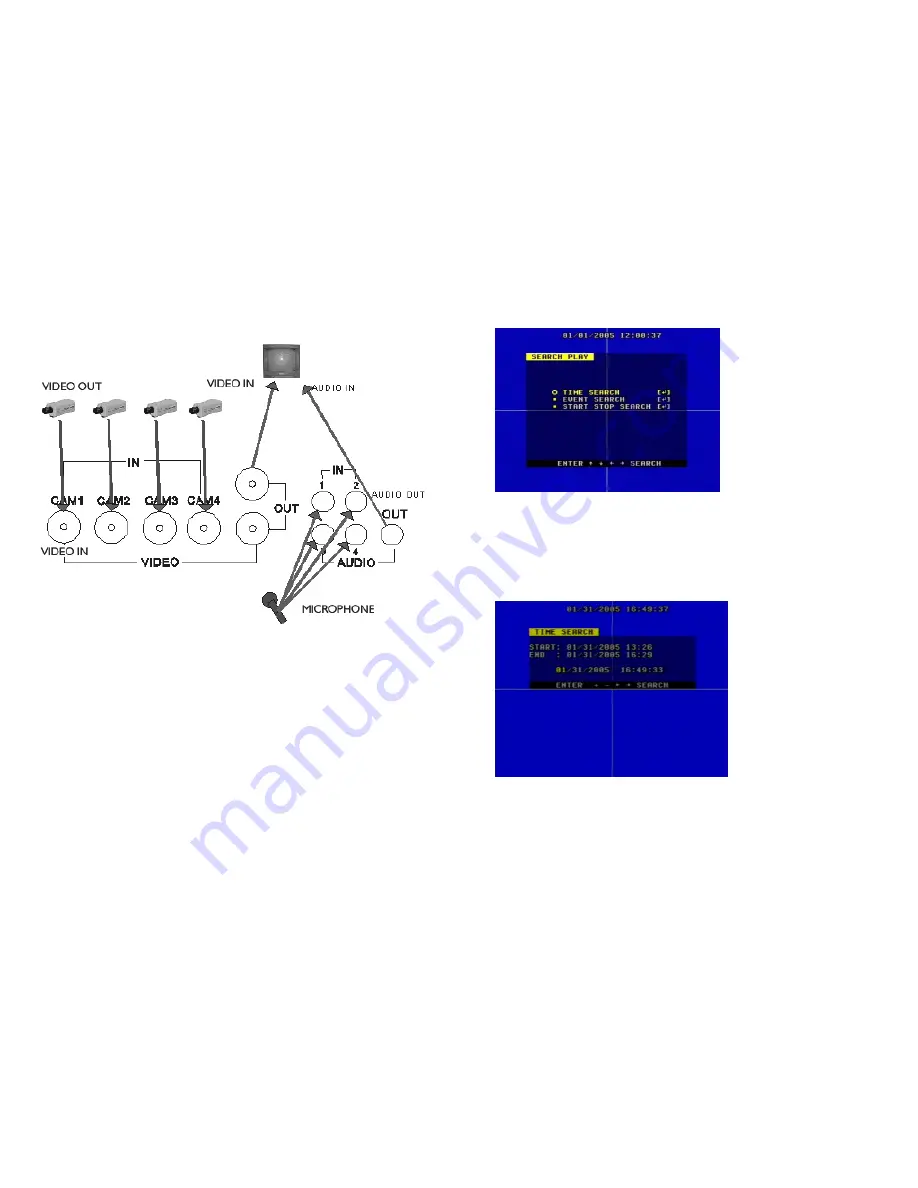
The DVR can support up to 4 cameras video input at the same time.
There are two steps for camera installation.
1.Connect the Video Signal Line to the DVR channel input.
2.Connect the power adaptor jack to the camera.
The DVR can connect 4 audio input channel's, but you can only select one for recording.
To display the DVR picture, the DVR's video output signal should be transferred to your TV set
or monitor. Any TV set that has a “
Video Inpu
t” terminal is suitable for displaying the picture.
The figure above shows the
default video and audio signal line connection.
Note: You can only record one audio input at a time, so you can only connect one audio
input at a time also. If you connect the audio to
cam1
, you cannot connect audio to any of the
sockets for
cam 2
to
cam 4
. You should disconnect them.
24
7.Search Play
Push the Search button to display the Search Play window on the screen.
TIME SEARCH:
search recording by the time you enter.
EVENT SEARCH:
search recording by event list.
START STOP SEARCH:
search recording by segment.
Push
the
UP
or
DOWN
button to move the cursor, then push the
ENTER
button to enter
the sub menu you have highlighted. Push the
SEARCH
button again to quit the search menu.
8. Time Search
Move the cursor to
Time Search
, then push the
ENTER
button
and
the
Time
Search
window will appear, as illustrated as below.
Push the
LEFT
or
RIGHT
button to move the cursor, push
+
and
-
button to modify
the
time, then push
the
ENTER
button to start play from the time you selected. Push
the
SEARCH
button again to return to the
Search Play
menu.
If the time you enter doesn’t match recorded video, the DVR will automatically play the video
closest to the time you enter.
START:
the first time you record.
END:
the end time of the last recording, you must enter a time between start and end. If the
HDD has been overwritten, the start time maybe not correct.


