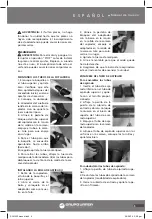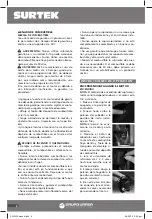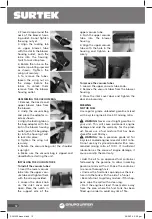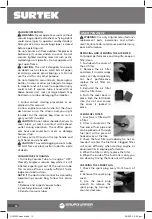
2. Place clamp around the
neck of the blower hous-
ing outlet. Do not tighten
the wing nut yet.
3. Align the locking tab
on upper blower tube
with the slot in the blower
housing outlet; push the
tube into the housing.
Twist to lock into place.
4. Rotate the tube so the
nozzle is pointing upward
as shown. Tighten the
wing nut securely.
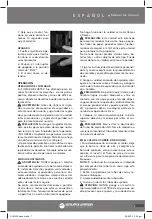
5. To remove the tubes,
loosen the wing nut on
the clamp. Rotate the
tubes to unlock them
remove from the blower
housing outlet.
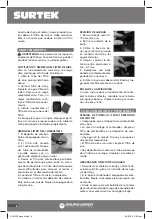
ASSEMBLING THE VACUUM BAG
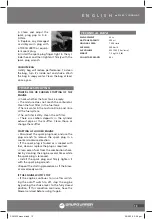
1. Remove the nozzle and
upper blower tube from
the blower.
2. Unzip the vacuum bag
and place the adaptor in-
side as shown.
3. Align the locking tab on
the bag adaptor with the
slot in the blower housing
outlet; push the bag adap-
tor into the housing. Twist
to lock into place.
4. Tighten the wing nut
securely.
5. Rotate the vacuum bag until the shoulder
is upright.
6. Make sure the vacuum bag is zipped and
closed before starting the unit.
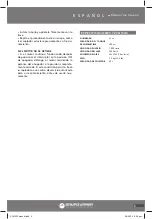
INSTALLING THE VACUUM TUBE
To install the vacuum tubes:
1. Insert the lower vacuum
tube into the upper vacu-
um tube and tighten them
with the screw provided.
2. Loosen the door knob
on the inlet cover and
open. Place the notch in
the support arm of the
upper vacuum tube.
3. Push the upper vacuum
tube into the blower
housing.
4. Align the upper vacuum
tube with the hole in the
housing and tighten se-
curely.
To remove the vacuum tubes
1. Loosen the upper vacuum tube knob.
2. Remove the vacuum tubes from the blower
housing.
3. Close the inlet cover door and tighten the
door knob securely.
FUELING
MOTOR FUEL
Use regular grade unleaded gasoline mixed
with 2-cycle engine oil. Use 40:1 mixing ratio.
WARNING: Never use straight gasoline in
your unit. This will cause permanent engine
damage and void the warranty for the prod-
uct. Never use a fuel mixture that has been
stored for over 90 days.
WARNING: Use a premium grade oil for
2-cycle air cooled engines mixed at a 50:1 ratio.
Do not use any 2-cycle oil product with a reco-
mended mixing ratio of 100:1. If insuficient
lubrication es the cause of engine damage, it
cause a void in the warranty.
• Add the oil to an approved fuel container
followed by the gasoline to allow incoming
gasoline to mix with oil. Shake the container
to ensure thorough mix.
• Unscrew the fuel tank cap and pour the mix-
ture into the tank with the aid of a funnel.
• Be careful not to spill any mixture. If this hap-
pens, wipe the spill with a clean rag.
• Start the engine at least three meters away
from the area where the fuel tank has been
filled up in order to avoid any risk of fire.
12
SAG532 manual.indd 12
08/06/16 2:58 p.m.


