


SurfRAID LC16 Series User’s
Manual
34
CHAPTER 4. Hot Swap Components
The
SurfRAID
LC16 supports hot-swappable disk cartridges, power supply modules and cooling fan
unit. The following sections describe how to use the hot swap feature.
4.1 Swapping the Disk
To hot swap a disk, perform the following steps (Refer to 2.5.2 Installing the disk).
1.
Slide the latch to the unlocked position.
2.
Open the cartridge handle by sliding the release button and wait for the drive to spin
down (The disk LED on the drive bay will turn from green to red indicate the disk is
powered down.).
3.
Lift the handle to disengage the disk cartridge from the slot.
4.
Gently pull the disk cartridge out of the slot.
5.
Replace the HDD.
6.
Holding the cartridge handle, insert the cartridge into the bay along the plastic guides
until the handle begins to close.
7.
Push down the handle to secure the cartridge into the
SurfRAID
LC16 system.
8.
Slide the latch to the locked position.
The drive is now replaced. Once the drive has powered on, it will be added to the RAID configu-
ration automatically.
4.2 Swapping the Power Supply Module
Once the power supply fails, the LED on the front panel will turn from green to Red and an
audible alarm will sound.
To hot swap a power supply module perform the following steps.
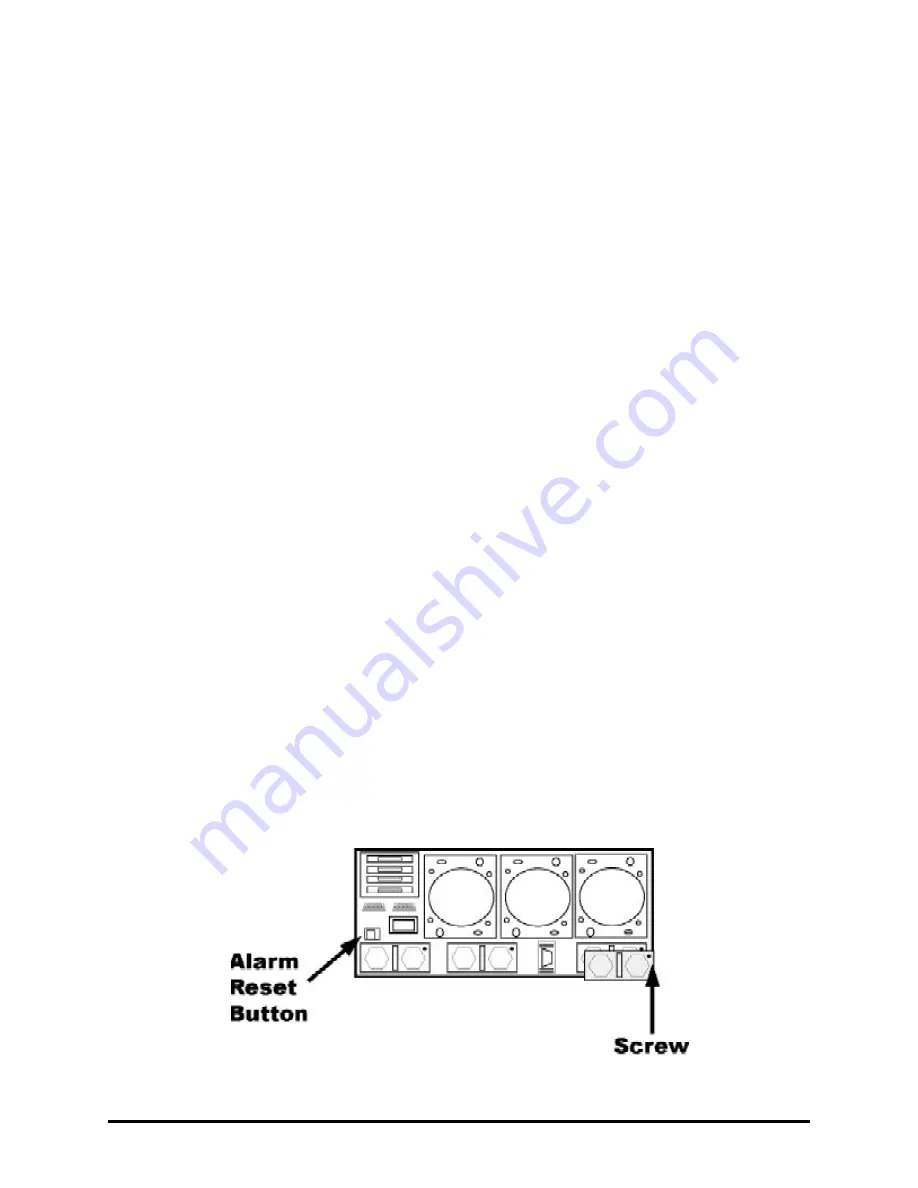
1.
Push the reset button to stop the audible alarm on the rear panel.
2.
Unscrew the defective power module unit.
3.
Pull the handle to disengage the module from the power supply base.
4.
Slide the module out completely from the power supply base.
5.
Insert the new power supply module.
NOTE:
Use the handle to slide the module into the base until it engages to the base.
6.
The LED will turn bright green to indicate it has powered on.


