Chapter 6: Advanced Chassis Setup
6-7
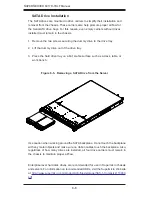
Figure 6-6. Mounting a SATA Drive in a Carrier
4. Slide the hard drive into the tray with the printed circuit board side facing
down.
5. Carefully align the mounting holes in the hard drive and the tray. Make sure
the bottom of the hard drive and bottom of the hard drive tray are fl ush.
6. Secure the hard drive using all six screws.
7. Replace the drive tray into the chassis. Make sure to close the drive tray us-
ing the drive tray handle.
SATA Power Cables
Serial ATA power cables should be routed so that they do not block the airfl ow
through the chassis. See the serverboard layout diagram for the location of the
cable connections.
SATA Backplane
The SATA drives plug into a backplane that provides power, drive ID and bus termi-
nation. A RAID controller can be used with the backplane to provide data security.
The operating system you use must have RAID support to enable the hot-swap
capability of the SATA drives. The backplane is already preconfi gured, so there are
no jumpers or switches present on it.
Drive Tray
Release Button
1
1
1
1
1
2
Содержание SUPERSERVER 6017R-TDLF
Страница 1: ...SUPERSERVER 6017R TDLF SUPER USER S MANUAL 1 0...
Страница 5: ...v Preface Notes...
Страница 14: ...1 6 SUPERSERVER 6017R TDLF User s Manual Notes...
Страница 20: ...2 6 SUPERSERVER 6017R TDLF User s Manual Figure 2 3 Installing the Outer Rails to the Server Rack 1 2 1 3 1 3...
Страница 26: ...3 4 SUPERSERVER 6017R TDLF User s Manual Notes...
Страница 46: ...4 20 SUPERSERVER 6017R TDLF User s Manual Notes...
Страница 72: ...5 26 SUPERSERVER 6017R TDLF User s Manual Notes...
Страница 82: ...6 10 SUPERSERVER 6017R TDLF Manual Figure 6 7 Removing Replacing the Power Supply...
Страница 114: ...A 2 SUPERSERVER 6017R TDLF User s Manual Notes...
Страница 118: ...B 4 SUPERSERVER 6017R TDLF User s Manual Notes...

