6-3
Chapter 6: Advanced Chassis Setup
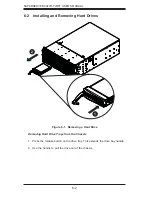
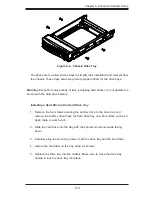
The drives are mounted in drive trays to simplify their installation and removal from
the chassis. These trays also help promote proper air
fl
ow for the drive bays.
Figure 6-2. Chassis Drive Tray
Installing a Hard Drive to the Hard Drive Tray
1. Remove the two screws securing the dummy drive to the drive tray and
remove the dummy drive.Place the hard drive tray on a
fl
at surface such as a
desk, table or work bench.
2. Slide the hard drive into the tray with the printed circuit board side facing
down.
3. Carefully align the mounting holes in both the drive tray and the hard drive.
4. Secure the hard drive to the tray using six screws.
5. Replace the drive tray into the chassis. Make sure to close the drive tray
handle to lock the drive tray into place.
Warning:
Except for short periods of time (swapping hard drives), do not operate the
server with the hard drives empty.
Содержание 8047R-7JRFT
Страница 5: ...v SUPERSERVER 8047R 7JRFT USER S MANUAL Notes ...
Страница 10: ...x Notes SUPERSERVER 8047R 7JRFT USER S MANUAL ...
Страница 18: ...1 8 SUPERSERVER 8047R 7JRFT USER S MANUAL Notes ...
Страница 28: ...2 10 SUPERSERVER 8047R 7JRFT USER S MANUAL Notes ...
Страница 52: ...4 20 SUPERSERVER 8047R 7JRFT USER S MANUAL Notes ...
Страница 100: ...SUPERSERVER 8047R 7JRFT USER S MANUAL 6 12 Notes ...
Страница 134: ...7 34 SUPERSERVER 8047R 7JRFT USER S MANUAL Notes ...
Страница 136: ...A 2 SUPERSERVER 8047R 7JRFT USER S MANUAL Notes ...
Страница 139: ...B 3 Appendix B System Specifications Notes ...

