91
·
·
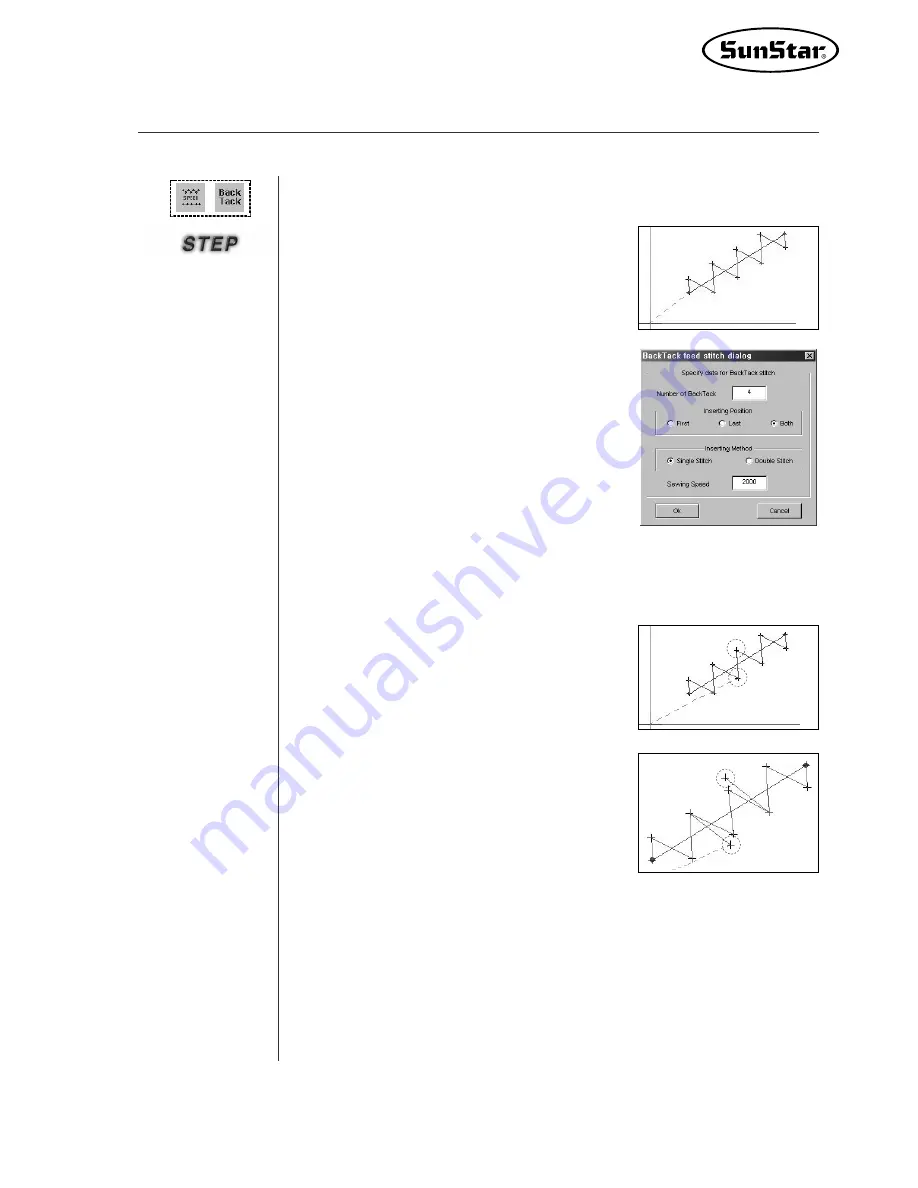
BackTack Sewing
①
Select the first sewing data to be changed.
②
Select Back Tack Sewing.
③
Back Tack Deed Stitch Dialog is displayed.
It includes various input boxes and selection
determines the number (default = 4 stitches) of
Back Tack to apply. Second, Inserting Position
determines the Back Tack input position with
three positions - First, Last, Both. Third, Insert-
ing Method determines how to input Back Tack
- whether to input one times or two times.
And Last, Sewing Speed determines the sewing
speed. (Not to be provided.)
④
Select
“
OK
”
, then you can find that Back
Tack has been inserted into the existing
sewing data.
⑤
However, you cannot find that Back Tack has
been input where and as much as you set
up. Therefore, you can find by the figure
through stitch move. As shown in the figure,
four stitches are moved into Back Tack on
either side.
Apply the Back Tack function to the selected sewing data.
Содержание SSP-WE/3.5
Страница 1: ...SSP WE 3 5 IInstruction M Manual SSP WE 3 5 MEE 070418 ...
Страница 2: ......
Страница 6: ...6 Before Using Check the followings prior to setting up the program and components ...
Страница 18: ...18 Configuration of Program Function ...
Страница 31: ...31 Data Configuration ...
Страница 37: ...37 Create Data ...
Страница 74: ...74 Data Processing These are indispensable functions upon processing configuration data or sewing data ...
Страница 103: ...103 Circle point setting Cross point setting ...
Страница 142: ...142 ...
Страница 147: ...147 ...


