background image


BEFORE YOU BEGIN 

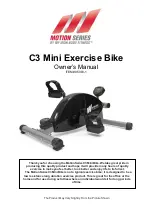
Thank you for choosing the self-powered

 UPRIGHT 

BIKE. 

We take great pride in producing this quality 

product and hope it will provide many hours of quality 

exercise to make you feel better, look better and enjoy 

life to its fullest. 

Yes, it's a proven fact that a regular exercise program 

can improve your physical and mental health. 


Too often, our busy lifestyles limit our time and 

opportunity to exercise. The 

UPRIGHT BIKE


provides a 

convenient and simple method to begin your assault on 

getting your body in shape and achieving a happier and 

healthier lifestyle. 

Before reading further, please review the drawing 

below and familiarize yourself with the parts that are 

labeled. Read this manual carefully before using the 

UPRIGHT BIKE.


THE FOLLOWING TOOLS ARE INCLUDED FOR ASSEMBLY:   


T-HAND SOCKET 

WRENCH (17MM) 

ALLEN WRENCH 

(M5) 


SOCKET WRENCH   

(13mm) 


COMBINATION 

WRENCH 


Handlebar 

Hand Wrist Pad 

Console 

Adjustment   

Bar 

Console Bracket 

Upright Post 

Seat Cap 

Crank Cover 

Upright Sleeve 

Main Frame 

Right Pedal 

Front Stabilizer 

Rear Stabilizer 

Leveler 

Accessory   

Tray 

Seat 


PHILLIPS 

SCREWDRIVER 

(6mm)


Содержание PR-7020

Страница 1: ...f this equipment Serious bodily injury can occur if this equipment is not assembled and used correctly Serious bodily injury can also occur if all instructions are not followed Keep others and pets away from equipment when in use Always make sure all bolts and nuts are tightened prior to each use Follow all safety instructions in this manual WARNING CAUTION Weight on this product should not exceed...

Страница 2: ...within them Always use common sense when exercising 12 Before using this product please consult your personal physician for a complete physical examination 13 Do not wear loose or dangling clothing while using the Upright Bike 14 Never exercise in bare feet or socks always wear correct footwear such as running walking or cross training shoes 15 Be careful to maintain your balance while using mount...

Страница 3: ...a convenient and simple method to begin your assault on getting your body in shape and achieving a happier and healthier lifestyle Before reading further please review the drawing below and familiarize yourself with the parts that are labeled Read this manual carefully before using the UPRIGHT BIKE THE FOLLOWING TOOLS ARE INCLUDED FOR ASSEMBLY T HAND SOCKET WRENCH 17MM ALLEN WRENCH M5 SOCKET WRENC...

Страница 4: ...s measured from below the head to the end of the bolt or screw Flat head bolts and screws are measured from the top of the head to the end of the bolt or screw After unpacking the unit open the hardware bag and make sure that you have all the following items Some hardware may be already attached to the part Part No and Description Qty 73 Washer 8x38x2 0t 4 78 Lock Washer M8 4 83 Screw Round Head M...

Страница 5: ...in Frame 1 and secure with the Washer 8x38x2 0t 73 the Lock Washer M8 78 and the Bolt Hex Head M8xp1 25x65mm 97 by using socket wrench as the main assembling drawing shows If the bike is not level review the LEVELING NOTE on the right side to level the Levelers 27 Detailed Lever drawing 1 Detailed Lever drawing 2 Adjustment Plate Stabilizer Leveler 27 LEVELING After placing the bike in the intende...

Страница 6: ...stration shown on the top right corner b Insert the Upright Post 5 into the Main Frame 1 and secure with the Bolt Hex Head M10xp1 5x50mm 99 by using the T HEAD SOCKET WRENCH 17MM as shown STEP 5 a Connect the Middle Connection Wire 109 to the Lower Connection Wire 110 b Attach the Front Decorating Upright Cover 12 onto the front of the Main Frame 1 with the Screw Round Head M5xp0 8x50mm 84 c Paste...

Страница 7: ...ine is suitable for Nickel Metal Hybrid NI MH rechargeable batteries only c Install rechargeable batteries into the console STEP 8 Attach the Battery Door 16 onto the back of the Console 13 with the Screw M3x10mm 79 STEP 9 a Connect the Middle Pulse Sensor Wire 112A to the Middle Pulse Sensor Wire 112 b Connect the Middle Connection Wire 109A to the Middle Connection Wire 109 Note the number of wi...

Страница 8: ...e Bolt Button Head M6xp1 0x12mm 88 STEP 14 a Remove the Screw Round Head M5xp0 8x15mm 83 from the Upright Post 5 b Attach the Accessory Tray 17 onto the Upright Post 5 and secure with the Screw Round Head M5xp0 8x15mm 83 STEP 15 Thread the Right Pedal 11 clockwise onto the Right Crank located inside the Right Crank Cover 9 as shown Tighten the pedal securely Repeat the same procedure to thread and...

Страница 9: ...stment Bar 23 up to adjust the seat height Seat downward to lower the seat height or slight move the body upward to raise the seat height Once adjusting to the proper position release the Adjustment Bar 23 until hearing the click sound C HOW TO TOW THE UPRIGHT BIKE SAFELY Hold the Rear Stabilizer 3 up with two hands and tow the upright bike to the desired place carefully Make sure the floor is lev...

Страница 10: ...crew M3x10mm 79 at the bottom on the Console 13 by using the combination wrench to open the Battery Door 16 c Install and replace batteries The Console 13 operates with four AA rechargeable batteries four batteries included into the hardware box The machine is suitable for Nickel Metal Hybrid NI MH rechargeable batteries only NOTE To prevent from any damages general batteries and other type of bat...

Страница 11: ...2 P4 P6 P8 P10 P12 55 HRC 75 HRC 90 HRC T HR arget Manual User The console display may vary slightly from the actual console display the above console overview is for reference only The console has metric and imperial system difference due to the usage of the different countries Distance 0 0 99 9 Km Mile ...

Страница 12: ...sound LCD diagram appears as below c Enter into the initial setting mode after around two seconds as below POWER OFF The console would automatically shut off after 30 seconds of inactivity NOTE the console would shut down any seconds if rechargeable batteries run out of power NOTE Low battery warning signal Initial Setting Mode ...

Страница 13: ...to MANUAL MODE immediately without selecting the function value displays of TIME DISTANCE CALORIES PULSE b START PAUSE button 1 Press to start a workout 2 Press to pause the program The console would display the current function values of workload level TIME DISTANCE CALORIES PULSE 3 User can press the START PAUSE button again to continue to run the current program PROGRAM ENTER START PAUSE NOTE A...

Страница 14: ...ro during setting b CHANGE SLECTED MODE MANUAL PROGRAM USER TARGET H R Under PAUSE MODE Hold the button for FOUR SECONDS to enter into the initial setting mode as shown RESET The RESET function only operates under PAUSE MODE The button is equipped with TWO operating methods The RESET function only operates under PAUSE MODE ...

Страница 15: ...ight side c Enter into the initial setting mode after around two seconds as shown on right side 2 RESTART FUNCTION a Press the START PAUSE button to pause the current program b Hold the RESET button for FOUR SECONDS to enter into the initial setting mode as illustration shown on the right c Skip to Step B of NORMAL OPERATION on the next page to continue the operation UNDER MANUAL MODE RESET The RE...

Страница 16: ...n for confirming and entering the function value setting d PAUSE MODE single will flash on LCD window for setting e LCD window then display flashing workload level as shown f UP or DOWN button Press the UP or DOWN button to increase or decrease the workload level 1 16 levels 2 levels increment g START PAUSE button Press the START PAUSE button to start a workout directly without setting function va...

Страница 17: ...0 Kcal Increment PULSE 70 to 240 BPM 1BPM increment Press the ENTER button to confirm the function value and enter the next function value setting Press the UP or DOWN button to select the value of the function TIME DISTANCE CALORIES PULSE To reset the function value to zero press the RESET button UNDER MANUAL MODE a WITHOUT PULSE VALUE flashing symbol will appear when detecting your pulse b THE W...

Страница 18: ...IES 10 to 990 Kcal Yes During a workout The selected value will turn to zero after turning off Yes Use RESET button 1 Calories will count up to 990 Kcal and cycle run the program profile without setting 2 Calories will count down to 10 depends on desired calories value users set up Two short beep sound for warning selected value reach to zero PULSE 70 to 240 BPM Yes During a workout The selected v...

Страница 19: ...ight side c Enter into the initial setting mode after around two seconds as shown on right side 2 RESTART FUNCTION a Press the START PAUSE button to pause the current program c Hold the RESET button for FOUR SECONDS to enter into the initial setting mode as illustration shown on the right c Skip to Step B of NORMAL OPERATION on the next page to continue the operation UNDER PROGRAM MODE RESET The R...

Страница 20: ... the function value setting d PAUSE MODE single will appear on LCD window for setting e START PAUSE button After flashing P1 appears on LCD window press the START PAUSE button to start a workout directly without setting function values Profile P1 P12 TIME DISTANCE CALORIES PULSE Or UP or DOWN button press the UP or DOWN button to directly select the desired profile P1 to P12 as shown P1 to P12 are...

Страница 21: ...ers to set the function values TIME 01 00 to 99 00 1minute increment DISTANCE 0 1 to 99 9km 0 1km increment CALORIES 10 to 990 Kcal 10 Kcal Increment PULSE 70 to 240 BPM 1BPM increment Press the ENTER button to confirm the function value and enter the next function value setting Press the UP or DOWN button to select the value of the function TIME DISTANCE CALORIES PULSE To reset the function value...

Страница 22: ...ngeable resistance depends on the value of RPM Rotate Per Minute RPM RESISTANCE RPM RESISTANCE In order to remain the value of Watt Control the value of the RPM Rotate Per Minute increases when you pedal faster while the value of the Resistance decrease becomes lighter resistance On the contrary the value of the Resistance would increase becomes heavier resistance when the value of the RPM decreas...

Страница 23: ...ROGRAM MODE d ENTER button Press the ENTER button for confirming and entering the function value setting e UP or DOWN button Press the UP or DOWN button to choose P12 as the following illustration shown f ENTER button Press the ENTER button to enter Program 12 g UP or DOWN button Press the UP or DOWN button to choose the desired Watt Control value 40 400 Watt 10 Watt increment h ENTER button To co...

Страница 24: ...on to confirm the function value and enter the next function value setting To increase or decrease the value of the function TIME DISTANCE CALORIES PULSE press the UP or DOWN button To reset the function value to zero press the RESET button a WITHOUT PULSE VALUE flashing symbol will appear when detecting your pulse Without wearing a chest belt make sure to always hold the pulse sensors on the hand...

Страница 25: ...h a long beep sound LCD diagram appears as shown on right side c Enter into the initial setting mode after around two seconds as shown on right side 2 RESTART FUNCTION a Press the START PAUSE button to pause the current program b Hold the RESET button for FOUR SECONDS to enter into the initial setting mode as illustration shown on the right UNDER USER MODE RESET The RESET function only operates un...

Страница 26: ...ming and entering the function value setting d PAUSE MODE single will appear on LCD window for setting e START PAUSE button After flashing the first time interval of the workload level appears on LCD window press the START PAUSE button to start a workout directly without setting function values TIME INTERVAL 1 TIME INTERVAL 16 TIME DISTANCE CALORIES PULSE Or UP or DOWN button Press the UP or DOWN ...

Страница 27: ...functions as follow and allow users to set the function values TIME 01 00 to 99 00 1minute increment DISTANCE 0 1 to 99 9km 0 1km increment CALORIES 10 to 990 Kcal 10 Kcal Increment PULSE 70 to 240 BPM 1BPM increment Press the ENTER button to confirm the function value and enter the next function value setting Press the UP or DOWN button to select the value of the function TIME DISTANCE CALORIES P...

Страница 28: ...h a long beep sound LCD diagram appears as shown on right side c Enter into the initial setting mode after around two seconds as shown on right side 2 RESTART FUNCTION a Press the START PAUSE button to pause the current program b Hold the RESET button for FOUR SECONDS to enter into the initial setting mode as illustration shown on the right UNDER TARGET H R MODE RESET The RESET function only opera...

Страница 29: ... flashing the age value the console preset appear on the LCD window press the UP or DOWN button to select your age f ENTER button Press the ENTER button to confirm the user s age g UP or DOWN button Continue to select the TARGET H R 55 75 90 THR you desire with the UP or DOWN button If choose the TARGET H R of 55 75 90 skip STEP H and operate STEP I directly UNDER TARGET H R MODE OVERVIEW SIMPLE F...

Страница 30: ...he function values TIME 01 00 to 99 00 1minute increment DISTANCE 0 1 to 99 9km 0 1km increment CALORIES 10 to 990 Kcal 10 Kcal Increment PULSE 70 to 240 BPM 1BPM increment Press the ENTER button to confirm the function value and enter the next function value setting Press the UP or DOWN button to select the value of the function TIME DISTANCE CALORIES PULSE To reset the function value to zero pre...

Страница 31: ...he legs as wide as possible Stretch the upper body toward the knee on the right leg by using your arms to pull your chest to your thighs Hold this stretch 10 to 30 seconds DO NOT BOUNCE Do this stretch 10 times Repeat the stretch with the left leg Bent Torso Pulls While sitting on the floor have legs apart one leg straight and one knee bent Pull the chest down to touch the thigh on the leg that is...

Страница 32: ...31 Pulse Sensor Top Housing 2 32 Pulse Sensor Bottom Housing 2 33 Pulse Sensor Plate 4 34 Generator 1 35 Pulley 120mm 1 NO PARTS NAME Q TY 36 Belt 762mm J8 1 37 Pulley 235mm 1 38 Magnet 1 39 Belt 1092mm J8 1 40 Front Aluminum Upright Cover 1 41 Rear Aluminum Upright Cover 1 42 Air Pressure Bar 1 43 Seat Adjustment Lever 1 44 Fixed Stand 1 45 Spacer 1 46 Cable 1 47 Cable Spring 1 48 Roller Axle 1 4...

Страница 33: ...x35mm 2 90 Bolt Button Head M8 p1 25 16mm 5 91 Bolt Button Head M10 p1 5 45mm 1 92 Screw Flat Head M8 p1 25 12mm 5 93 Bolt Socket Head M8 p1 25 70mm 2 94 Bolt Socket Head M10 p1 5 30mm 1 NO PARTS NAME Q TY 95 Bolt Hex Head M8 p1 25 15mm 4 96 Bolt Hex Head M8 p1 25 15mm 1 97 Bolt Hex Head M8 p1 25 65mm 4 98 Bolt Hex Head M8 p1 25 80mm 4 99 Bolt Hex Head M10 p1 5 50mm 2 100 Nut M3 4 101 Flange Nut M...

Страница 34: ...33 PRODUCT PARTS DRAWING ...

Отзывы: