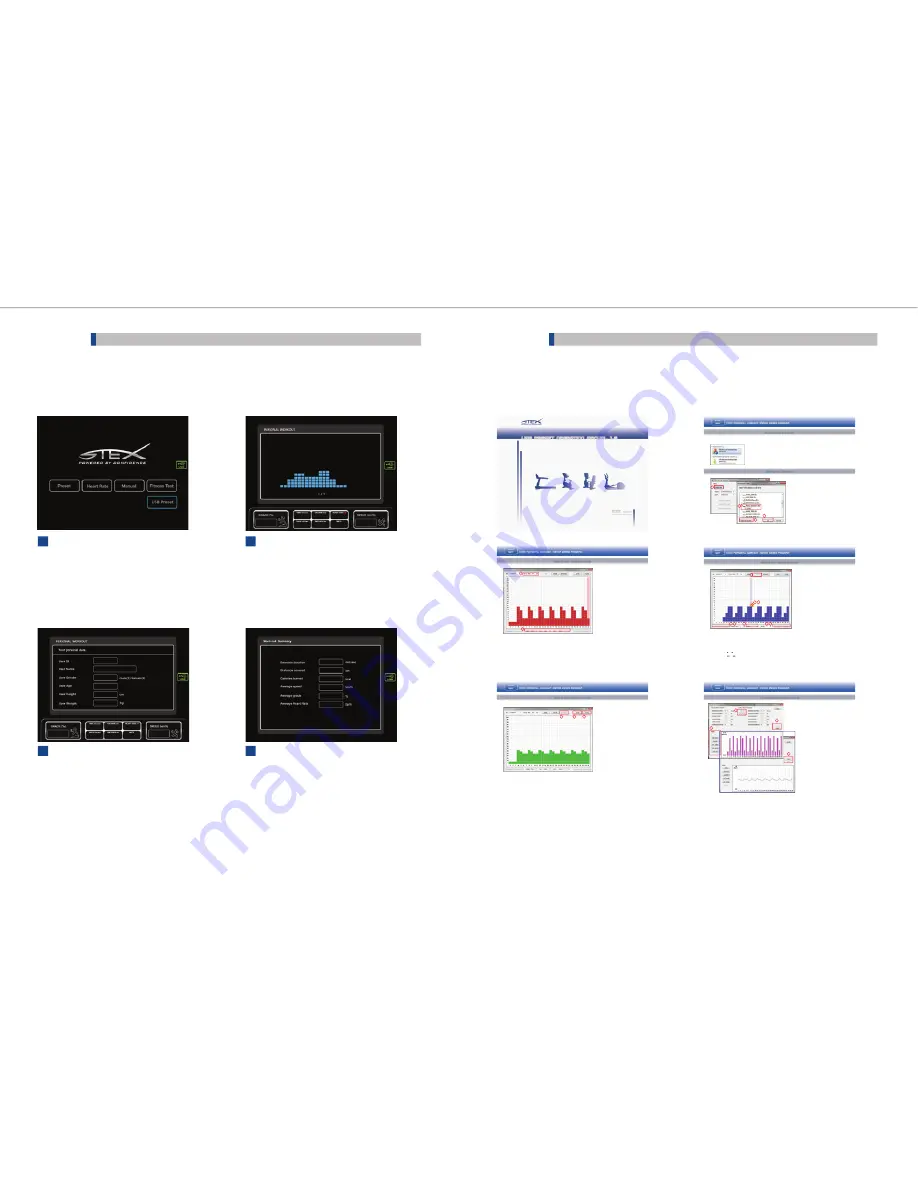
USB PRESET INFORMATION
USB PRESET
This fuction is running the stored program in the USB and store the personal
workout data after exercise for individual training.
If you want to get more information of USB preset, visit our website.
And download the program manual, read and use with your concern.
(www.stex
fi
tness.com)
Menu Screen
Insert USB memory stick to the USB slot of
equipment, then "USB Preset" window is
activated.
Select "USB Preset" icon by using ” PROGRAM”
button, then press “ENTER”.
Check User Information
Program list of USB memory will be shown
on the screen. Select program by using
UP(+),DOWN(-) button, then press
“START” button.
In this stage, you can check user information
by pressing display button.
VIR
TUAL TRAINER
Select Workout by using or Button
Quick Start : Start immediately, change speed and grade by manually.
Program : Select preset program which is favorable or suitable.
PROGRAM
1
2-2
Select Workout
Program list of USB memory will be shown
on the screen. Select program by using
UP(+),DOWN(-) button, then press
“START” button.
In this stage, you can check user
information by pressing display button.
Workout summary
Save your workout to your USB memory
stick by pressing “ENTER” button.
* At any exercise program, workout
summary can be saved to USB memory .
2-1
3
5. HOW TO USE (S23TX)
5. HOW TO USE (S23TX)
29
30
.
Running the STEX Personal Workout Editor (Demo)
①
Release Unzip
the ZIP file.
②
Run Execute
the file, “STEX Personal Workout Editor (Demo).exe” by clicking double.
1
2
3
4
①
Press the “DIRECTORY” for saving data
②
Select the “STEX” folder in USB.
③
Otherwise press the “Make New Folder”, and then
create the “STEX“ folder.
④
Pressing the “OK” the setting is completed
* “STEX” folder must be created on the main directory
Running the program
Setting the directory
Setting and saving exercise
Description
1
①
“TOTAL TIME” window displays whole exercise time.
②
“CURRENT TIME” window displays the selected time.
“SPEED” window displays the selected speed.
“GRADE” window displays the selected grade.
* Exercise time can be set up to 90minutes
2
Setting and saving exercise
Setting the grade
①
The grade can be set in “GRADE” window.
②
Set the grade with left button of mouse on the graph.
③
Input the grade per 0.5km/h in “GRADE” and then press the “Enter”. Pressing the “Tap” button of keyboard, next time
can be selected.
④
The speed can be removed with right button of mouse on the graph.
⑤
Pressing “<“, “>”, the cursor will be moved to previous or next 1 minute.
⑥
Pressing “<<“, “>>”, the cursor will be moved to previous or next 30 minute.
2
3
4
5 6
5 6
1
Setting and saving exercise
Checking the exercise intensity
①
The exercise intensity based on the speed and grade you input earlier can be checked in “INTENSITY” window.
②
Pressing the “SAVE”, the setting of the speed and grade will be completed.
③
Press the “CLOSE” after finishing the setting.
* This graph is the same as the screen shown when you exercise.
1
2
3
Checking the exercise result
①
Pressing “<“, “>”, result of other exercise are
displayed.
②
Pressing the icons such as DISTANCE, CALORIE,
AVG.SPEED, AVG. GRADE, AVG H/R in “GRAPH”
window, results of other exercise are displayed as
graph.
③
Pressing the “BAR” or “CURVE”, exercise result
displays as bar or line graph.
1
2
3
3


