20
INSTALL
THE DIP
SWITCH
8-pin DIP switch (1)
#100779
5
5
The DIP switch you’re about to install allows the user to customize tone
when its four switches are arranged in different combinations. The four
switches engage two different groups of diodes that affect not only the
overall distortion type, but also the sustain and response to pick attack
of the pedal. You can choose between the Clean Boost, Overdrive, and
Distortion settings for each side of the pedal.
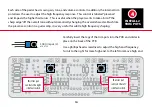
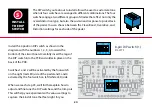
Install the 4 position DIP switch as shown in the
diagram, with the numbers 1, 2, 3, 4, towards the
bottom of the circuit board. Carefully insert the legs of
the DIP switch into the PCB and solder in place on the
back of the PCB.
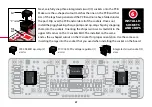
Switches 1 and 2 will be activated by the footswitch
on the right (red LED) side of the pedal and 3 and 4
activated by the footswitch on left (white LED) side.
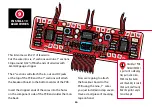
When we reach step 23, we’ll further explain how to
adjust and fine tune the DIP switches and the trim pots.
This will help you experiment with various settings to
capture the kind of tone that feels right for you.


