page 15
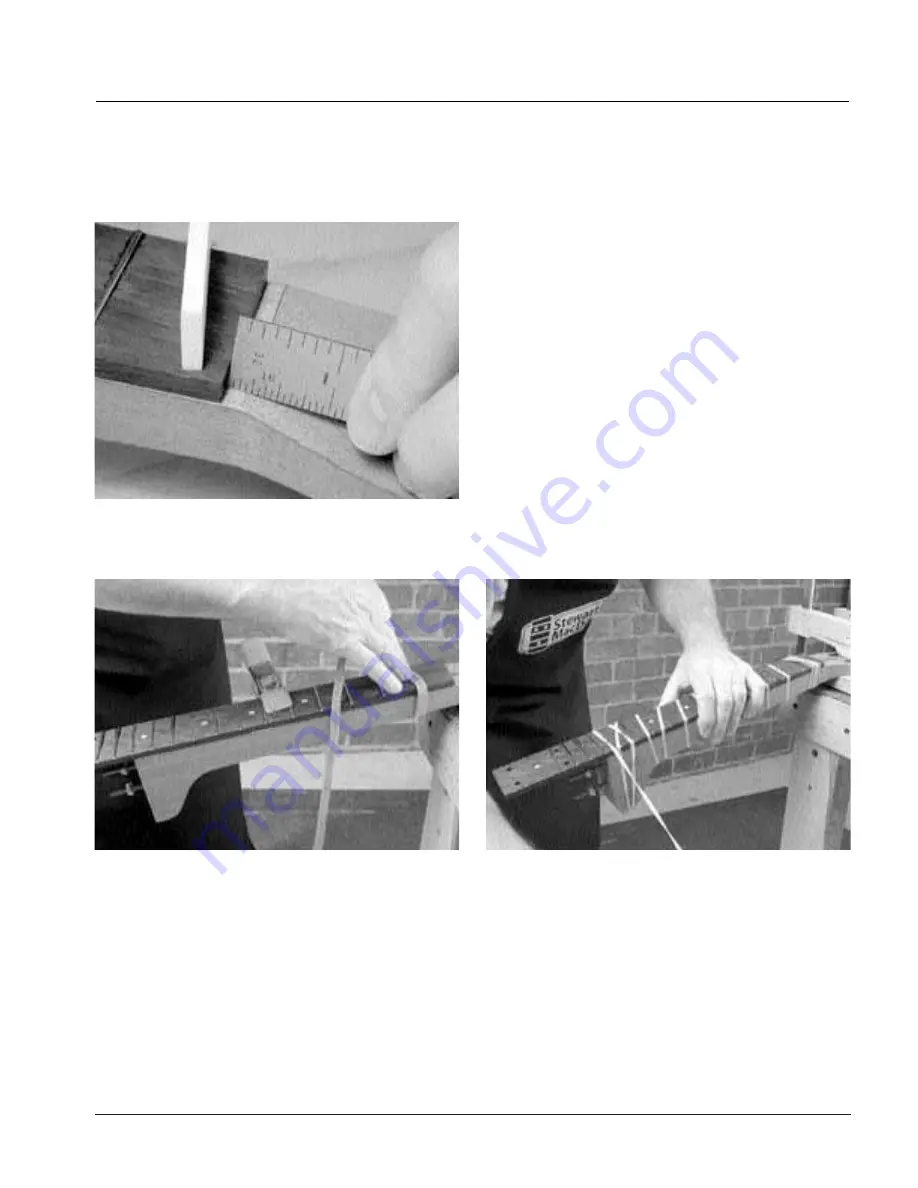
There should be a flat area approximately 3/16" to 7/32" wide
left between the end of the fingerboard and the break angle
of the peghead. This is where the bone nut will rest
(30)
.
Install the fingerboard with Titebond glue. To get just the
right glue coverage, spread it with a flux brush. Work the glue
up to the edge of the truss rod channel, and then draw it
away from the edge with the flux brush to keep glue
squeeze-out from getting into the channel.
Place the fingerboard onto the evenly-glued neck surface
and center the 12th fret slot directly over the edge of the
neck heel. Hold the fingerboard in place temporarily with a
spring clamp
(31)
as you start to wrap with the rubber bands
supplied with your kit. Tie the rubber band at the peghead
and wrap from end-to-end and back again. Get plenty of
wraps on the heel
(32
). You may find that one rubber band is
all that’s needed for the job. You can a shift the fingerboard
slightly from side-to-side as you wrap, but usually the board
will center itself nicely.
Installing the fingerboard
30.
The bone nut will rest on the flat area approximately 3/16" to
7/32" wide, left between the end of the fingerboard and the break
angle of the peghead.
31.
Hold the fingerboard in place temporarily with a spring clamp
as you start to wrap with the rubber bands supplied with your kit.
32.
Get plenty of wraps on the heel.
Содержание Bluegrass Resomaster
Страница 1: ...Resonator Guitar Kit Assembly Instructions www stewmac com ...
Страница 3: ...page 2 ...


