page 9
The binding supplied with your kit measures approximately
1/4" x .060". Use StewMac’s Binding Router Cutter Set, with
the largest ball-bearing installed
(14)
. This setup will rout a
ledge of approximately .060" for the binding width. Set the
height of the router bit’s cut at 15/64", or slightly more than
the thickness of the plywood guitar top/back, so the binding
hides the laminated edge of the plywood.
Rest the router squarely on the guitar’s top or back, and rout
a clean ledge for the binding. Be careful along the edge of
the soundwell because the router could tip easily with such
a small surface to rest on. It’s a good idea to practice routing
on scrap plywood or other wood to get a feel for the router
bit’s cut.
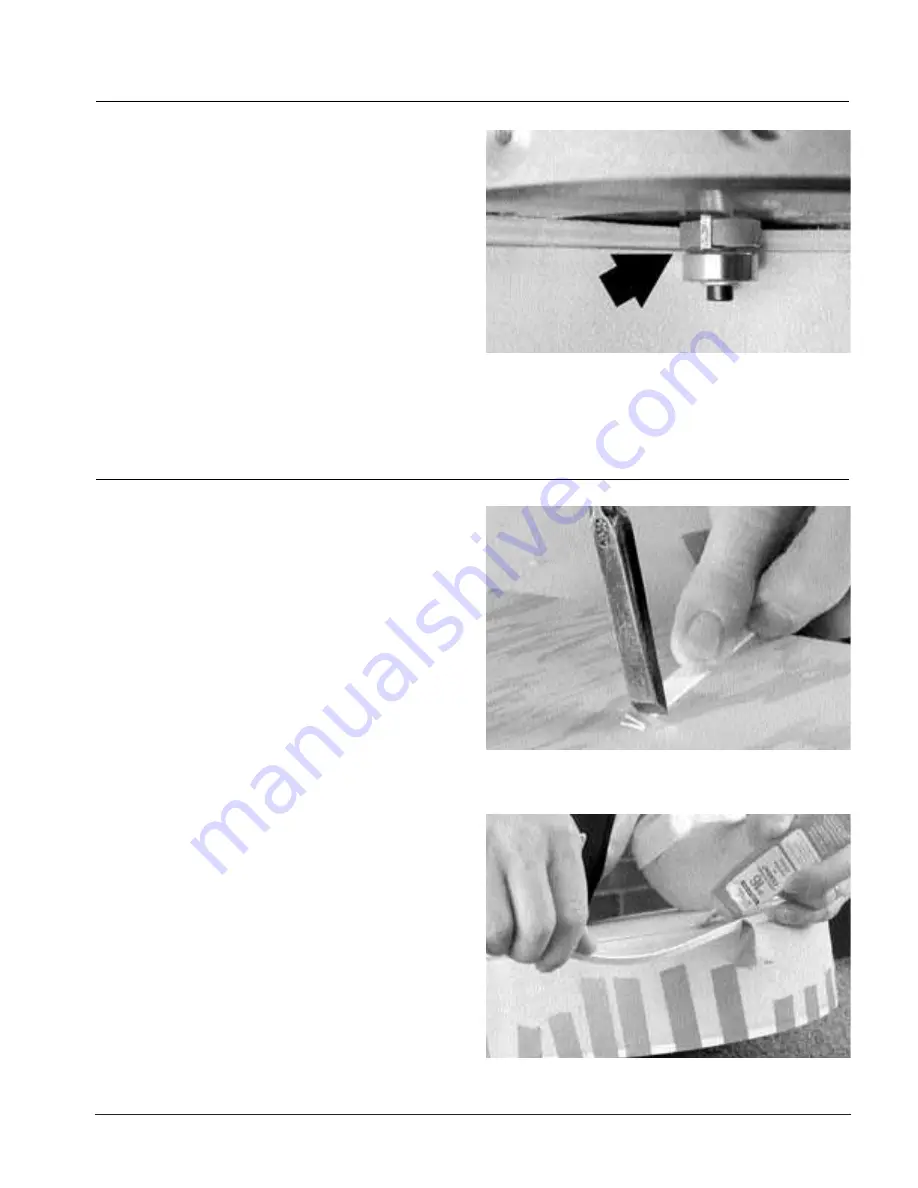
14.
Set the height of the router bit’s cut at 15/64", or slightly more
than the thickness of the plywood, so the binding hides the lami-
nated edge of the plywood.
One strip of binding is not long enough to go completely
around the guitar, so you must use two strips and bind one
half of the top or back at a time. Bind both halves of the top
first, to practice getting a tight seam where the two bindings
meet. (The seam between the top bindings will be hidden
by the tailpiece, but on the back side the seam will show.)
With clean hands and careful work, it’s possible to produce
an invisible glue line between two pieces of binding by melt-
ing the seam together with Weld-On 16, the solvent-based
glue recommended for this work.
Start binding at the center seam of the tail block end. Trim
the binding square at the starting point
(15)
so that the butt-
jointed seam between the two halves is tight. Use Weld-On
16 glue in the channel and strong masking tape to hold the
binding in place. Weld-On 16 glue sets quickly, so glue and
tape in three or four short sections, working toward the neck
block
(16)
.
Let the glue dry 24 hours before removing the masking tape.
Pull the tape off at a 45° angle to lessen the chance of pulling
up wood fibers. If you heat the tape lightly with a hair dryer
held 8 inches away, it will soften the sticky tape and allow it
to pull free easily.
Routing for binding
Installing the binding
15.
Trim the binding square at the starting point so that the butt-
jointed seam between the two halves is tight.
16.
Apply glue and tape, working in short sections.
Содержание Bluegrass Resomaster
Страница 1: ...Resonator Guitar Kit Assembly Instructions www stewmac com ...
Страница 3: ...page 2 ...


