background image

Page 11 of 19 

OPERATIONS 


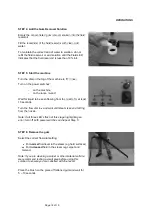
STEP 1: Pre-run set up 


Make sure that the battery is fully charged. 
 
Connect the handle plug to the socket on the main unit    


STEP 2: Assemble the heating assembly 

 
Assemble the Heating Assembly based on the  
gum cleaning needed  
 

For a short hand-held wand, attach the heating 
assembly directly to the handle. 

For a longer wand, attach extension pole(s) 
onto the handle and then attach the heating 
assembly onto the extension pole(s). 


FOR SAFETY:
 

A maximum of two extension poles can  

be used. 


Make sure that the internal connectors are aligned before  
fastening the screw collars. These can only be inserted  
correctly one way. 
 

Note: Do not overtighten the connection collars on each  
of the extension poles. 

 
Place the support handle based on the operator’s comfort.  
Place the wand onto the holster on top of the machine. 


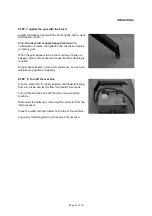
STEP 3: Attach a brush to the nozzle 


brass brush

 should be used for cleaning hard or urban 

surfaces. Brass brushes can be used on concrete, asphalt 
(tarmac), stone, block paving, sports surfaces, marble and 
other hard surfaces. 
 

Note: If you are not certain if a brass brush may scratch 
the surface being cleaned, we recommend using a nylon 
brush instead. 


nylon brush

 should be used for cleaning carpets, mats,  

upholstery and surfaces, which could be scratched by 
using a brass brush.   


Содержание Gum Remover

Страница 1: ...Page 1 of 19 Gum Remover Operating Instructions March 2017...

Страница 2: ...Number Owner representative 12 month warranty registration Thank you for purchasing a Steam e product Warranty registration is quick and easy Your registration will allow us to serve you better over...

Страница 3: ...s 9 Lithium Ion Battery 9 Main Components 10 Step 1 Pre run set up 11 Step 2 Assemble the heating assembly 11 Step 3 Attach a brush to the nozzle 11 Step 4 Add the Gum Removal Solution 12 Step 5 Start...

Страница 4: ...CE section contains preventative maintenance information to keep the machine and its components in good working condition They are listed in this general order Warning indicators Troubleshooting Hazar...

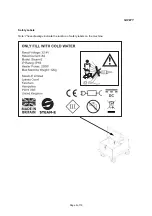
Страница 5: ...Page 5 of 19 SAFETY Safety Labels Note These drawings indicate the location of safety labels on the machine...

Страница 6: ...aintained or fixed by authorised people Always keep the nozzle in a downward facing direction when operating to ensure no hot liquid or steam can cause harm to the operator or bystanders Only Steam e...

Страница 7: ...nformation carefully Know when conditions can exist Locate all safe devices on the machine Please take the necessary steps to train the machine operating personal FOR SAFETY DO NOT OPERATE MACHINE Unt...

Страница 8: ...pe Lithium Ion Voltage 33V Amp Hours 18 Ah Run Time 3 5 Hours Charge Time 5 Hours Max Operating Temperature 110 C 230 F Dimensions Item Description Height 370mm 14 56 inches Width 350mm 13 78 inches L...

Страница 9: ...ge to the internal components of this appliance Lithium Ion Battery This machine is manufactured with 33V 18Ah rechargeable lithium battery The charging voltage is 100 240V The battery should be suffi...

Страница 10: ...eater Housing 11 Handle Power Switch 2 of 2 This appliance is not intended for use by persons including children with reduced physical sensory or mental capabilities or lack of experience and knowledg...

Страница 11: ...igned before fastening the screw collars These can only be inserted correctly one way Note Do not overtighten the connection collars on each of the extension poles Place the support handle based on th...

Страница 12: ...e on the lance wand Wait for liquid to be seen flowing from the nozzle for at least 10 seconds Turn the flow dial to and wait until steam is seen emitting from the nozzle Note If all three LED s flash...

Страница 13: ...e area to see if further cleaning is required All gum deposits vary in size and consistency so each one will take varying times to destroy STEP 8 Turn off the machine Turn the dial to the R rinse posi...

Страница 14: ...h to R 3 Turn both power switches on 4 After seeing fluid run for at least 10 seconds turn the flow dial to either or If the three lights are still flashing 1 Turn off both power switches 2 Disconnect...

Страница 15: ...es are turned off Turn both switches on The fluid reservoir is empty Fill the fluid reservoir with clean cold water There is a loose connection in the pole Re attach the heater and all poles Fluid is...

Страница 16: ...hours on flow setting Brass brushes Available from all approved Steam e distributors or directly from Steam E Limited brass brushes are supplied in bags of 20 A brass brush will typically last for aro...

Страница 17: ...dispatch to the UK and within 3 5 business days for European countries where possible Certain items may have to be specially ordered into stock When this is the case delivery may take longer and we wi...

Страница 18: ...ts back to Steam E Limited If an item is damaged upon arrival with the customer who placed the order we will arrange collection and a subsequent replacement will be provided Faulty items still under w...

Страница 19: ...t that the seller of the Steam e machinery is no longer able to fulfil their obligations contact Steam E Limited with the full details of the issue claim proof of purchase and your full contact and bu...

Отзывы: