16
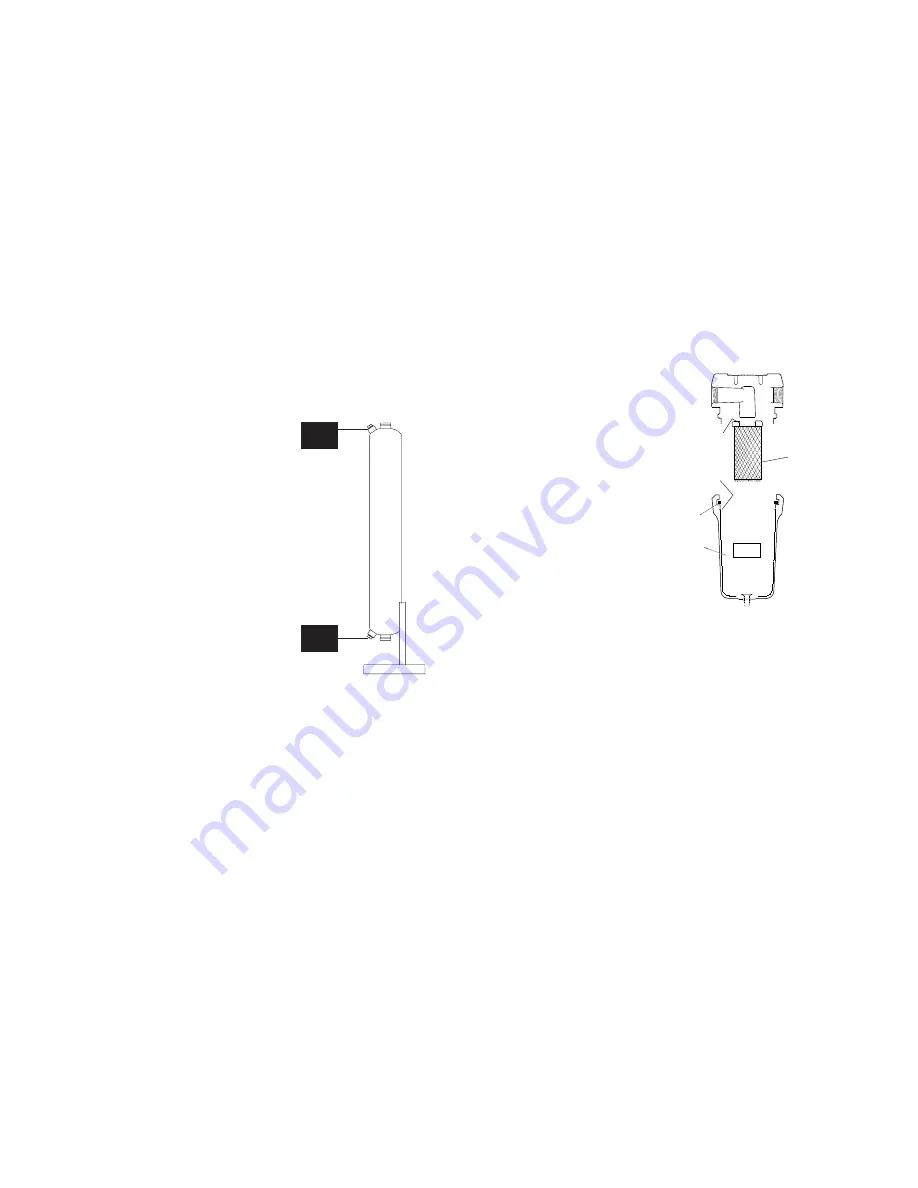
4.2 Pilot Air Filter - Element Replacement -
Models 370 scfm and larger
4.2.1 Frequency of replacement -
Pilot air filter contains a filter element which should be changed yearly
or sooner if pressure drop across cartridge prevents valves from actu-
ating. Pilot air pressure must not drop below 60 psig (4.2 kgf/cm
2
).
4.2.2 Procedure for element replacement.
Follow instructions supplied with replacement element.
WARNING
THIS SEPARATOR IS A PRESSURE CONTAINING DEVICE. DEPRES-
SURIZE BEFORE SERVICING. IF SEPARATOR HAS NOT BEEN DEPRES-
SURIZED BEFORE DISASSEMBLY, AN AUDIBLE ALARM WILL SOUND
WHEN THE BOWL BEGINS TO BE REMOVED FROM THE HEAD. IF THIS
OCCURS, STOP DISASSEMBLY, ISOLATE AND COMPLETELY DEPRES-
SURIZE SEPARATOR BEFORE PROCEEDING.
1. Shut off air supply.
2. Depressurize Dryer.
3. Remove bowl.
a. Push bowl up, turn bowl
1/8th turn to your left,
and pull bowl straight down
4. Clean filter bowl
5. Replace element
a. Pull off old element and
discard
b. Make certain o-ring inside
top of replacement element
is in place and push element
onto filter head.
NOTE: Make certain o-ring is generously lubricated.
6. After making certain that bowl o-ring is in place, reassemble bowl
to head.
NOTE: Wave spring ends should be pointed down to prevent the wave
spring from interfering with reassembly.
4.3 Fuse Replacement
4.3.1 Fuses are located on board in electrical enclosure. See figure
3B for Standard Control Board and 3C for Automatic Purge Sav-
ing System.
4.0 MAINTENANCE
FIGURE 4B
Element O-ring
Replacement
Element
Bowl O-ring
Wave Spring
Spacer
WARNING
The heatless desiccant dryer is a pressure containing device. Depressurize
before servicing. (See Section 3.3)
4.1 Desiccant Replacement
NOTE: The use of the correct replacement desiccant is necessary for
proper dryer operation. Never use hygroscopic salts of the type com-
monly used in “deliquescent” type dryers.
4.1.1 Frequency of desiccant replacement
Desiccant should be replaced whenever the required dew point cannot
be maintained while the dryer is being operated within its design condi-
tions and there are no mechanical malfunctions. Refer to section 5.0 for
troubleshooting hints.
NOTE: Desiccant life is determined by the quality of the inlet air. Proper
filtering of the inlet air will extend the life of the desiccant.
Typically desiccant life is 3 to 5 years.
4.1.2 Procedure for Desiccant Charge Replacement
4.1.2.1 Depressurize and de-energize the dryer. (See section 3.3)
4.1.2.2 Remove the fill and drain plugs
from desiccant tower and drain
the spent desiccant. Place a
container at the base of the
vessel to collect the desiccant.
If necessary tap the sides of the
vessels with a rubber mallet to
loosen desiccant.
4.1.2.3 Replace the drain plug using
teflon tape sealant or equivalent.
4.1.2.4 Fill the desiccant drying tower as
full as possible with dry desic-
cant. Do not tamp desiccant.
4.1.2.5 Replace the fill plug using teflon
tape sealant or equivalent.
4.1.2.6 Repeat this procedure for the
other tower.
4.1.3 Insuring desiccant dryness
4.1.3.1 Replacement desiccant is shipped in air tight containers. Keep
the covers on these containers tightly closed until use to avoid
moisture contamination. If desiccant is exposed to air it can be
heated in an oven at 400°F (204°C) for four hours before use,
or the procedure in 4.1.3.2 can be used.
4.1.3.2 If the dryer is not refilled with dry desiccant, it will be necessary
to operate the dryer with an inlet flow rate of less than 50% of
maximum to dry the desiccant. To do this, set the Economizer
Switch for 100%, and the purge pressure for 45 psig. (3.2 kgf/
cm
2
)
4.1.3.3 Purge mufflers should be changed annually.
4.1.3.4 Valve(s) should be checked annually.
DRAIN
PLUGS
FILL
PLUG
FIGURE 4A
DRAIN
PLUGS


