SpectraLink Corporation
Installation, Configuration, and Administration
NetLink Telephony Gateway
Part Number: 72-0065-02-R.doc
Page 29
3.
Connect to the NetLink Telephony Gateway(s) per the instructions located in
section 9,
Connecting to the NetLink Telephony Gateway
, and select a NetLink
Telephony Gateway to administer. Initial configuring of the NetLink Telephony
Gateway(s) is done via a serial connection if a DHCP server is not available.
4.
Set the network configuration options per section 11,
Network Configuration
.
5.
Configure additional NetLink Telephony Gateways: Connect to each additional
NetLink Telephony Gateway in your system and use the
Network Configuration
and
Change Password
(if desired) screens to configure them. Reset each
Gateway as the last configuration step.
6.
Reset all NetLink Telephony Gateways: After you have configured and reset the
last NetLink Telephony Gateway, do not unplug the serial cable. Log in again
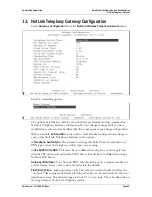
and navigate to the
Gateway Configuration
screen. Use the arrow keys to
highlight
Reset All Systems
and press Enter. Respond with a
Y
to the reset
prompt.
7.
For each Gateway, assign handsets to telephone lines controlled by each NetLink
Telephony Gateway per section 15,
Telephone Line Configuration.
8.
For each Gateway (using Send All as indicated): Establish feature programming
per section 16
Features Programming Menu
and the
LinkPlus Interface Guide
for your
telephone system.
9.
At this point, the NetLink Telephony Gateway is configured. The remaining
steps are done on the handsets. These steps are detailed in the handset
administration document:
NetLink e340/h340/i640 Wireless Telephone: Configuration
and Administration
or
NetLink 8000 Series Wireless Telephone: Configuration and
Administration.
10.
Configure, test and verify each handset.
11.
Perform AP coverage test per
Certifying the Wireless Telephones
.
12.
Call Customer Support at SpectraLink for Site Certification clearance.
8.2
Send All
Depending on your system configuration, each NetLink Telephony Gateway may
have identical settings. Relevant selections, such as DNS and WINS options, have an
S=Send All
option allowing you to send that configuration parameter to every
NetLink Telephony Gateway on the LAN. Send All can only be used after the IP
address is established on EACH NetLink Telephony Gateway via the serial
connection. If you anticipate identical settings across the LAN, set just the IP
address and custom hostname (if desired) for each NetLink Telephony Gateway
using the initial serial connection. Then connect via the LAN and use Send All to set
identical configuration options for all NetLink Telephony Gateways.
If Send All is to be utilized in your system, all passwords must be identical. DO
NOT CHANGE THE PASSWORD AT THE INITIAL CONFIGURATION IF
THE SEND ALL OPTION IS DESIRED. Use the default password and change it
globally if desired after a LAN connection is established for all NetLink Telephony
Gateways.

