


9
Location and Function of Parts and Controls
In
tro
duc
tion
is pressed. The DISPLAY setting in the OUTPUT
SETUP menu also changes in conjunction with each
press of this button.
When the menu is displayed, pressing this button
temporarily hides the menu display on the monitor.
The menu display is hidden for as long as the button
is pressed.
G
Directional buttons (
<
,
,
,
M
,
m
)
Use these buttons to select menu items and change
settings.
H
x
STOP/CLEAR button (page 36)
When printing is in progress, this button functions as
the STOP button. Press this button during continuous
printing operations to stop printing after the current
item finishes printing.
When printing is not in progress, this button functions
as the CLEAR button. Press this button to delete
images captured in memory. The images that are
deleted when the button is pressed depend on the
setting in the FUNCTION SETUP menu. If the button
is pressed while the setting is OFF, an error tone will
sound.
I
MULTI PICTURE button (page 29)
Press this button during normal screen display to
select the layout (full-size, two reduced images, or
four reduced images) in which images are captured to
memory. Each press of this button switches the image
type in the following sequence: “1, 2, 4, 1...,” and the
current selection is displayed for a few seconds when
the button is pressed. The MULTI PIX setting in the
LAYOUT SETUP menu also changes in conjunction
with each press of this button.
J
PRINT QTY button (page 24)
Press this button to select the number of copies to
print. You can select up to nine copies, and the current
selection is displayed for a few seconds when the
button is pressed. The PRINT QTY setting in the
PRINTER SETUP menu also changes in conjunction
with each press of this button.
You can press this button to change the number of
copies to print, even while printing is in progress.
K
CAPTURE button
Press this button to capture images to memory for
printing.
L
PRINT button
Press this button to print the images that are captured
to memory.
M
!
POWER switch
Use this switch to turn the printer on or off.
N
Tray light
Illuminates the output tray. (You can configure the
setting for this.) (page 61)
O
Paper feed tray (page 17)
Load paper in this tray. Printouts stack in the tray
above.
P
Z
(eject) mark
Press here to eject the paper feed tray.
Q
EXEC button
Use this button to confirm a menu setting.
R
MEMORY PAGE button (page 25, 28, 37)
Press this button to select the memory page to use.
S
SOURCE/MEMORY button
Press this button to select the source for images that
are output to the monitor. Each press of this button
toggles between memory images and input source
images.
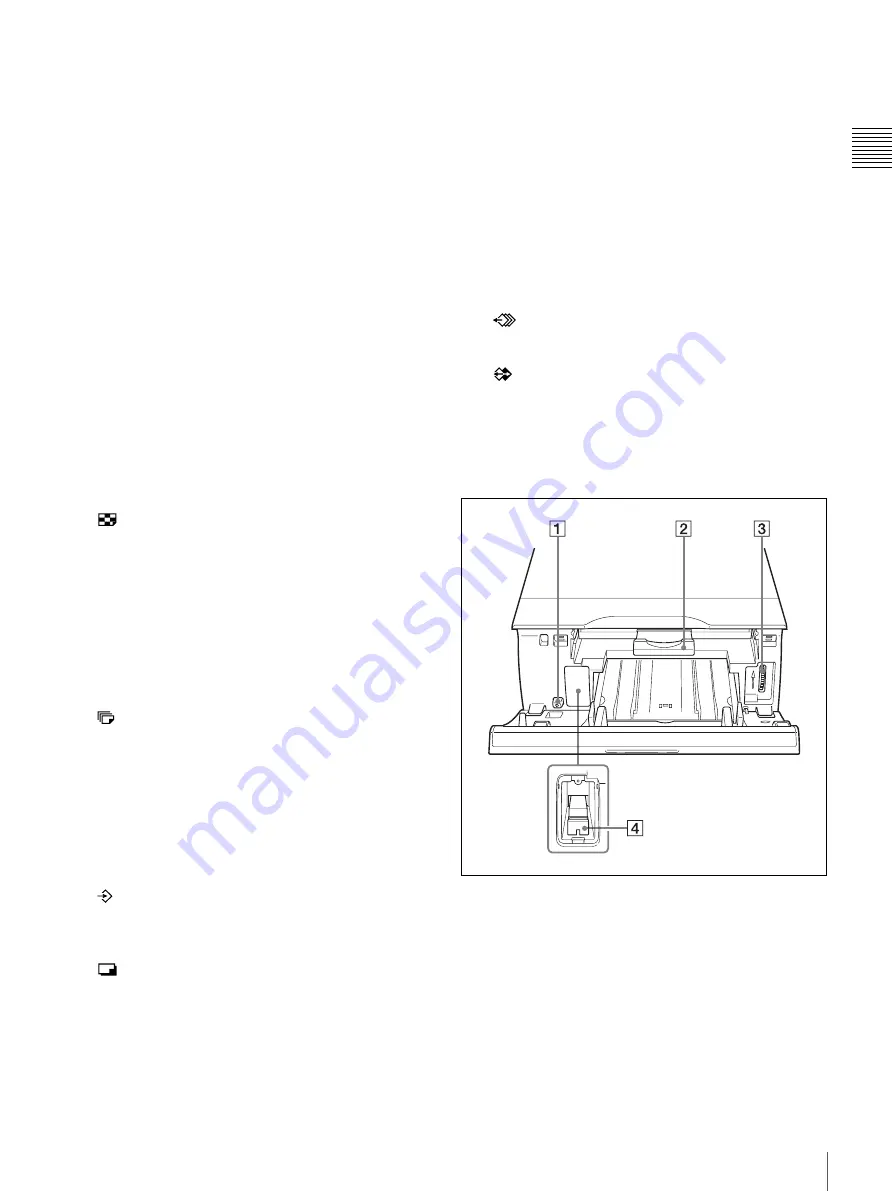
Inside the Ribbon Door Panel
A
!
POWER switch
Use this switch to turn the printer on or off. This
switch functions even while the ribbon door panel is
open.
B
Ribbon tray (page 15)
Load the ink ribbon in this tray.
C
Dial (page 74)
Use this dial to clear paper manually when an internal
paper jam occurs.
Содержание UP25MD
Страница 76: ...Sony Corporation ...


