background image

TV menu system

28

OK

1

4

7

3

6

9

2

5

8

0

DIGIT

AL

DIGIT

AL

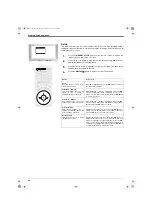
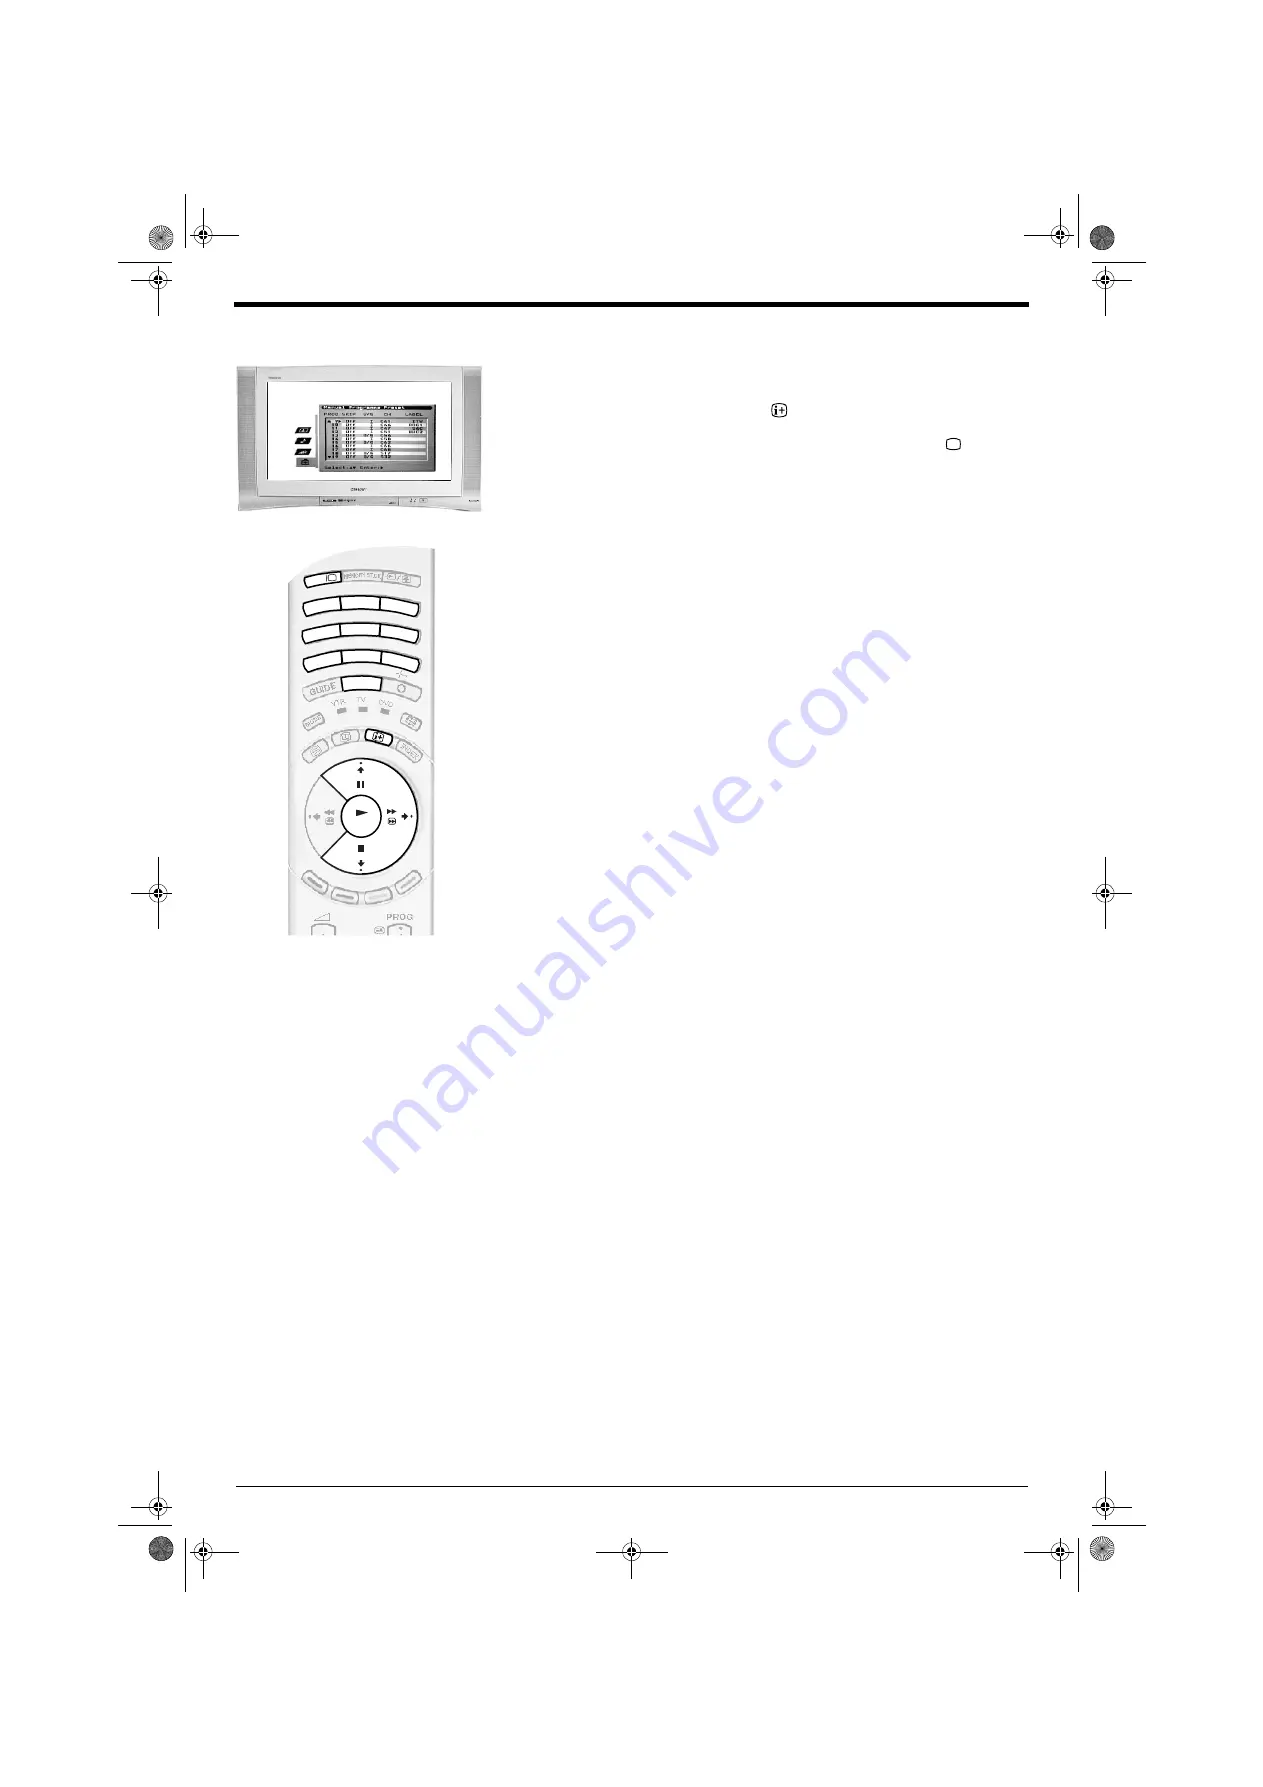
Manual Programme Preset menu 
(for analogue channels only)

To check which mode you are in, press the 

 button on the remote control. If you are

watching a digital programme, an Info display appears on screen providing brief details
for the current and next programme. If this happens, press the 

DIGITAL/

 button on

the remote control to switch to analogue channels. 

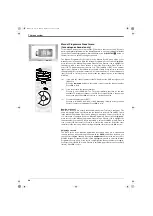
The  ‘Manual Programme Preset’ option in the ‘Manual Set Up’ menu allows you to
manually tune in channels. With the ‘Manual Programme Preset’ option highlighted,
press 

b

 to enter the ‘Manual Programme Preset’ menu. Press 

or 

to highlight the

channel you wish to tune. Press 

b

 twice to select the SYS column. Press 

or 

to

select the TV broadcast system (Choose I for TV broadcasts or EXT for an external
input source). Press 

b

 to confirm and select the CH column. Press 

or 

to select the

channel tuning (C for terrestrial channels, S for cable channels or F for direct frequency
input). Press 

b

 to confirm. You now need to tune the channel by one of the following

methods:

(a)

If you know the channel number of the TV broadcast, the VCR test signal or the
frequency:
Press the 

numbered 

buttons on the remote control to enter the channel number.

Press 

OK

 to store.

(b)

If you do not know the channel number:
Press 

v

 to select SEARCH. The TV set automatically searches for the next

available TV broadcast channel or the VCR test signal. When a channel has
been found press either 

OK

 to store or 

v

 to continue searching.

(c)

For external input sources (EXT):
Press 

v

 to select AV1, AV2, AV3, or AV4 depending on which socket you have

used to connect your equipment. Press 

OK

 to store.

Naming a channel

Names for channels are usually taken automatically from Teletext (if available). This
name is displayed briefly on screen when the channel is selected. The ‘LABEL’ option
in the ‘Manual Programme Preset’ menu allows you to assign a name of your choice up
to 5 characters or numbers. With the ‘Manual Programme Preset’ option highlighted,
press 

b

 to enter the ‘Manual Programme Preset’ menu. Press 

or 

to highlight the

channel number you require. Press 

b

 repeatedly to select the


LABEL column. Press 

v

or 

to select the first character. Press 

b

 to confirm this character. Select the other

characters in the same way. After selecting all required characters, press 

OK

 to store.

Skipping a channel

The ‘SKIP’ option in the ‘Manual Programme Preset’ menu allows you to skip unused
channel positions when selecting channels with the 

PROG+/- 

buttons. However, you

can still select skipped channels by using the 

numbered 

buttons on the remote control.

With the ‘Manual Programme Preset’ option highlighted, press 

b

 to enter the ‘Manual

Programme Preset’ menu. Press 

or 

to highlight the channel number you require.

Press 

b

 to select the


SKIP column. Press 

to select On (select Off to remove the SKIP

feature). Press 

OK

 to store.

NX 24-33.fm  Page 28  Monday, September 16, 2002  2:04 PM

Содержание Trinitron KD-32NX200U

Страница 1: ...R 4 090 229 62 1 Trinitron Digital TV Instruction Manual GB KD 32NX200U KD 36NX200U 2002 by Sony Corporation 409022962 32nx200Ucover fm Page 1 Monday September 16 2002 11 53 AM ...

Страница 2: ...plug without the fuse cover If you should lose the fuse cover please contact your nearest Sony service centre How to replace the Fuse Open the fuse compartment with a flat blade screwdriver and replace the fuse IMPORTANT If the plug supplied is not suitable for the socket outlet in your home it should be cut off and an appropriate plug fitted in accordance with the following instructions The wires...

Страница 3: ...or choosing this FD Trinitron Integrated Digital Television Before operating the TV please read this instruction manual thoroughly and retain it for future reference NX1 8 fm Page 1 Monday September 16 2002 12 24 PM ...

Страница 4: ...the set Never place the TV in hot humid or excessively dusty places Do not install the TV where it may be exposed to mechanical vibrations Clean the TV with a soft lightly dampened cloth Do not use benzine thinner or any other chemicals to clean the TV Do not scratch the TV screen As a safety precaution unplug the TV before cleaning it Pull out the power lead by the plug Do not pull on the power l...

Страница 5: ...nload 18 System Information 18 CAM Setup 19 The Channel Index menu 20 Searching for digital channels 20 The Category pop up list 21 Favourite programmes 21 The EPG menu 22 To record programmes 23 To set the Manual Timer 23 To cancel a recording 23 TV menu system Using the TV menu system 24 Picture Adjustment menu 24 Sound Adjustment menu 25 Features menu 26 Set Up menu 26 Manual Set Up menu 27 Man...

Страница 6: ...trol Always remember to dispose of batteries in an environmentally friendly way 1 2 Remote control Place a coin in the slot at the bottom of the remote control Turn anti clockwise to release the battery compartment Insert the batteries as indicated in the battery compartment Replace the battery compartment and lock in place by twisting the coin clockwise in the slot RF Loopthrough cable 1 2 3 7 1 ...

Страница 7: ... recorded tape into the VCR and press the PLAY button This enables the TV to locate and store the video channel during the Automatically tuning the TV procedure Note Your VCR sockets may not be labelled RF IN and RF OUT If not please refer to your VCR instruction manual for guidance s 3 3 1 Connect the TV plug to your mains socket 220 240 V AC 50 Hz 2 Push in the on off button labelled on the fron...

Страница 8: ...orrection is required press the OK button Press the V or v button to rotate the picture over a range of 5 to 5 Press the OK button to store The autotune prompt screen appears Press the OK button to select Yes and begin the digital autotune procedure When all the available digital programmes are found the analogue tuning display appears and all the analogue signals are captured and stored If no dig...

Страница 9: ...eo channel to a different programme number refer to the Programme Sorting section of this manual If you connected your VCR using a scart lead press the button repeatedly on the remote control until the picture from the pre recorded tape appears on the TV screen Switching between digital and analogue programmes 6 1 Press the DIGITAL button on the remote control to switch between digital and analogu...

Страница 10: ...nel Volume control buttons Press to increase or decrease the volume Video input button Press to select input signals from a VCR etc Reset button Press to return picture and sound levels to their factory settings Note When the Memory Stick is reading or wriiting data the memory stick indicator lights up in red Data stored on a Memory Stick may become damaged or erased if you remove the Memory Stick...

Страница 11: ...the mode selected Note Before operating your VCR or DVD you must enter the correct configuration code Please refer to the section Remote control operation for VCR and DVD players GUIDE button Press to launch digital text or digital interactive services Text button Press to enter the text mode EPG button Press to display the Electronic Programme Guide when in digital mode Coloured buttons These but...

Страница 12: ...nnel by using the numbered buttons on the remote control If you do not know the channel number of a dedicated digital text channel you can use the Channel Index menu to find one Please refer to the Channel index menu section of this manual 3 Once the text page is displayed follow the on screen instructions to obtain your required selection Note On some pages the TV programme may also be displayed ...

Страница 13: ...mbers as required 5 When you have finished viewing the text service press the DIGITAL button to remove the text display from the screen Text Features How to select To select the next or preceding page Press the or button To select a sub page A text page can consist of several sub pages In this case an information box is displayed at the bottom of the screen showing the number of sub pages availabl...

Страница 14: ...o return to the Teletext menu Text Clear not available in P T mode Use this feature to watch a TV programme when the text service is searching for a page Once the page has been found a blue symbol appears in the top left corner of the screen Press the button to view the page Index Most Text services contain an index page which lists all the available pages and their 3 digit page number Press the b...

Страница 15: ...ed below Wide For 16 9 broadcasts For 4 3 broadcasts Zoom Imitation of wide screen effect for movies broadcast in cinemascopic letter box format 14 9 Compromise between the 4 3 and 16 9 format 4 3 Conventional screen format Smart Imitation of wide screen effect for 4 3 broadcasts Note In Smart Zoom and 14 9 modes parts of the top and bottom of the screen are cut off Press the V or v button to adju...

Страница 16: ...utton to activate the Wake up facility If your VCR does not have Smartlink a message is displayed reminding you to manually set your VCR Press the RED button to continue or press the BLUE button to return to the Info display When you highlight a future programme the Timer facility allows you to set your VCR to automatically record the selected programme or set the TV to automatically switch to the...

Страница 17: ...f the displayed programmes as a favourite press the RED or GREEN button to display the previous or next 5 programmes in the list 4 When you have found and highlighted a programme you want to store as a favourite press the OK button A tick appears alongside that programme in the display If you wish to cancel your selection press the OK button again 5 Repeat steps 3 and 4 to store other programmes a...

Страница 18: ... return to the Digital Set up menu Auto Tuning This feature allows you to automatically re tune all available digital channels 1 Press the button on the remote control to obtain the Digital Info display Press the BLUE button to display the Main menu 2 Press the V or v button to highlight Auto Tuning then press the OK button to display the Auto Tuning menu 3 Press the RED button to begin tuning in ...

Страница 19: ...inues When all services allocated to the selected channel have been found the service selection screen is displayed 8 Press the V or v button to find and highlight the service you wish to allocate to the programme number selected in Step 4 then press the OK button to store 9 Repeat Steps 4 to 8 if you wish to manually add more channels to your TV Press the BLUE button repeatedly to remove all menu...

Страница 20: ...tting to On If you do not wish to receive downloads set the Current Setting to Off 5 Press the OK button to confirm 6 Press the BLUE button repeatedly until all menus are removed from the screen System Information This is an information screen only It tells you the current version of the software in your TV together with the signal quality as indicated by the coloured bar in the display 1 Press th...

Страница 21: ...amage the CAM when inserting Note If you have already attached the door that covers the rear sockets you will have to unscrew and remove this to gain access to the CAM socket 3 Insert your viewing card into the CAM 4 Connect the TV to the mains and switch on 5 Press the button on the remote control to obtain the Digital Info display 6 Press the BLUE button to display the Main menu 7 Press the V or...

Страница 22: ...he highlighted programme is previewed in the top right corner of the screen with its number and channel name displayed below it 3 Press the V or v buttons to move the cursor up or down the list to select the desired programme If you do not want to select a programme from the 6 channels listed press the GREEN button to display the next 6 channels or the RED button to display the preceding 6 channel...

Страница 23: ... channels News Contains all news channels Film Contains all film channels Entertainment Contains all entertainment channels Lifestyle Contains all lifestyle channels Education Contains all education channels Kids Contains all kids channels 4 Press the BLUE button repeatedly until all menus are removed from the screen To remove a programme from the Favourite list 1 With the Channel Index menu on sc...

Страница 24: ...currently being broadcast you will be prompted to press the OK button to obtain a preview Note If an age limit for viewing has been set and the programme selected exceeds that age limit you will need to enter your PIN code before the preview is displayed Refer to The Main menu for more information on the PIN Code feature Programmes that exceed the age limit you have set will be identified by a sym...

Страница 25: ... menu on screen press the BLUE button to display the Timer List menu then press the RED button to select Manual Rec If your VCR does not have Smartlink a message will be displayed reminding you to set your VCR timer Press the RED button to display the Manual Timer Setup menu 2 Press the V or v buttons to select the correct date Press the b button to highlight the start time 3 Press the V or v butt...

Страница 26: ...n allows you to select one of four picture modes Live Movie and Game modes are preset and only Contrast can be adjusted The Personal mode however also allows you to adjust the Brightness Colour and Sharpness options Press V or v to select Live Personal Movie or Game Press OK to confirm Contrast Brightness Colour Sharpness These options allow you to adjust the contrast brightness colour and sharpne...

Страница 27: ...level of effect Press OK to confirm Balance This option allows you to set the balance of sound between the left and right speakers Press B or b to set the balance Press OK to confirm Auto Vol Control Sometimes the broadcast volume level changes e g adverts tend to be louder than programmes This option allows you to cancel this effect giving a constant volume level Press V or v to select Off or On ...

Страница 28: ...b to enter the AV Preset menu Press v or V to highlight the socket you wish to name Press b to select the LABEL column Press v or V to select the first character Press b to confirm this character Select the other characters in the same way up to a maximum of five characters After selecting all required characters press OK to store Manual Set Up With the Manual Set Up option highlighted press b to ...

Страница 29: ...picture position of signals from RGB equipment With the RGB Set Up option highlighted press b to enter the RGB Set Up menu Press b to select H Centre Press v or V to centralise the picture over a range of 10 to 10 Press OK to store Press v to select H Size Press v or V to adjust the picture size over a range of 10 to 10 Press OK to store Note If there is no RGB equipment connected to either the AV...

Страница 30: ... the next available TV broadcast channel or the VCR test signal When a channel has been found press either OK to store or v to continue searching c For external input sources EXT Press v to select AV1 AV2 AV3 or AV4 depending on which socket you have used to connect your equipment Press OK to store Naming a channel Names for channels are usually taken automatically from Teletext if available This ...

Страница 31: ...t the channel number you require Press b repeatedly to select one of the following options a ATT RF Attenuator This allows you to improve the picture if there is interference from other channels Press v to select On Press OK to store b VOL Volume Level Offset This allows you to set the volume level for an individual channel Press v or V to adjust the volume level over a range of 7 to 7 Press OK to...

Страница 32: ...ead Removing a Memory Stick Confirm that the red light is off Do not pull the memory stick You must push the memory stick and then release The memory stick will spring out Note Data stored on a Memory Stick may become damaged or erased if you remove the Memory Stick when it is reading or writing data The Memory Stick menu The Memory Stick menu is displayed automatically when you insert the memory ...

Страница 33: ...ss the OK button to view the next set of pictures Press the v V B or b buttons to select your desired picture then press the OK button to view 4 Use the v V B or b buttons to highlight Back Press the OK button to return to the Memory Stick menu or press the DIGITAL button at any time to return to normal TV operation Slideshow This feature allows you to display all the memory stick pictures as a sl...

Страница 34: ... highlighted press the OK button to adjust Press the v or V button to select 5 sec 10 sec 1 min 5 min or 15 min then press the OK button to confirm your choice Slideshow Repeat This option allows you to set a slideshow to continuously repeat With Slideshow Repeat highlighted press the OK button to adjust Press the v or V button to select On or Off then press the OK button to confirm File Informati...

Страница 35: ...emble or modify the Memory Stick Do not allow the Memory Stick to get wet Do not use or store the Memory Stick in a location that is extremely hot such as in a car parked in the sun under direct sunlight very humid or subject to corrosive substances Memory Stick supports JPEG DCF formatted files only Any files not recognised as DCF format will be displayed as JPEG DCF formatted files that have bee...

Страница 36: ...ual 2 Insert a DVD into the DVD player then press the PLAY button The picture appears automatically on the TV If not press the button on the remote control repeatedly until the picture appears on screen 3 Press the DIGITAL button when you wish to return to normal TV operation 1 Connect a scart lead from the A socket of the TV to a scart socket on your set top box refer to your set top box instruct...

Страница 37: ...ecord on to your MD DAT player 1 Connect a phono jack lead from the D sockets of the TV to your Hi Fi refer to your Hi Fi instruction manual 2 Use the Audio out vol option in the Sound Adjustment menu to adjust the volume level refer to page 24 R D D D L G S I ANALOGUE 1 2 DVD VCR s 3 3 SMARTLINK DIGITAL OPTICAL OUTPUT MODEM 5V 200mA DVD Decoder Set top box Hi Fi D Note Connecting cables are not s...

Страница 38: ...Connect your camcorder to the sockets G and I or H and I as shown 2 Press the PLAY button on your camcorder then press the button on the remote control repeatedly until the picture appears on screen 3 Press the DIGITAL button when you wish to return to normal TV operation 1 Connect your headphones to the F socket on the TV 2 Use the Audio out vol feature of the TV to adjust the headphone volume re...

Страница 39: ...forget to select VCR or DVD using the MODE button every time you wish to operate that equipment with this remote control Note The brand codes you set may be lost if weak batteries are not replaced immediately Should this happen use the above procedure to reset the code A small label has been attached to the inside of the battery cover for you to make a note of your brand codes Not all brands and m...

Страница 40: ...87kg Rear Terminals 21 pin Euro connector CENELEC standard including audio video input RGB input TV audio video output 21 pin Euro connector CENELEC standard including audio video input RGB input TV audio video output 21 pin Euro connector CENELEC standard including audio video input S video input selectable audio video output Conditional Access Module RF In Audio output RCA phono jacks Front Term...

Страница 41: ...our aerial to cover the channels used by digital programmes Ensure your aerial is correctly aligned to the transmitter Ensure your aerial is plugged directly into the TV not through other equipment Upgrade to a higher gain aerial Some channels are blank Scrambled or subscription only channel Programme used only for data no picture or sound Programme not being transmitted Subscribe to a pay TV broa...

Страница 42: ...Further Programme Preset menu 29 H Headphones connecting 36 Headphones Dual Sound 25 HiFi connecting 35 L Language selecting 27 M MD DAT player connecting 35 Memory Stick 30 N Noise Reduction 24 O Overview TV set 8 Overview remote control 9 Overview front and rear sockets P Parental Control 16 Personal ID 27 Picture Mode 24 Picture Rotation 27 Picture Settings adjusting 24 PIN Code 17 Playstation ...

Страница 43: ...Additional Information 41 NX34 44 fm Page 41 Monday September 16 2002 2 37 PM ...

Страница 44: ...Additional Information 42 NX34 44 fm Page 42 Monday September 16 2002 2 37 PM ...

Страница 45: ...Additional Information 43 NX34 44 fm Page 43 Monday September 16 2002 2 37 PM ...

Страница 46: ...Additional Information 44 NX34 44 fm Page 44 Monday September 16 2002 2 37 PM ...

Страница 47: ...32nx200Ucover fm Page 3 Monday September 16 2002 11 53 AM ...

Страница 48: ...Sony Corporation Printed in UK Recyclable KD 32NX200 KD 36NX200 32nx200Ucover fm Page 4 Monday September 16 2002 11 53 AM ...
Отзывы: