


5-3 (E)
SRX-R515P
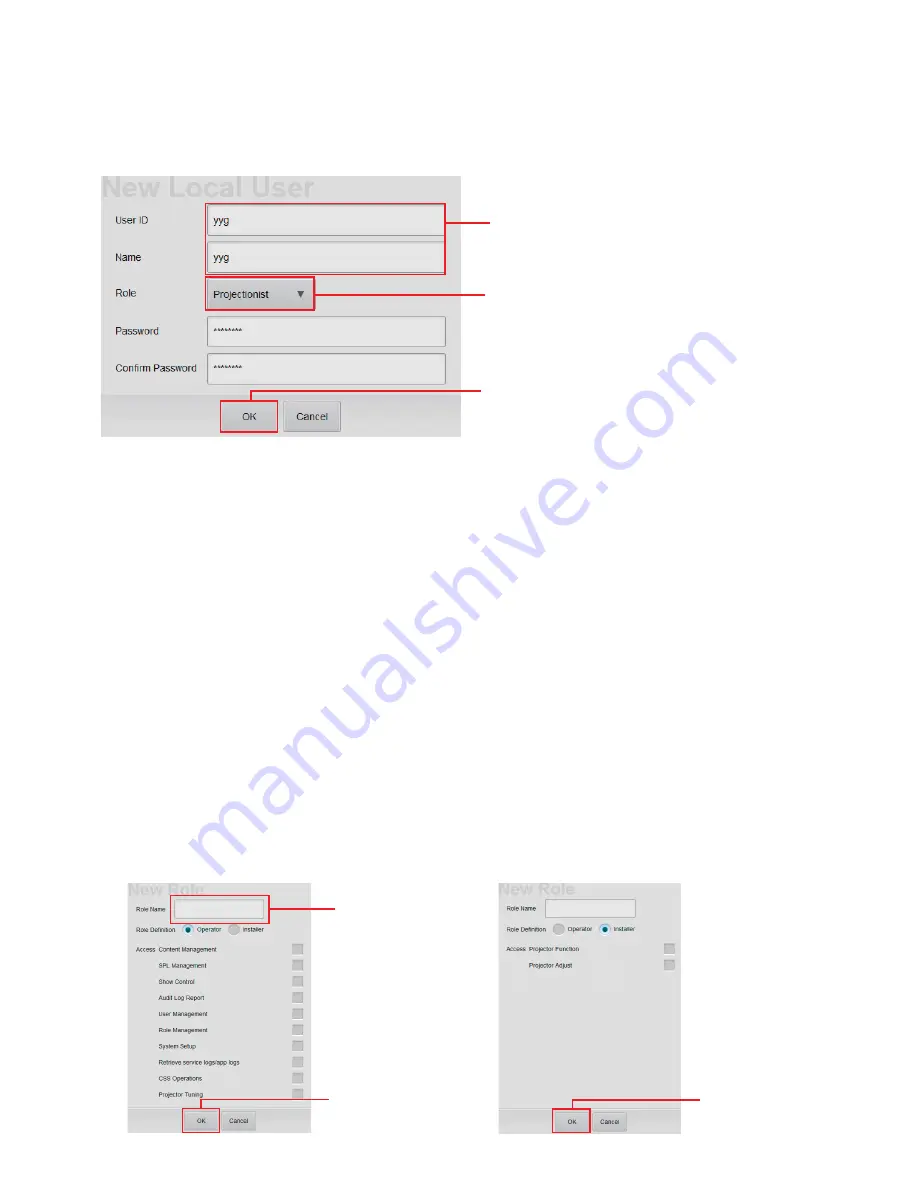
4. Tap
[New]
in the Users pane.
The New Local User screen is displayed.
5. Type the information to be registered in “User ID” and “Name”, and then select “Role” from the
pull-down menu.
You may enter up to 50 characters (only alphanumeric) in “User ID” and “Name” respectively.
(Entering of “Name” is arbitrary.)
In the case of adding “Role”, perform “Addition of Role” described later.
6. Tap
[OK]
on the New Local User screen.
Addition of Role
This system can restrict the operation on the GUI screen for each user. The item that can be operated is
registered as “Role” which is assigned for each user.
The four Roles are provided in advance (“Projectionist”, “ShowManager”, “Administrator” and “Maintenance”).
To create a new Role, perform the following procedure.
1. Tap
[New]
in the Roles pane.
The New Role screen is displayed.
2. Type the Role name in “Role Name”.
You may enter up to 50 characters (only alphanumeric).
3. Place a check mark in the item that you want to enable operation.
n
There are items that can be selected for each Role Definition.
4. Tap
[OK]
.
Type User ID and Name.
Select Role.
[OK]
Screen example
Type Role Name.
[OK]
[OK]
Содержание SRX-R515P
Страница 4: ......
Страница 8: ......
Страница 20: ......
Страница 25: ...2 5 E SRX R515P 3D filter R assembly Knob Knob 3 Attach the 3D filter R assembly with the two knobs ...
Страница 30: ...2 10 E SRX R515P Touch panel monitor Screw Screw Screw 4 Attach the touch panel monitor with the three screws ...
Страница 44: ......
Страница 50: ......
Страница 145: ......


