2-5
SRX-R320
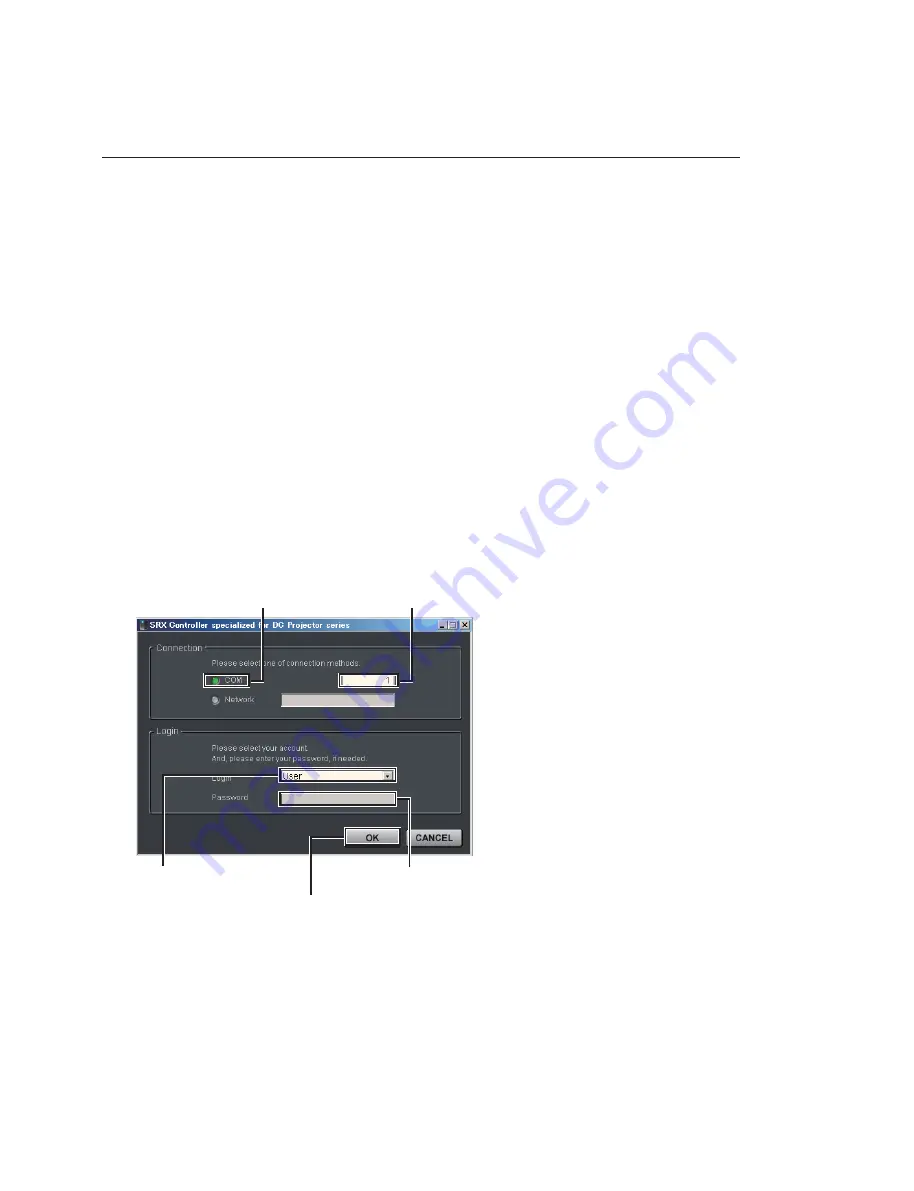
Click this radio button.
Select “User”, “Maintenance”
or “Installer”.
Enter the password.
[OK]
button
Enter the COM
port No. to be used.
Fig. 2-1-3a
2-1-3. Startup and Initialization of SRX Controller
Procedure
1. Connect each equipment according to Section 2-1-2.
2. Turn on the power switch on the rear of this unit so that it enters the standby state.
(Refer to step 1 of “2-1-4. Startup of This Unit”.)
3. Double-click “Start SRX Controller.exe” on the desktop window.
4. Click the “COM” radio button from the “Connection” menu.
.
COM selection: Enter the COM port No. to be used.
5. Select the adjustment menu (Login) to be used in a “Login” menu. The three adjustment menus
below are available.
.
User:
Can check the signal input to this unit or adjust an image.
.
Maintenance:
Can set a lamp or adjust an image in details.
.
Installer:
Can check and change the contents of setting during installation of login informa-
tion or a network.
6. Enter the passwords and click the
[OK]
button.
.
User:
A password is not required.
.
Maintenance: service
.
Installation:
setting
n
Enter the passwords of “Maintenance” and “Installer” using lower-case characters.
Содержание SRX-R320
Страница 1: ...DIGITAL CINEMA PROJECTOR SRX R320 INSTALLATION MANUAL 1st Edition ...
Страница 4: ......
Страница 6: ......
Страница 44: ...1 38 SRX R320 1 14 Dimensions Front Left Exhaust Barycentric position Barycentric position ...
Страница 46: ......
Страница 125: ......
Страница 126: ...Sony Corporation SRX R320 SY E 9 968 659 01 Printed in Japan 2009 10 22 2009 ...


