1-8
CCD-TRV107/TRV108/TRV308/TRV408/TRV608
32
If your TV is already connected to a VCR
Connect your camcorder to the LINE IN input on the VCR by using the A/V connecting
cable supplied with your camcorder. Set the input selector on the VCR to LINE.
To connect to a TV without Video/Audio input jacks
Use an NTSC system RFU adaptor (optional). Refer to the operating instructions of your
TV and the RFU adaptor.
If your TV is a stereo type
Connect the audio plug of the A/V connecting cable supplied to the left (white) input
jack of your TV.
If your TV has an S video jack
Connect using an S video cable (optional) to obtain optimum quality screen images.
With this connection, you do not need to connect the yellow (video) plug of the A/V
connecting cable.
Connect an S video cable (optional) to the S video jacks on both your camcorder and the
TV.
To display the screen indicators on TV
Set DISPLAY to V-OUT/LCD in the menu settings (p. 72). Then press DISPLAY on
your camcorder. To turn off the screen indicators, press DISPLAY on your camcorder
again.
Viewing the recording on TV
Connect your camcorder to your TV with the A/V connecting cable supplied with your
camcorder to watch the playback picture on the TV screen. You can operate the
playback control buttons in the same way as when you monitor playback pictures on
the LCD screen. We recommend that you power your camcorder from a wall outlet
using the AC power adaptor, when monitoring the playback picture on the TV screen
(p. 15). Refer to the operating instructions of your TV.
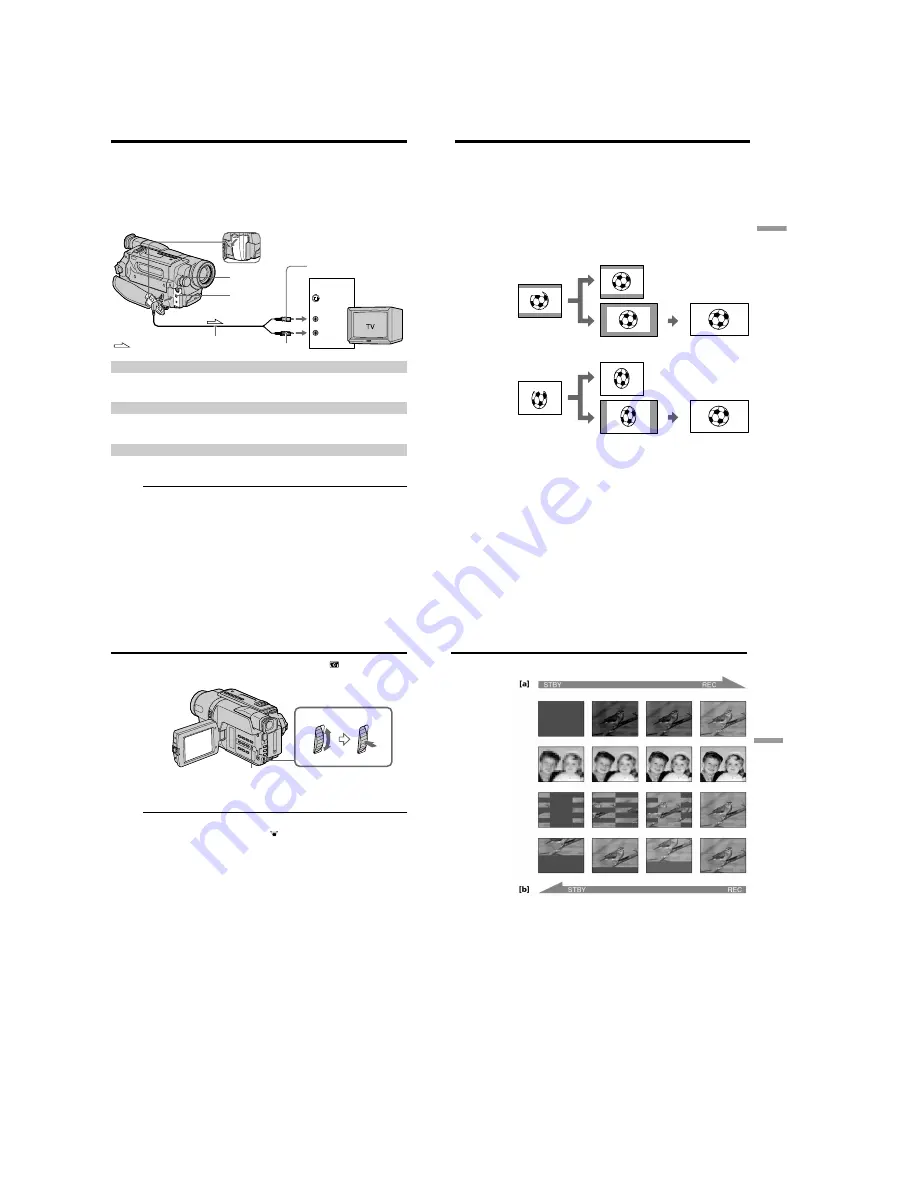
Open the jack cover. Connect your camcorder to the TV using the A/V connecting
cable. Then, set the TV/VCR selector on the TV to VCR.
S VIDEO OUT
A/ V OUT
S VIDEO
VIDEO
AUDIO
IN
Yellow
Black
: Signal flow
A/V connecting cable
(supplied)
33
Advanced Recording Operations
You can record a cinema-like picture (CINEMA) or a 16:9 wide picture to watch on the
16:9 wide-screen TV (16:9FULL). Refer to the operating instructions of your TV.
CINEMA
Black bands appear on the screen during recording in the CINEMA mode
[a]
, playing
back on a normal TV
[b]
or a wide-screen TV
[c]
. If you set the screen mode of the wide-
screen TV to the zoom mode, a picture without black bands appears
[d]
.
16:9FULL
The picture during recording in the 16:9FULL mode
[e]
, or playing back on a normal TV
[f]
or a wide-screen TV
[g]
is horizontally compressed. If you set the screen mode of the
wide-screen TV to the full mode, you can watch correctly proportioned images in wide-
screen format
[h]
.
— Advanced Recording Operations —
Using the wide mode
[b]
CINEMA
[a]
[c]
[f]
[g]
CINEMA
16:9FULL
16:9FULL
[e]
[d]
[h]
34
In CAMERA mode, set 16:9WIDE to CINEMA or 16:9FULL in
in the menu settings
(p. 68).
To cancel the wide mode
Set 16:9WIDE to OFF in the menu settings.
If the wide mode is set to 16:9FULL (CCD-TRV308/TRV408/TRV608 only)
The SteadyShot function does not work. If you select 16:9FULL in the menu settings
when the SteadyShot function is working,
flashes and the SteadyShot function does
not function.
In the wide mode
You cannot select the bounce function with FADER.
Date or time indicator
When you record in the 16:9FULL mode, the date or time indicator will be widened on
wide-screen TVs.
During recording
You cannot select or cancel the wide mode. When you cancel the wide mode, set your
camcorder to the standby mode and then set 16:9WIDE to OFF in the menu settings.
Using the wide mode
MENU
35
Advanced Recording Operations
You can fade in or out to give your recording a professional appearance.
Using the fader function
MONOTONE
When fading in, the picture gradually changes from black-and-white to color.
When fading out, the picture gradually changes from color to black-and-white.
FADER
M.FADER
(mosaic)
STRIPE
BOUNCE
(Fade in only)


