


GRW
Maintenance
20
GRW - Manual
|
SolutionAirGroup.com
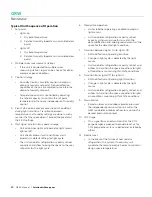
Typical Unit Sequence of Operation
1. Set points
•
Lights on
i)
Dry bulb temperature
ii) Relative Humidity (operates on calculated dew
point)
•
Lights off
i)
Dry bulb temperature
ii) Relative Humidity (operates on calculated dew
point)
2. Multiple room measurement stations
•
If the unit is connected to multiple room
measuring stations logic can be chosen for either
average or peak conditions.
3. Control strategy
•
Humidity Control: humidity control is based on
absolute humidity set points. Dehumidification
capacities of the unit are adjusted to maintain the
absolute humidity set point.
•
Temperature control is controlled by adjusting
the reheat capacity to maintain the set point
temperature in the space independent of humidity
control.
4. Plant Safe controls prevent excessive RH conditions
during light transitions. Transitions between
temperature and humidity settings are done in such a
manner that the space doesn’t exceed the greater of
the 2 RH settings.
5. Start signal or return from power outage
•
Unit establishes light cycle based on light sensor
light on/off.
•
Unit checks blower faults and if clear starts
blower(s) at default setting for light cycle.
•
The unit modulates refrigeration capacity, reheat
capacity and airflow to bring the space to the user
set points for the light cycle.
6. Steady state operation
•
Unit establishes operating conditions based on
light sensor.
•
Unit modulates refrigeration capacity, reheat
capacity, airflow and air paths to match the
dehumidification and cooling requirements of the
space for the detected light condition.
7. Transition between Lights On to Lights Off
•
BMS notification of pending transition
•
Change in light cycle is detected by the light
sensor.
•
Unit modulates refrigeration capacity, reheat, and
airflow to transition the space conditions to lights
off conditions maintaining Plant Safe conditions.
8. Transition from Lights Off to Lights On
•
BMS notification of pending light transition.
•
Change in light cycle is detected by the light
sensor.
•
Unit modulates refrigeration capacity, reheat, and
airflow to transition the space conditions to lights
on conditions maintaining Plant Safe conditions.
9. Pressurization
•
Based on room and outdoor absolute pressures
the independent pressurization unit within the
GRW modulates outdoor airflow to maintain the
desired pressurization level.
10. CO2 Purge
•
On a signal from an external control, the CO2
purge damper is opened to provide relief air for
CO2 purge exhaust fans, supplied and installed by
others.
11. Electric Heat
•
In the event of the failure of heat reclaim
refrigeration, the system, if necessary, will
modulate the remote electric heater to maintain
design space temperatures.
Содержание GRW
Страница 29: ...GRW Notes 27 SolutionAirGroup com GRW Manual ...


