


GRW
Installation
13
SolutionAirGroup.com
|
GRW - Manual
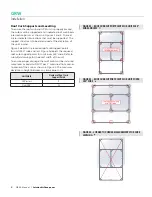
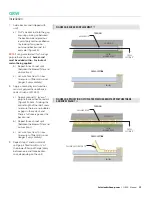
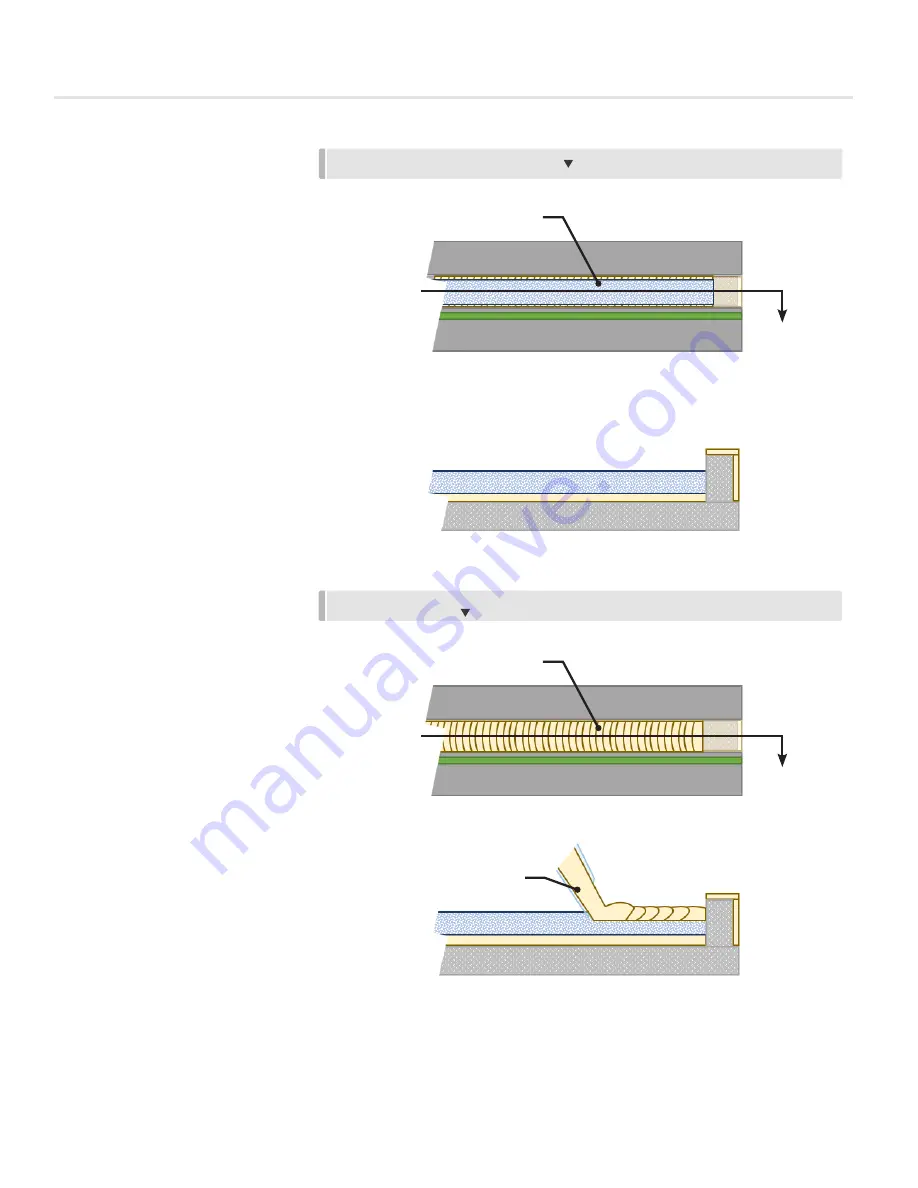
FIGURE 18: BACKER ROD PLACEMENT
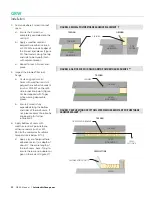
7. Add a backer-rod (shipped with
unit).
a) Stuff a backer rod into the gap,
ensuring no air-gap between
the backer rod and previous
layer of polyurethane adhesive
(by looking for squeeze-
out around backer-rod, for
example) (Figure 18).
NOTE:
if using accelerated (fast-curing)
polyurethane sealants,
backer-rod
must be added within ~1 minute of
sealant being applied
.
b) Repeat for each roof split
(between the blower/filter and
coil sections).
c) Let cure for at least 1-hour
to ensure sufficient skin-over
(longer if very cold/dry).
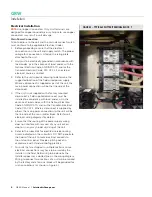
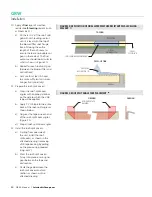
8. Apply a second layer of weather-
resistant polyurethane adhesive
sealant (such as 3M 550).
a) Apply a second ½” layer of
polyurethane adhesive sealant
(Figure 19). Back-fill along the
entire length of the roof-seam
to ensure there are no bubbles
or gaps in the sealant, and
there is full coverage over the
backer-rod.
b) Repeat for each roof split
(between the blower/filter and
coil sections).
c) Let cure for at least 1-hour
to ensure sufficient skin-over
(longer if very cold/dry).
9. Repeat steps 7 and 8 until roof
split gap is filled to within ½” of
the blower/filler roof flange (likely
between one and three backer-
rods, depending on the unit).
FIGURE 19: APPLICATION OF TOP LAYER WEATHER RESISTANT POLYURETHANE
ADHESIVE SEALANT
TOP VIEW
TOP VIEW
CROSS-SECTION
CROSS-SECTION
COIL ROOF
COIL ROOF
FILTER/
BLOWER ROOF
FILTER/
BLOWER ROOF
EMSEAL
EMSEAL
CAULKING APPLICATOR TIP
CROSS-
SECTION “A”
CROSS-
SECTION “A”
CAULKING BEAD
BACKER ROD
Содержание GRW
Страница 29: ...GRW Notes 27 SolutionAirGroup com GRW Manual ...


