


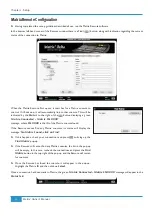


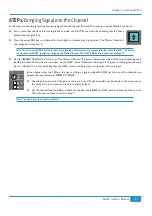


STEP 4:
Sending to the Auxiliary Sends
% ;]
CUE ST
) send (which you will probably use for monitoring
for musicians) and the remaining four labelled
FX 1-4
(which you will probably use for feeding global effects such as reverb units).
³
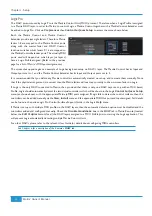
Check that the gain pots for the overall bus levels, located in the top right corner of the centre section (
FX1
is shown right), are all set to 0dB, with the white line pointing towards the meters. This will allow you to
see what happens in the meters when you turn the pots in the channel.
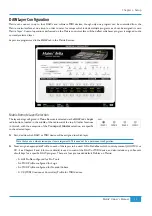
\
CHOP
are the pan and gain trim for the
CUE ST
, which we
will cover in Step 8. The stereo cue functions similarly to the FX sends which we will
concentrate on here: The two pots below the stereo cue are the gain trim for the FX busses. FX1 and 3 share
a pot, as do FX 2 and 4.
³
Press the upper gain pot, labelled
FX1/3
, to switch on FX1. The LED below it and to the right will light to
indicate that it is on.
³
`
FX1
meter to the right of the VU’s as a reference.
³
In the Master Channel, press the button marked
FX3
. This swaps the
FX1/3
gain pot from controlling
the
FX1
send level to controlling the
FX3
send level. The
FX3
button will light to indicate that this swap
has been made, as will the
FX3
LED to the right of the
FX1/3
pot. Notice that the
FX1
meter has gone
blank and the
FX3
;<\
FX1
send transfer
automatically to the
FX3
send.
FX busses 2 and 4 work in exactly the same way as FX busses 1 and 3, using the next gain pot down.
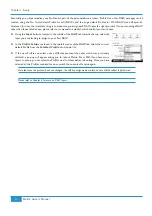
Once you have sent signal to the aux busses, you need to set the overall output level of the bus. Each aux bus
# j
this tutorial, we will use
FX3
, as well as
ST RET 3
(Stereo Return 3, shown right).
³
In the
FX3
# #
³
Press the AFL button in the
FX3
area to listen to the
FX3
bus send. Press it again to return to normal
monitoring.
³
In the
ST RET 3
area, located below FX sends 1 and 2, press
MIX
to send the returning signal to the mix
bus. You should now hear the processing you created added to the clean CD signal in the monitoring.
³
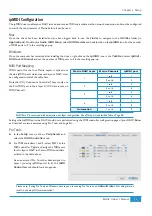
Press the
AFL
button below the
ST RET 3
gain trim to listen to the signal on its own.
³
" # ! #
³
Press the
MONO
button above the balance control. This reduces the stereo return to mono. The balance
pot will now be a pan pot. Press the
MONO
button again to restore the return to stereo again.
³
Press the
AFL
button again to return to normal monitoring.
2 * # #:#-F
Chapter 2 - Getting Started
21
Matrix
2
Owner’s Manual
Содержание Matrix2 Delta
Страница 37: ... Chapter 2 Getting Started 29 Matrix2 Owner s Manual ...
Страница 128: ... Chapter 6 DAW and CC Configuration 120 Matrix2 Owner s Manual ...
Страница 136: ...Appendix B Technical Specifications 128 Matrix2 Owner s Manual ...
Страница 140: ... Appendix D Environmental Specifications 132 Matrix2 Owner s Manual ...
Страница 142: ... Appendix E Software Updates 134 Matrix2 Owner s Manual ...
Страница 178: ... Appendix G Service 170 Matrix2 Owner s Manual ...
Страница 179: ......