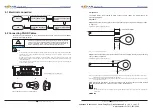
Enable Set Country
Users press Back button to enter “1.Enter Setting” interface, Press OK button to enter
main setting interface.Enter “7.Enable Set Country” by pressing “Up” button
or“Down”button, press “OK” button and enter “Input Password” Setting interface.
Press “Back” button to set passwords (default: 0001), increase or decrease value though
pressing “Up” button or “Down” button, press “OK” button to next value setting. “Error! Try
again” will be displayed for wrong passwords. Press “Back” button and rekey in the correct
passwords. “success” will be displayed if setting successfully,
Attention: when inverter working for power generation over 24h, country setting is
forbidden, it can only be set after LCD setting. Key in passwords for country setting through
LCD (default: 0001), country setting can be set in 24h after keying in the correct passwords,
over 24h, set through LCD again.
“
”
“
”
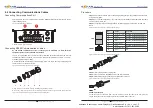
Set Address
Users press “Back” button to enter “1.Enter setting” interface, Press ”OK“ button to enter
main setting interface. Enter “9. Set Address” by pressing “Up” button or ”Down“ button.
Press “OK” button and enter setting interface “Success” or “fail” is displayed after setting.
All rights reserved
Shenzhen SOFARSOLAR Co ., Ltd.
C
49
All rights reserved
Shenzhen SOFARSOLAR Co ., Ltd.
C
50
User manual
User manual
Operation
interface
Operation
interface
Sofar 30K~40KTL
Sofar 30K~40KTL
Document Version 1.0(2015.08.06)
Document Version 1.0(2015.08.06)
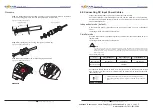
Remote Control
Relay Command
Users press “Back” button to enter “1.Enter Setting” interface, Press OK button to enter
main setting interface.Enter “5. Remote Control” by pressing “Up” button or “Down” button.
Press “OK” button and enter Remote Control Switch On &Off interface. Choose “1.Enable”or
“2.Disable” by pressing “Up” button or “Down” button, press “OK” button, then
communication board start to transmit control signals to control board. “success” is displayed
after setting success ; otherwise it will show “fail”.
“
”
Users press “Back” button to enter “1.Enter Setting” interface, Press ”OK“ button to enter
main setting interface.
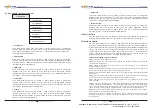
Enter “6. Relay Command” by pressing “Up” button or”Down“button, press “OK ” button and
enter “Relay Command setting “interface. Choose corresponded setting items by pressing
“Up” button or “Down” button, then press “OK” button. “success” or “fail” is displayed after
setting.
6
.
Relay Command
1. Production
2. Alarm
3. Config Alarm
4. Relay Disable
Relay Command Definition:
the relay switches whenever a connection to (and therefore a disconnection from)
the grid occurs.
If the relay contractor is in normally open (close) mode, the contact will stay open
(or closed) until the inverter is connected to the grid; once the inverter con-nects to
the grid and starts to export power, the relay switches state and therefore closes (or
opens).
When the inverter disconnects from the grid, the relay contact returns to its
position of rest, namely open (or closed).
Production
Alarm
Config Alarm
The relay switches whenever there is an alarm on the inverter (Error). No
switching occurs when there is a Warning.
If the relay contractor is in normally open(close)mode, the contact will stay open
(or closed) until the inverter reports an error; once the inverter reports an error, the
relay switches state and therefore closes (or opens).The contact remains switched
from its rest condition until normal opera-tion is restored.
the relay switches whenever there is an alarm (Error) or a Warning, which have
been previously selected by the user through the PC. the contact will stay open (or
closed) until the inverter reports an error or a warning out of those selected from
the menu; once the inverter displays an error or a warning out of those selected, the
relay switches state and therefore closes (or opens) the contact. The relay remains
switched from its rest condition until the alarm or warning has disappeared.
Relay Disable
Control function is forbidden
Set inputmode
Input mode selection
:
sofar 30~40KTL has 2 MPPT, The two MPPT can run independently,
and also can be operated in parallel, According to the system design, the user can choose the
mode of MPPT operation.The input mode can be setting by the LCD .
Users press “Back” button to enter “1.Enter setting” interface, Press ”OK“ button to enter
main setting interface. Enter “10. Set inputmode” by pressing “Up” button or ”Down“ button.
Press “OK” button and enter setting interface. Choose corresponded setting items by pressing
“Up” button or “Down” button, then press “OK” button. “Success” or “fail” is displayed after
setting.
Set Language
Users press “Back” button to enter “1.Enter setting” interface, Press ”OK“ button to enter
main setting interface. Enter “11. Set Language” by pressing “Up” button or ”Down“ button.
Press “OK” button and enter setting interface. Choose corresponded setting items by pressing
“Up” button or “Down” button, then press “OK” button. “Success” or “fail” is displayed after
setting.
Set StartPara
User can change the start parameter by the LCD. First the User need to copy the. TXT file
which is used to change the start parameter to the SD card .
Users press Back button to enter “1.Enter setting” interface, Press OK button to enter main
setting interface. Enter “12. Set StartPara” by pressing “Up” button Or “Down” button, press
“OK” button and enter “Input Password” Setting interface. Press “Back” button to set
passwords (default: 0001), increase or decrease value though pressing “Up” button or
“Down” button, press “OK” button to next value setting. “Error!” Try again” will be displayed
for wrong passwords. Press “Back” button and rekey in the correct passwords. “Success” will
be displayed if setting successfully.
Компания
«
Реалсолар
»,
Санкт
-
Петербург
,
Октябрьская
наб
.,
д
. 104,
к
. 1,
лит
.
П
www.realsolar.ru +7911-921-52-96


