


©2010 Skookum Robotics, Ltd
25
•
Use the collective stick to check that all swashplate servos are correctly
synchronized. (i.e. all swashplate servos move up and down together in
response to collective stick motion.) Do not worry if the direction of
motion is incorrect; this will be set next. If the swash plate servos are not
correctly synchronized, then you can reverse the individual servo
directions by clicking on the associated
Rev
checkbox in the
Servo Trims
and Reversing
area of the
Swash Servos
tab. (See Figure 11.4 above.)
•
Check aileron, elevator and collective swash motion for correct direction
of travel. If it isn’t right, you can reverse the individual channels by
clicking on the appropriate checkbox in the
Swash Mixing
area on the
Swashplate
tab. (See Figure 11.3 on the previous page.)
•
Now check the blade pitch range in response to full max and min
collective, elevator and aileron. These can be adjusted using the
swash
mixing
values on the
Swashplate
tab. (See Figure 11.3 on the previous
page.) Try to keep swash mixes to 60% or less. This prevents unwanted
interaction at max and min collective. Increase the servo travels instead
if you need more motion.
Step 6: Tail Setup
Figure 11.5 – Offline Setup Values
Tail Servo
Tab
•
Click the
Tail Servo
tab in the Offline Setup Values area of the
Windows SK720 setup software. Select “By Name” and find the model
of tail servo on your heli in the
Servo Name
drop-down list.
•
If you can’t find your model of servo in the list, then select Custom and
look up the pulse type, max frame rate and speed for your tail servo.
(Most servos will work at 333 Hz but the pulse type is important.)
©2010 Skookum Robotics, Ltd
26
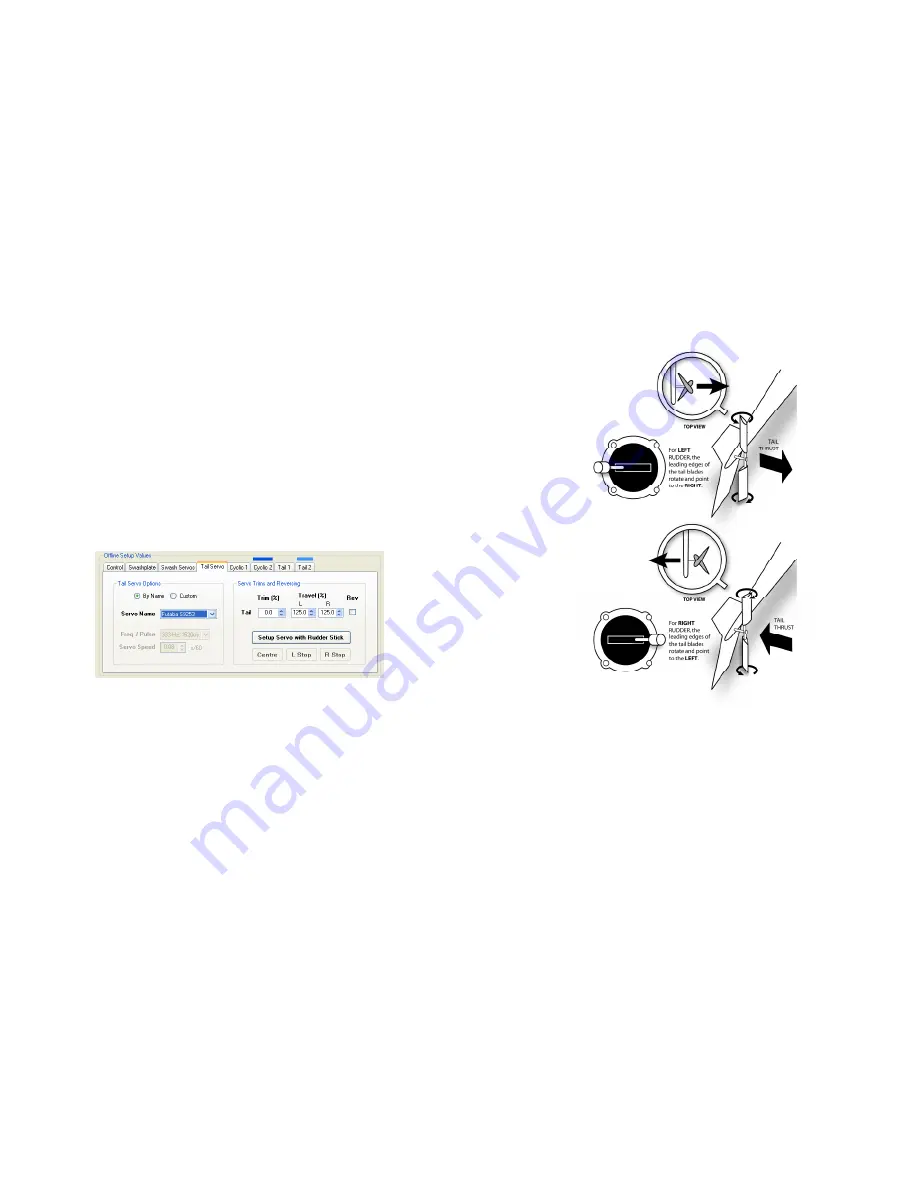
•
Now, connect the tail servo to the gyro. First check that the direction of
the servo is correct by moving the rudder stick on your radio as shown
in Figure 11.6 below.
Figure 11.6 – Check for Correct Tail Rotor Blade Movement
•
If the tail blade pitch response is not correct, reverse it by clicking on the
Rev
checkbox in the
Servo Trims and Reversing
area.
•
Set the servo centering and endpoints by clicking “Setup Servo with
Rudder Stick” and follow the instructions in the popup window.
•
The servo and tail should be set up so at center the servo arm is at 90
degrees to its pushrod, and the tail has about 5 degrees of nose-right
blade pitch.


