background image

n

  g

l    

i    

 s

SKF  TMEA  2

Shaft  alignment  tool

23

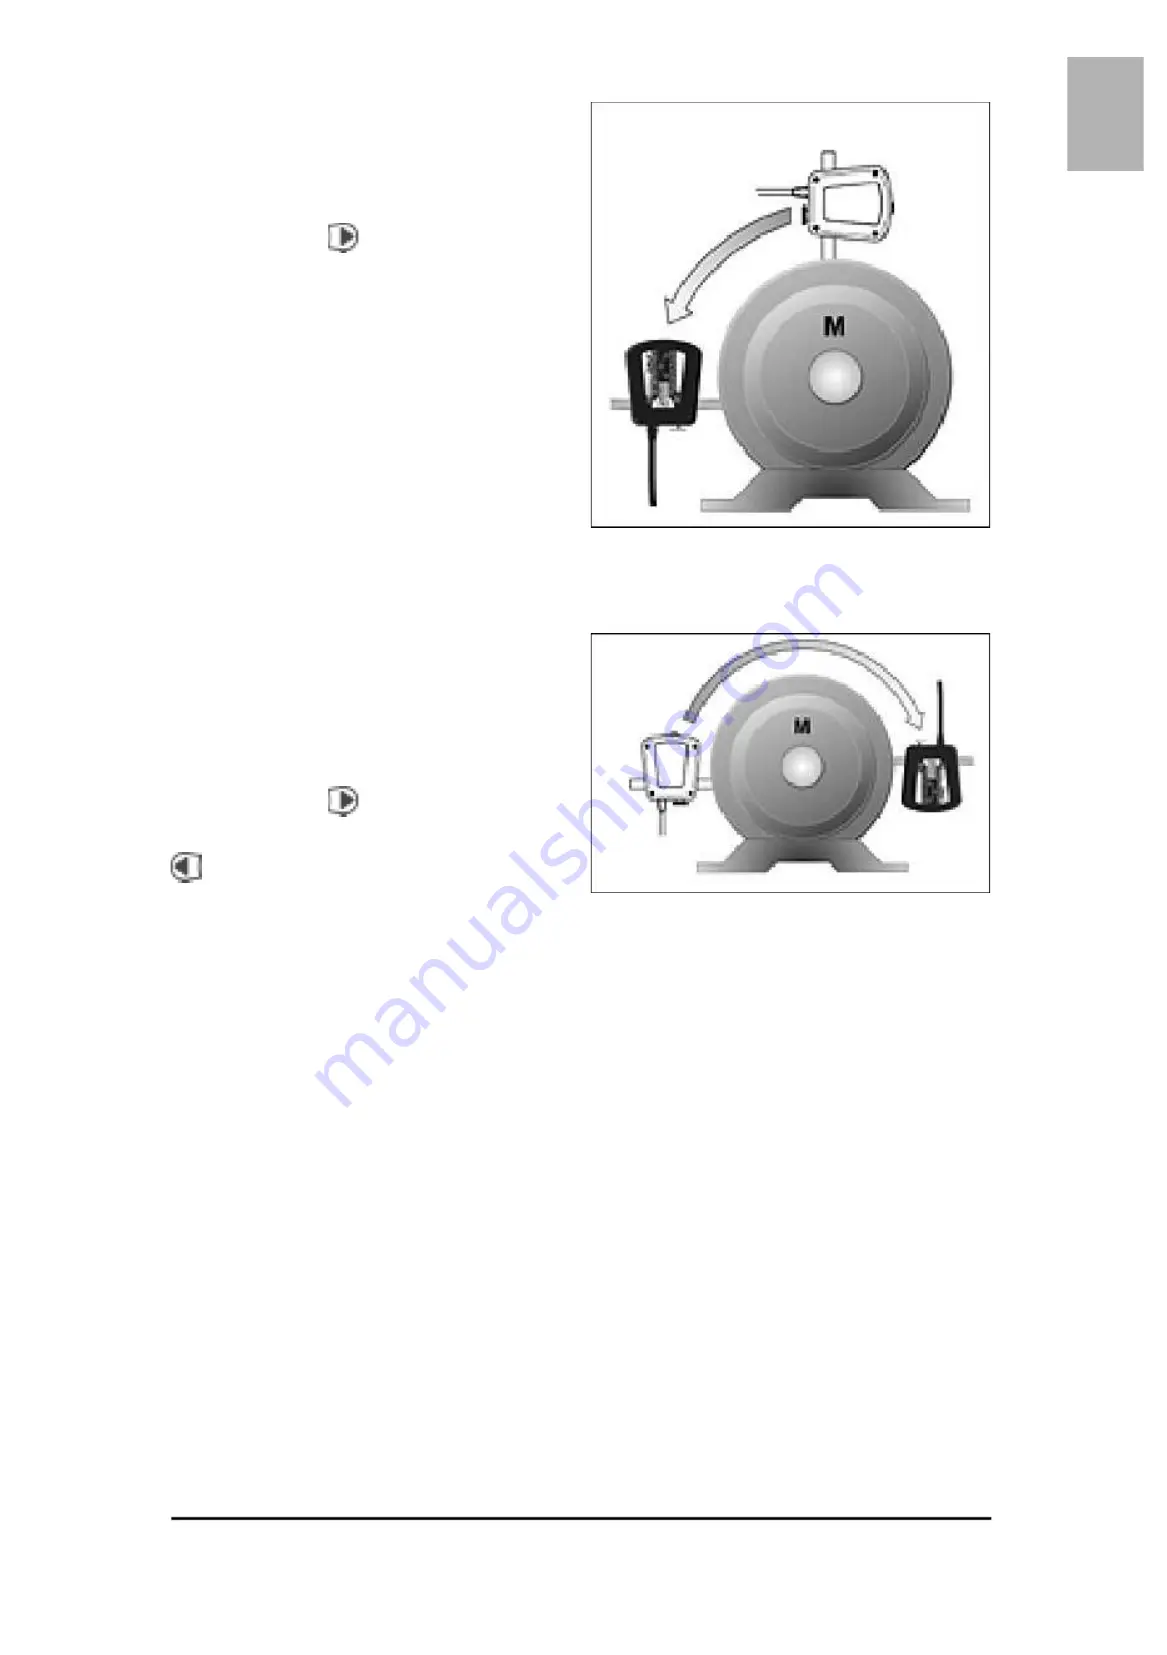
a) Adjust the measuring units to

the 9 o'clock position with the
aid of the spirit levels (fig. 17).

b) Confirm the measurement by

pressing 

.

c) Follow the circle symbol on

the display and rotate the
measuring units to the
3 o'clock position (fig. 18).

d) Confirm the measurement by

pressing 

.

Note!

By pressing the "previous"
button, you will reverse the
process in order to repeat any
of the measurement steps or
to adjust any of the machine
dimensions.

Fig. 17. Adjust to the 9 o'clock

 position

Fig. 18. Rotate to the 3 o'clock

 position

Содержание TMEA 2

Страница 1: ...nungsanleitung Instrucciones de uso Instrucciones de uso Manuale d instruzioni Manuale d instruzioni Bruksanvisning Bruksanvisning Gebruiksaanwijzing Gebruiksaanwijzing Instruc es de utiliza o Instruc...

Страница 2: ...2 2 V Ve er rt ti ic ca al l a al li ig gn nm me en nt t 2 25 5 3 3 8 8 3 3 H Ho or ri iz zo on nt ta al l a al li ig gn nm me en nt t 2 27 7 3 3 9 V 9 Ve er ri if fy y a al li ig gn nm me en nt t 2 2...

Страница 3: ...2 2 V Ve er rt ti ic ca al l a al li ig gn nm me en nt t 2 25 5 3 3 8 8 3 3 H Ho or ri iz zo on nt ta al l a al li ig gn nm me en nt t 2 27 7 3 3 9 V 9 Ve er ri if fy y a al li ig gn nm me en nt t 2 2...

Страница 4: ...m for for Emission EN 50081 1 EN 55011 B Emission EN 50081 1 EN 55011 B Immunity EN 50082 2 EN Immunity EN 50082 2 EN 61000 4 2 3 lev 61000 4 2 3 level 3 el 3 The laser is classified in The laser is c...

Страница 5: ...h an output power below 1 mW Still never stare directly into the laser transmitter Calibrate the equipment regularly Never aim the laser line into someone s eyes Opening the housing of the measuring u...

Страница 6: ...ode and a positioning detector As the shafts are rotated through 180 any parallel misalignment or angular misalignment causes the two laser lines to deflect from their initial relative position The me...

Страница 7: ...chine 1 3 Measuring positions To define the various measuring positions during the alignment procedure we use the analogy of a clock as viewed from behind the Movable machine The position with the mea...

Страница 8: ...following components are included with the TMEA 2 tools Display unit 2 measuring units with spirit levels 2 magnetic mechanical shaft fixtures 2 locking chains 5 sets of shims Measuring tape Instruct...

Страница 9: ...machine C LCD Display D ON OFF button E Increase button F Next button G Previous button H Decrease button J Machine dimensions A B and C Measured values S and M K Rear feet values L Front feet values...

Страница 10: ...ector B Spirit level C Wheel for vertical fine adjustment of laser line D Warning LED E Chain fixation screw F Locking chain G Magnetic mechanical fixture H Connection rod J Release tightening knob Fi...

Страница 11: ...splay type LCD 35 x 48 mm 1 4 x 1 9 in Battery type 2 x 1 5V LR14 Alkaline Operating time 20 hours continuous operating Auto power off after 1 hour if no keys are pressed Displayed resolution 0 01 mm...

Страница 12: ...e you want to change into inches press the minus sign simultaneously to switching the tool on To revert back to mm press the plus sign when switching on The last setting will always be remembered 3 2...

Страница 13: ...sufficiently secured to them use the chains Make sure that the M marked unit is attached to the Movable machine and the S marked unit to the Stationary machine For diameters larger than 150 mm if cha...

Страница 14: ...les corresponds to the marking of the ports in the display unit fig 9 3 4 Switch on Switch on the display unit by pressing the ON OFF button You will now be prompted to enter the machine dimensions as...

Страница 15: ...imensions A The distance between the two measuring units as measured between the fixture centre marks B The distance between the M marked measuring unit and the front pair of feet of the Movable machi...

Страница 16: ...ues for these three distances are A 200 mm 8 in B 200 mm 8 in C 400 mm 15 in b Adjust each value by using the and buttons c Confirm the setting of each value by pressing the next button Note If you ne...

Страница 17: ...18 Shaft alignment tool SKF TMEA 2 3 6 Aiming the laser lines a Put the two measuring units in the 12 o clock position with the help of the spirit levels fig 12 Fig 12 The 12 o clock position...

Страница 18: ...E n g l i s h SKF TMEA 2 Shaft alignment tool 19 b Aim the laser lines so that they hit in the centre of the target of the opposite measuring unit fig 13 Fig 13 Hit the target A Laser line A A...

Страница 19: ...4 This allows the measuring unit to slide up and down the rod at the same time as it can swivel freely For the fine adjustment in height use the adjustment wheels on the measuring units Fig 14 Adjustm...

Страница 20: ...n Turn the measuring units to the 3 o clock position when the lines will hit outside the detector areas Adjust the lines to the position half way between the detector centre and the actual position by...

Страница 21: ...of misalignment The logic circuitry within the tool will translate this movement to misalignment figures and advise on how to correct it A circle symbol on the display will help indicating the requir...

Страница 22: ...c Follow the circle symbol on the display and rotate the measuring units to the 3 o clock position fig 18 d Confirm the measurement by pressing Note By pressing the previous button you will reverse t...

Страница 23: ...of the two shafts in the measurement plane measured in mm 100 mm or 0 001 1 The value below on the display shows the parallel off set of the two centre lines in the measurement plane These two values...

Страница 24: ...ustment The machine misalignment should always be within the manufacturer s specified tolerances In case such tolerances are missing table 1 can be used as a rough guide line Fig 20 The 12 o clock pos...

Страница 25: ...F2 values on the display indicate the relative positions of the Movable machine when viewed from the side fig 21 A positive value means that the feet are too high and need to be lowered while a negat...

Страница 26: ...be within the manufacturer s specified tolerances In case such tolerances are missing table 1 can again be used as a general recommendation a If the measured coupling values are within the tolerances...

Страница 27: ...that the feet have to be moved to the right A positive value means that the feet have to be moved to the left fig 26 Observe the coupling and feet values live adjustment while moving the movable mach...

Страница 28: ...E n g l i s h SKF TMEA 2 Shaft alignment tool 29 This page has been intentionally left blank...

Страница 29: ...eet To find and correct the soft foot do as follows 1 Tighten all bolts 2 Execute all preparation steps as per chapter 3 1 to 3 6 3 Press and simultaniously to reach the soft foot mode The text soft f...

Страница 30: ...If the deviation is larger than the previously tightened foot then this is the soft foot If not tighten the bolt and go back to the previous diagonally opposed foot It is normally worthwhile to try t...

Страница 31: ...foot correction done l Vertical alignment resulting angular error m Vertical alignment resulting parallel offset n Horizontal alignment resulting angular error o Horizontal alignment resulting parall...

Страница 32: ...E n g l i s h SKF TMEA 2 Shaft alignment tool 33...

Страница 33: ...lock and confirm the measurement by pressing the next button 2 The display unit now indicates the measuring units should be placed in the 3 o clock position Rotate the measuring units by 180 in our ex...

Страница 34: ...Assure that external extensive vibrations do not influence the measurement f Assure that radio communications like walkie talkies do not influence the measurement 5 2 5 Incorrect measuring results a A...

Страница 35: ...rints If necessary clean with cotton cloth 6 3 Batteries of the display unit The display unit is powered by two LR14 C batteries Most LR14 C batteries can be used but Alkaline batteries have the longe...

Отзывы: