background image

SilverCrest SCAW 5.00 B2 

38 - Français 

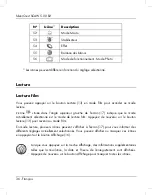
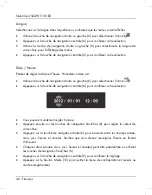
En mode de lecture, les fonctions disponibles sont les suivantes : 


Utilisez la touche de navigation droite ou gauche (6) pour sélectionner le film de votre 
choix. 


Appuyez sur la touche de navigation centrale (6) pour lire le film sélectionné.


Vous pouvez utiliser le bouton de zoom / réglage du volume (3) pour régler le volume de 
lecture. 


Les fonctions ci-dessous sont disponibles pendant la lecture des films : 


Appuyez sur le bouton Menu (14) pour effectuer une pause dans la lecture. Appuyez 
de nouveau sur le bouton Menu (14) pour reprendre la lecture. 


Pour effectuer un retour rapide ou une avance rapide, appuyez sur la touche de 
navigation droite ou gauche (6) et maintenez-la enfoncée pendant un moment. 
Appuyez de nouveau sur la touche pour augmenter progressivement la vitesse jusqu’à 
8x maximum. 


Pour arrêter la lecture, appuyez sur a touche de navigation centrale (6).  


Содержание 79938

Страница 1: ......

Страница 2: ......

Страница 3: ...V 1 85 Français 2 Deutsch 92 English 182 ...

Страница 4: ...3 Remarque sur le débranchement 13 Enfants et personnes handicapées 13 Chargeur et batterie 14 Avertissement risque d explosion 14 Câbles 15 Commandes et boutons 16 Face avant 16 Face supérieure 16 Panneau arrière 16 Panneau de gauche 17 Panneau de droite 17 Vue inférieure 17 Avant de commencer 18 Chargement de la batterie dans le chargeur 18 Chargement de la batterie alors qu elle est insérée dan...

Страница 5: ...menus 29 Réglage de la date et de l heure 30 Enregistrement 31 Enregistrement de films 31 Écran du mode vidéo 32 Mode Macro 34 Enregistrements en mode portrait paysage 34 Prises de vues 34 L écran du mode photo 35 Lecture 36 Lecture film 36 L écran en mode Lecture film 37 Lecture photo 39 L écran en mode Lecture photo 40 Utilisation sous l eau 41 Réglages pour l utilisation sous l eau 43 Nettoyage...

Страница 6: ...s du menu Film 52 Balance des blancs 53 Résolution 54 Effet 55 Qualité 55 Stabilisateur 56 Lampe vidéo 57 Compensation d exposition EV 58 Enreg boucle 59 Détection de mouvement 60 Horodateur 61 Pré enregistrement 61 Vidéo accélérée 62 Menu de lecture film 63 Icônes du menu de lecture film 63 Suppression d un enregistrement vidéo 63 Suppression de tous les films enregistrés 64 Verr un 65 Verr tout ...

Страница 7: ...err tout 72 Diaporama 72 DPOF un 72 DPOF tous 73 Connecteurs et prises 74 Regarder les enregistrements sur un téléviseur 74 Connexion par câble HDMI 74 Connexion par câble USB AV 75 Transfert d enregistrements sur un ordinateur 75 Utilisation du port USB 76 Utilisation d un lecteur de cartes 77 Logiciel 77 Configuration système requise 77 Installation du logiciel 78 Désinstallation du logiciel 78 ...

Страница 8: ... 83 Fusionner des vidéos 83 Créer un disque AVCHD 84 Couper des vidéos 85 Télécharger dans YouTube 85 Télécharger dans Facebook 85 Album photo 85 Page album 86 Résolution des problèmes 87 Entretien nettoyage 88 Entretien 88 Nettoyage 88 Réglementation environnementale et informations sur la mise au rebut 88 Avis de conformité 89 Informations relatives à la garantie et aux services 89 ...

Страница 9: ... Il vous permettra d immortaliser à tout moment vos plus beaux souvenirs Utilisation prévue Votre caméscope est un appareil électronique grand public et est conçu exclusivement pour enregistrer et lire des vidéos et des photos Toute utilisation autre que celle mentionnée ci dessus ne correspond pas à l utilisation prévue Cet appareil est destiné à un usage exclusivement privé et en aucun cas à un ...

Страница 10: ... B2 Chargeur HWAN CHYUN ENTERPRISE CO LTD DJ04V20500A 2 batteries FUJI Electronics Shenzhen Co Ltd CA NP 40 Câble d alimentation Câble USB AV Câble HDMI Carte mémoire SD de 4 Go non illustrée CD ROM non illustré Sacoche de transport non illustrée Manuel d utilisation non illustré ...

Страница 11: ...tions du mode film QVGA 30 i s 320x240 WVGA 30 i s 848x480 WVGA 60 i s 848x480 720p 30 i s 1280x720 720p 60 i s 1280x720 1080p 30 i s 1920 x 1080 Zoom numérique en mode photo 10x jusqu à 2x sans perte puis zoom numérique traditionnel Zoom numérique en mode vidéo 10x jusqu à 2x sans perte puis zoom numérique traditionnel pour 1080p zoom numérique 8x uniquement Format de fichier Film H 264 AVI Photo...

Страница 12: ...Ah Fabricant FUJI Electronics Shenzhen Co Ltd Chargeur Fabricant HWAN CHYUN ENTERPRISE CO LTD Modèle DJ04V20500A Tension d entrée CA 100 240 V 50 60 Hz 0 07 A Tension de sortie 4 2 V 500 mA Température de fonctionnement 0 C à 35 C Humidité de fonctionnement 85 max d humidité relative Microphone Incorporé Haut parleur Incorporé Dimensions 55 x 67 5 x 121 mm L x H x P sans dragonne Poids environ 289...

Страница 13: ...opérations de maintenance et de réparation doivent exclusivement être réalisées par un personnel technique qualifié N orientez pas directement le caméscope en direction du soleil ou de toute autre source de lumière intense Vous pourriez endommager sérieusement votre vue N activez jamais le flash à proximité des yeux d animaux ou d individus en particulier des enfants Le flash peut endommager grave...

Страница 14: ... enregistrement Dans le cas contraire les données en mémoire risquent d être détruites N ouvrez jamais le compartiment de la batterie carte mémoire ou le cache des ports alors que le caméscope est sous l eau Dans le cas contraire l appareil et les données en mémoire risquent d être détruits Conditions d utilisation Cet appareil peut être utilisé à des températures situées entre 0 C et 35 C Conserv...

Страница 15: ... débranchez le câble d alimentation de la prise de courant La prise de courant sur laquelle est branché l appareil doit être facile d accès afin de pouvoir débrancher rapidement le câble d alimentation en cas d urgence Débranchez également le câble d alimentation de la prise de courant lorsqu il existe un risque d orage ou bien si vous n avez pas l intention d utiliser le chargeur pendant une péri...

Страница 16: ...par un modèle identique ou recommandé par le fabricant Ne remplacez jamais les piles batteries dans un lieu propice aux explosions Lors de l insertion ou du retrait des piles batteries une étincelle peut se produire et être à l origine d une explosion Les zones dangereuses présentant un risque d explosion sont généralement signalées mais pas toujours Elles incluent entre autres les zones de stocka...

Страница 17: ...lui même sur le câble et veillez à ce que le câble ne soit pas emmêlé en particulier au niveau de la prise de courant et des connecteurs Ne faites jamais de nœuds avec le câble et ne le raccordez à aucun autre câble Tous les câbles doivent être placés de façon à ne pas gêner le passage et à ne pas trébucher dessus Un câble endommagé présente un risque d incendie ou d électrocution Vérifiez réguliè...

Страница 18: ...nt 1 Objectif 2 Lampe incorporée de type LED Face supérieure 3 Bouton de zoom réglage du volume 4 Microphone Panneau arrière 5 Voyant d alimentation 6 Touches de navigation 7 Bouton enregistrement obturateur 8 Bouton mode plongée 9 Sorties HDMI USB AV et port chargeur ...

Страница 19: ...12 Bouton marche arrêt 13 Bouton lecture PLAYBACK 14 Bouton menu MENU 15 Bouton mode MODE 16 Bouton affichage DISP 17 Écran Vue inférieure 18 Fixation du trépied 19 Compartiment de la batterie et de la carte mémoire 20 Bouton de déverrouillage LOCK du compartiment de la batterie et de la carte mémoire ...

Страница 20: ...charger avant d utiliser l appareil pour la première fois Utilisez uniquement des batteries rechargeables au lithium ion CA NP 40 fabriquée par Electronics Shenzhen Co Ltd C pour faire fonctionner le caméscope Chargement de la batterie dans le chargeur Insérez la batterie rechargeable dans le socle de chargement de façon à faire correspondre les pôles de la batterie et avec ceux du socle ...

Страница 21: ...e et le chargeur chauffent pendant le chargement Cela est normal Le voyant d état du chargeur s allume en orange lorsque la batterie est en cours de chargement À la fin du chargement il s allume en vert Vous pouvez alors insérer la batterie dans le caméscope Selon le niveau de charge de la batterie son rechargement peut prendre jusqu à 3 heures Si le voyant reste vert lorsque vous insérez la batte...

Страница 22: ...n marche arrêt 12 pour éteindre le caméscope Pendant le chargement le voyant d alimentation 5 s allume en orange Une fois le processus de chargement terminé le voyant d alimentation s éteint Sur certains ordinateurs les prises USB ne sont pas alimentées lorsque ces derniers sont éteints Si le voyant d alimentation du caméscope ne s allume pas veillez à allumer votre ordinateur En plus des solution...

Страница 23: ... compartiment de la batterie carte mémoire et ou le cache des ports vous devez attendre que le caméscope soit complètement sec Veillez à avoir du papier absorbant à portée de main à l ouverture des caches pour retirer toute trace d eau et de saleté se trouvant autour des caches Le compartiment de la batterie carte mémoire 19 s ouvre et vous pouvez y insérer la batterie Veillez à faire correspondre...

Страница 24: ...arte mémoire 19 et appuyez dessus jusqu à ce qu il soit bien en place Assurez vous que le compartiment de la batterie carte mémoire a été correctement fermé pour que l appareil soit bien étanche fermé correctement non fermé correctement Insertion d une carte mémoire La carte mémoire SD fournie vous permet d augmenter la capacité de stockage de photos et vidéos de votre caméscope Si une carte mémoi...

Страница 25: ...ns le sens de la flèche voir figure Si vous avez utilisé le caméscope sous l eau avant d ouvrir le compartiment de la batterie carte mémoire et ou le cache des ports vous devez attendre que le caméscope soit complètement sec Veillez à avoir du papier absorbant à portée de main à l ouverture des caches pour retirer toute trace d eau et de saleté se trouvant autour des caches Insérez ensuite la cart...

Страница 26: ...ercle du compartiment de la batterie carte mémoire 19 et appuyez dessus jusqu à ce qu il soit bien en place Assurez vous que le compartiment de la batterie carte mémoire a été correctement fermé pour que l appareil soit bien étanche fermé correctement non fermé correctement Si la carte mémoire ou la mémoire interne est pleine le message Mémoire pleine s affiche sur l écran d affichage 17 La vidéo ...

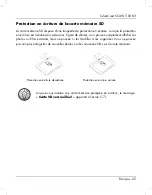
Страница 27: ...ous figure de droite vous pouvez uniquement afficher les photos ou films existants mais ne pouvez ni les modifier ni les supprimer Vous ne pouvez pas non plus enregistrer de nouvelles photos ou des nouveaux films sur la carte mémoire Protection en écriture désactivée Protection en écriture activée Lorsque vous insérez une carte mémoire protégée en écriture le message Carte SD verrouillée apparaît ...

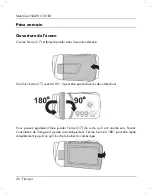
Страница 28: ...on désirée Une fois l écran 17 ouvert à 90 il peut être pivoté dans les deux directions Vous pouvez également faire pivoter l écran 17 de sorte qu il soit orienté vers l avant L orientation de l image est ajustée automatiquement L écran tourné à 180 peut être replié complètement jusqu à ce qu il touche le boîtier du caméscope ...

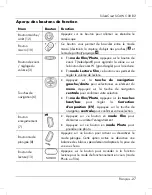
Страница 29: ...uche de navigation gauche droite pour sélectionner un élément du menu Appuyez sur la touche de navigation centrale pour confirmer votre sélection En mode Film Photo appuyez sur les touches haut bas pour régler la Correction d exposition EV Appuyez sur la touche de navigation centrale pour confirmer votre sélection Bouton enregistrement 7 Appuyez sur ce bouton en mode Film pour démarrer ou arrêter ...

Страница 30: ...r le bouton marche arrêt 12 pour allumer le caméscope Le voyant d alimentation 5 s allume en vert Appuyez sur le bouton marche arrêt 12 pour éteindre le caméscope Le voyant d alimentation 5 s éteint Lorsque vous ouvrez l écran 17 le caméscope s allume automatiquement Lorsque vous fermez l écran le caméscope s éteint sauf si un film est en cours d enregistrement Le tableau ci dessous présente un ap...

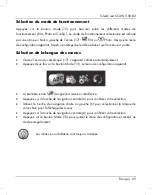
Страница 31: ... menus Ouvrez l écran du caméscope 17 L appareil s allume automatiquement Appuyez deux fois sur le bouton Mode 15 Le menu de configuration apparaît La première icône Langue est mise en surbrillance Appuyez sur la touche de navigation centrale 6 pour confirmer votre sélection Utilisez la touche de navigation droite ou gauche 6 pour sélectionner la langue de votre choix pour l affichage des menus Ap...

Страница 32: ... de navigation centrale 6 pour confirmer votre sélection Vous pouvez maintenant régler l année Appuyez ensuite sur les touches de navigation haut bas 6 pour régler la valeur de votre choix Appuyez sur la touche de navigation droite 6 pour basculer entre les champs année mois jour heures et minutes Sachez que vous devez renseigner l heure au format 24 heures Chaque valeur année mois jour heures et ...

Страница 33: ...ton de zoom W grand angle pour la réduire Pendant l enregistrement vous pouvez appuyer sur le bouton Lecture 13 pour prendre jusqu à 3 photos Vous pouvez faire une pause dans l enregistrement vidéo en appuyant sur le bouton Menu 14 puis reprendre l enregistrement en appuyant de nouveau sur le bouton Appuyez sur le bouton Enregistrement 7 pour arrêter l enregistrement Le voyant d alimentation 5 s a...

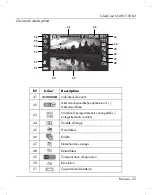
Страница 34: ...escription 21 Indicateur de zoom 22 mémoire disponible exprimée en mémoire utilisée 23 Nombre d enregistrements sauvegardés Nombre de photos sauvegardées 1 24 Qualité du film 25 Horodateur 26 Enreg boucle Pré enregistrement Vidéo accélérée 27 Détection de mouvement 28 Durée d enregistrement 29 Compensation d exposition ...

Страница 35: ...pacité de la batterie 32 Mode Macro 33 Lampe vidéo 34 Stabilisateur 35 Effet 36 Balance des blancs 37 Mode de fonctionnement Mode vidéo Les icônes peuvent différer en fonction du réglage sélectionné 1 Le nombre de photos sera indiqué uniquement pendant l enregistrement d un film ...

Страница 36: ...ur passer en mode Photo Le bouton macro 10 vous permet de basculer entre le mode macro destiné à la capture d objets très proches et le mode portrait paysage Utilisez le bouton de zoom réglage du volume 3 pendant pour agrandir ou réduire la vue de l image Appuyez sur le bouton de zoom T téléobjectif pour agrandir la scène ou sur le bouton de zoom W grand angle pour la réduire Appuyez sur le bouton...

Страница 37: ...º Icône Description 41 Indicateur de zoom 42 mémoire disponible exprimée en mémoire utilisée 43 Nombre d enregistrements sauvegardés enregistrements restants 44 Qualité d image 45 Horodateur 46 Rafale 47 Détection des visages 48 Retardateur 49 Compensation d exposition 50 Résolution 51 Capacité de la batterie ...

Страница 38: ...indique que le mode actuellement sélectionné est le mode de lecture film Appuyez de nouveau sur le bouton lecture 13 pour revenir au mode Film En mode lecture plusieurs icônes peuvent s afficher à l écran 17 pour vous informer des différents réglages actuellement sélectionnés Vous pouvez afficher ou masquer ces icônes en appuyant sur le bouton Affichage 16 Lorsque vous appuyez sur la touche Affich...

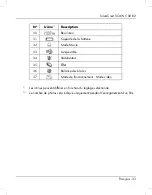
Страница 39: ...ran en mode Lecture film 65 61 62 63 64 Nº Icône Description 61 Mode de lecture 62 Temps écoulé temps total d enregistrement 63 mémoire disponible exprimée en mémoire utilisée 64 Nº du film actuel nombre total de films 65 Protection du fichier ...

Страница 40: ...le volume de lecture Les fonctions ci dessous sont disponibles pendant la lecture des films Appuyez sur le bouton Menu 14 pour effectuer une pause dans la lecture Appuyez de nouveau sur le bouton Menu 14 pour reprendre la lecture Pour effectuer un retour rapide ou une avance rapide appuyez sur la touche de navigation droite ou gauche 6 et maintenez la enfoncée pendant un moment Appuyez de nouveau ...

Страница 41: ... gauche 6 en mode lecture pour sélectionner une photo Vous pouvez utiliser le bouton de zoom volume 3 pour afficher une mosaïque de 4 ou 9 miniatures des photos sélectionnées en appuyant sur deux fois sur le bouton de zoom W grand angle Vous pouvez ensuite sélectionner l une des photos de cette mosaïque en appuyant sur les touches de navigation 6 L image sélectionnée apparaît entourée d un cadre r...

Страница 42: ...n en mode Lecture photo 75 71 72 73 74 Nº Icône Description 71 Visionneuse photo 72 Mémoire disponible exprimée en mémoire utilisée 73 N de la photo actuelle Nombre total de photos enregistrées 74 Capacité de la batterie 75 Protection du fichier ...

Страница 43: ...s d une plongée Assurez vous que votre caméscope ne présente aucun dommage Vérifiez à deux reprises que le compartiment de la batterie carte mémoire 19 ainsi que le cache des ports 9 sont bien fermés et qu il n y a ni saleté ni sable autour des caches Ceci est essentiel pour assurer l étanchéité de l appareil fermé correctement non fermé correctement ...

Страница 44: ... l eau pendant plus de 60 minutes de suite Le caméscope peut être utilisé dans l eau uniquement à des températures situées entre 0 C et 40 C L étanchéité de ce caméscope est valable pour l eau salée et l eau douce Elle ne s applique pas aux détergents produits chimiques solvants ni à l eau des piscines publiques Ce type de liquides doit être immédiatement essuyé en cas de contact avec le caméscope...

Страница 45: ... la fois pour le mode Photo et pour le mode Film Nettoyage après utilisation sous l eau Après chaque utilisation sous l eau il est nécessaire de nettoyer le caméscope Assurez vous que votre caméscope ne présente aucun dommage Après l avoir utilisé sous l eau lavez le caméscope avec de l eau du robinet Pour ce faire immergez le pendant environ 10 minutes dans de l eau du robinet afin d éliminer tou...

Страница 46: ...on Les icônes indiquent les réglages sélectionnés Les icônes en surbrillance sont toujours animées Menu de configuration Le menu de configuration vous permet de régler les préférences du caméscope Ouvrez l écran du caméscope 17 L appareil s allume automatiquement Appuyez deux fois sur le bouton Mode 15 Le menu de configuration apparaît alors Une fois que vous avez effectué tous les réglages que vo...

Страница 47: ...lages d usine par défaut Extinction automatique Permet de sélectionner un délai d extinction automatique Fréquence Permet de régler la fréquence de l alimentation électrique CA Standard TV Permet de sélectionner le standard TV Bip Permet d activer ou désactiver les signaux sonores Informations Permet d afficher des informations relatives aux photos films enregistrés et à propos de l espace mémoire...

Страница 48: ... Utilisez la touche de navigation droite ou gauche 6 pour sélectionner l icône Appuyez sur la touche de navigation centrale 6 pour confirmer votre sélection Vous pouvez maintenant régler l année Appuyez ensuite sur les touches de navigation haut bas 6 pour régler la valeur de votre choix Appuyez sur la touche de navigation droite 6 pour basculer entre les champs année mois jour heures et minutes S...

Страница 49: ...rer la carte mémoire insérée s il y en a une Vous ne pouvez formater la mémoire interne que s il n y a pas de carte mémoire dans le caméscope Indique que la carte SD va être formatée Indique que la mémoire interne va être formatée Les réglages disponibles sont les suivants Ne formate pas Formate le support de stockage indiqué Utilisez la touche de navigation droite ou gauche 6 pour sélectionner le...

Страница 50: ...méscope de façon à ce qu il s éteigne automatiquement après un certain laps de temps afin d économiser la batterie Si l appareil n est pas utilisé pendant le délai défini il s éteint automatiquement Pour rallumer le caméscope appuyez sur le bouton marche arrêt 12 Utilisez la touche de navigation droite ou gauche 6 pour sélectionner l icône Appuyez sur la touche de navigation centrale 6 pour confir...

Страница 51: ...r sélectionner le réglage de votre choix Appuyez sur la touche de navigation centrale 6 pour confirmer votre sélection Standard TV Cette option permet de choisir entre les systèmes de télévision PAL et NTSC Le système NTSC est utilisé en Amérique et au Japon le système PAL est utilisé en Europe Ce réglage n est applicable que lors de l utilisation du câble vidéo Utilisez la touche de navigation dr...

Страница 52: ...tionner le réglage de votre choix Appuyez sur la touche de navigation centrale 6 pour confirmer votre sélection Informations Cette option permet d afficher des informations à propos de l espace de stockage Le nombre de photos films en mémoire ainsi que des informations à propos de l état de la mémoire interne ou de la carte SD sont affichés Utilisez la touche de navigation droite ou gauche 6 pour ...

Страница 53: ...SD Appuyez sur le bouton Menu 14 pour quitter cette vue Standard HDMI Sélectionnez le standard HDMI que vous voulez utiliser Utilisez la touche de navigation droite ou gauche 6 pour sélectionner l icône Appuyez sur la touche de navigation centrale 6 pour confirmer votre sélection Les réglages disponibles sont les suivants 720P 1080i Utilisez la touche de navigation droite ou gauche 6 pour sélectio...

Страница 54: ...r ou désactiver le stabilisateur Lampe vidéo Permet d allumer ou d éteindre la lampe vidéo Compensation d exposition EV Permet de sélectionner la compensation d exposition Enreg boucle Permet d activer ou désactiver l enregistrement en boucle Détection de mouvement Si cette fonction est activée le caméscope lance l enregistrement d un fil dès qu il détecte un mouvement Horodateur Permet d activer ...

Страница 55: ... 6 pour sélectionner l icône Appuyez sur la touche de navigation centrale 6 pour confirmer votre sélection Les réglages disponibles sont les suivants Automatique Lumière du jour Nuageux Fluorescent Tungstène Utilisez la touche de navigation droite ou gauche 6 pour sélectionner le réglage de votre choix Appuyez sur la touche de navigation centrale 6 pour confirmer votre sélection Il est aussi possi...

Страница 56: ...ible résolution de 320 x 240 pixels et fréquence d images de 30 i s Résolution moyenne de 848 x 480 pixels Fréquence d images de 30 i s Résolution moyenne de 848 x 480 pixels Fréquence d images de 60 i s Haute résolution de 1280 x 720 pixels et fréquence d images élevée de 30 i s Haute résolution de 1280 x 720 pixels et fréquence d images élevée de 60 i s Haute résolution de 1920 x 1080 pixels et ...

Страница 57: ...er votre sélection L option Sépia crée une image en noir et blanc avec une teinte marron Cela donne à la photo un aspect plus ancien Qualité Le paramètre Qualité détermine le taux de compression du film réalisé lors de son enregistrement sur la carte mémoire ou dans la mémoire interne Avec un taux de compression plus élevé qualité normale vous pouvez enregistrer plus de films ou des films plus lon...

Страница 58: ...ver le stabilisateur pour réduire les phénomènes de photos tremblantes Utilisez la touche de navigation droite ou gauche 6 pour sélectionner l icône Appuyez sur la touche de navigation centrale 6 pour confirmer votre sélection Les réglages disponibles sont les suivants Permet de désactiver le stabilisateur Permet d activer le stabilisateur Utilisez la touche de navigation droite ou gauche 6 pour s...

Страница 59: ...es suivants Permet d éteindre la lampe à LED 2 Permet d allumer la lampe à LED 2 Permet d activer le mode Nuit Cela augmente la sensibilité du caméscope à la lumière Utilisez la touche de navigation droite ou gauche 6 pour sélectionner le réglage de votre choix Appuyez sur la touche de navigation centrale 6 pour confirmer votre sélection Il est aussi possible de régler la lampe vidéo en appuyant s...

Страница 60: ...ar exemple ou si vous enregistrez à contre jour soleil de face par exemple Utilisez la touche de navigation droite ou gauche 6 pour sélectionner l icône Appuyez sur la touche de navigation centrale 6 pour confirmer votre sélection Appuyez ensuite sur les touches de navigation haut bas 6 pour régler la valeur de votre choix 2 0 2 0 Appuyez sur la touche de navigation centrale 6 pour confirmer votre...

Страница 61: ...ner le réglage de votre choix Appuyez sur la touche de navigation centrale 6 pour confirmer votre sélection Un nouveau fichier sera automatiquement créé au bout de 10 minutes Les données seront supprimées et remplacées automatiquement dès que la carte mémoire ou la mémoire interne sera pleine Les données les plus anciennes seront supprimées en premier Si vous ne voulez pas supprimer ou remplacer l...

Страница 62: ... mouvement avec une sensibilité moyenne Active la détection de mouvement avec une sensibilité élevée Utilisez la touche de navigation droite ou gauche 6 pour sélectionner le réglage de votre choix Appuyez sur la touche de navigation centrale 6 pour confirmer votre sélection Veuillez connecter un adaptateur secteur USB externe non fourni lorsque vous activez cette fonction et que vous avez l intent...

Страница 63: ... touche de navigation centrale 6 pour confirmer votre sélection Une fois que l horodateur a été activé il n est plus possible d effacer la date et l heure de l enregistrement Veillez donc à bien vérifier que la date et l heure sont correctement réglées avant de commencer l enregistrement Pré enregistrement Si cette fonction est activée l enregistrement commencera 3 secondes après la pression sur l...

Страница 64: ...déo accélérée L appareil enregistrera une image par seconde L appareil enregistrera une image toutes les 5 secondes L appareil enregistrera une image toutes les 30 secondes Utilisez la touche de navigation droite ou gauche 6 pour sélectionner le réglage de votre choix Appuyez sur la touche de navigation centrale 6 pour confirmer votre sélection Veuillez connecter un adaptateur secteur USB externe ...

Страница 65: ... tous les enregistrements vidéo Permet de protéger vos enregistrements contre toute suppression accidentelle Suppression d un enregistrement vidéo Utilisez cette option pour supprimer un film Attention Une fois l enregistrement supprimé vous ne pouvez plus le récupérer Utilisez la touche de navigation droite ou gauche 6 pour sélectionner l icône Appuyez sur la touche de navigation centrale 6 pour ...

Страница 66: ... peuvent être supprimés en une seule fois Les photos ne sont pas effacées Attention Une fois un enregistrement supprimé vous ne pouvez plus le récupérer Utilisez la touche de navigation droite ou gauche 6 pour sélectionner l icône Appuyez sur la touche de navigation centrale 6 pour confirmer votre sélection Les réglages disponibles sont les suivants N applique aucune modification Permet de supprim...

Страница 67: ...côté des films protégés Verr tout Cette option permet de protéger tous les enregistrements contre toute suppression accidentelle Utilisez la touche de navigation droite ou gauche 6 pour sélectionner l icône Appuyez sur la touche de navigation centrale 6 pour confirmer votre sélection Les réglages disponibles sont les suivants N applique aucune modification Permet de protéger tous les films Permet ...

Страница 68: ...pour confirmer votre sélection Les réglages disponibles sont les suivants Désactive le diaporama Active le diaporama Utilisez la touche de navigation droite ou gauche 6 pour sélectionner le réglage de votre choix Appuyez sur la touche de navigation centrale 6 pour confirmer votre sélection Vous pouvez appuyer sur le bouton Menu 14 pour faire une pause dans la lecture et vous pouvez appuyer sur la ...

Страница 69: ...strement Stabilisateur Permet d activer ou désactiver le stabilisateur Rafale Permet d activer ou désactiver le mode rafale Retardateur Permet de retarder l enregistrement Horodateur Permet d activer ou désactiver la fonction horodateur Détection des visages Permet d activer ou désactiver la détection des visages La plupart des fonctions et réglages du mode Photo sont identiques à ceux du mode Fil...

Страница 70: ...0 pixels Résolution moyenne de 1920 x 1080 pixels Résolution moyenne de 2592 x 1944 pixels Résolution plus élevée de 3648 x 2052 pixels interpolation Résolution élevée de 4616 x 3462 pixels interpolation Utilisez la touche de navigation droite ou gauche 6 pour sélectionner le réglage de votre choix Appuyez sur la touche de navigation centrale 6 pour confirmer votre sélection Rafale Cette fonction ...

Страница 71: ...i après avoir appuyé sur le bouton Enregistrement 7 Cela vous permet d être présent sur la photo photo de groupe par exemple Utilisez la touche de navigation droite ou gauche 6 pour sélectionner l icône Appuyez sur la touche de navigation centrale 6 pour confirmer votre sélection Les réglages disponibles sont les suivants Retardateur désactivé La photo est prise 2 secondes après la pression du bou...

Страница 72: ...ois que l horodateur a été activé il n est plus possible d effacer la date et l heure de l enregistrement Veillez donc à bien vérifier que la date et l heure sont correctement réglées avant de commencer l enregistrement Détection des visages Cette fonction détecte les visages et optimise les paramètres de prise en vue en conséquence Utilisez la touche de navigation droite ou gauche 6 pour sélectio...

Страница 73: ...ntelle Verr tout Permet de protéger vos photos contre toute suppression accidentelle Lecture auto Permet d afficher toutes les photos sous forme de diaporama Définition des propriétés d impression pour une photo Permet de configurer le nombre d impressions d une photo Définition des propriétés d impression pour toutes les photos Permet de configurer le nombre d impressions de toutes les photos Sup...

Страница 74: ...OF un La fonction DPOF Digital Print Order Format vous permet de sélectionner une image à imprimer depuis votre caméscope et d indiquer ensuite le nombre d impressions désirées Utilisez la touche de navigation droite ou gauche 6 pour sélectionner l icône Appuyez sur la touche de navigation centrale 6 pour confirmer votre sélection Utilisez la touche de navigation droite ou gauche 6 pour sélectionn...

Страница 75: ...photos ou de supprimer les réglages attribués pour toutes les photos en même temps Utilisez la touche de navigation droite ou gauche 6 pour sélectionner l icône Appuyez sur la touche de navigation centrale 6 pour confirmer votre sélection Les réglages disponibles sont les suivants N applique aucune modification Permet de supprimer les réglages attribués pour toutes les photos Permet d appliquer le...

Страница 76: ...e Votre téléviseur doit pour cela disposer d un connecteur d entrée vidéo adapté Selon les connecteurs disponibles sur votre téléviseur utilisez le câble USB AV ou le câble HDMI Le câble HDMI fournit des images et un son numériques et donc une qualité optimale Utilisez le caméscope comme à votre habitude Activez par exemple la fonction de lecture automatique diaporama pour afficher toutes les phot...

Страница 77: ... possible de transférer des données de l ordinateur vers le caméscope La fonction de copie permet uniquement de transférer des données du caméscope vers l ordinateur Soyez prudent lorsque vous renommez des dossiers et des fichiers N essayez JAMAIS de renommer des dossiers ou des fichiers présents sur le caméscope à partir de l ordinateur Vous risqueriez de ne plus pouvoir les lire avec le caméscop...

Страница 78: ...SilverCrest SCAW 5 00 B2 76 Français Utilisation du port USB Utilisez le câble USB fourni pour raccorder le caméscope à l ordinateur tel que représenté sur la figure Allumez le caméscope ...

Страница 79: ...ez au Poste de travail de l ordinateur et double cliquez sur le lecteur correspondant au lecteur de cartes Tous les fichiers enregistrés se trouvent dans un sous dossier du dossier DCIM de ce lecteur Vous pouvez à présent copier les fichiers enregistrés sur le caméscope dans un dossier de votre choix sur le disque dur de l ordinateur Logiciel Le logiciel fourni vous permet de modifier et de lire v...

Страница 80: ...améscope Insérez le CD ROM dans le lecteur de CD ou de DVD de votre ordinateur Le CD est automatiquement lu Suivez ensuite les instructions qui s affichent à l écran Si le programme d installation ne démarre pas automatiquement ou si vous l avez supprimé accidentellement vous pouvez exécuter manuellement le fichier TotalMedia HDCam exe Désinstallation du logiciel Pour désinstaller le logiciel util...

Страница 81: ...bilité de changer la langue de l interface logicielle Dans la boîte de dialogue principale cliquez sur Options Préférences Sélectionnez la langue de votre choix dans la liste et cliquez sur OK pour confirmer Un message apparaît et vous devez alors redémarrer Cliquez sur OK pour confirmer le message Redémarrez l application Modification d enregistrements Affichage des enregistrements Utilisez le câ...

Страница 82: ...ent actuel Pour afficher un enregistrement dans une nouvelle fenêtre double cliquez dessus Dans la fenêtre d affichage cliquez sur les icônes des flèches ou utilisez les touches flèches de votre clavier pour afficher l enregistrement précédent ou suivant Pour regarder un film enregistré double cliquez dessus La fenêtre vidéo contient les icônes Arrêt Lecture et Pause Cliquez sur les icônes des flè...

Страница 83: ...rements que vous voulez importer à partir du lecteur actuellement sélectionné et cliquez sur l icône Importer dans la barre d outils inférieure Une fenêtre comportant une invite apparaît alors Pour importer les enregistrements sélectionnés choisissez l option Importer les scènes sélectionnées Vous pouvez choisir d importer tous les enregistrements ou uniquement les nouveaux Si nécessaire saisissez...

Страница 84: ...nregistrements stockés sur un CD ROM Fenêtre d aperçu La fenêtre d aperçu propose plusieurs options vous permettant de trier et modifier vos enregistrements Cette option permet d afficher tous les enregistrements en fonction de la note qui leur a été attribuée Cette option permet d afficher tous les enregistrements qui n ont pas encore été importés Cette option permet de filtrer les enregistrement...

Страница 85: ...book Album photo Cette option permet de créer un album photo à partir de vos photos Page album Cette option permet de créer une page ex un carton d invitation à partir de vos photos L icône appelée YouKu est un lien vers un portail vidéo asiatique et n est pas adapté aux pays européens Importer Voir page 81 Importation d enregistrements Fusionner des vidéos Cette option vous permet de fusionner pl...

Страница 86: ...urs ne supportent pas tous les disques AVCHD enregistrés à la maison Insérez un disque DVD R DVD R DL DVD RW ou DVD RAM dans votre lecteur de DVD Cliquez sur l icône Créer un disque AVCHD pour ouvrir l espace de travail de compilation de disque Faites glisser les vidéos de votre choix sur la frise en bas de la fenêtre Cliquez sur Suivant pour démarrer le processus Sélectionnez le lecteur et le dos...

Страница 87: ...isissez votre nom d utilisateur et votre mot passe et cliquez sur Connexion Suivez les instructions de YouTube qui apparaissent à l écran Télécharger dans Facebook Cliquez sur l icône Télécharger dans Facebook Faites glisser la vidéo de votre choix sur la frise en bas de la fenêtre Cliquez sur Suivant Saisissez votre adresse de courrier électronique et votre mot passe et cliquez sur Connexion Suiv...

Страница 88: ...plusieurs modèles que vous pouvez utiliser Cliquez sur l icône Page album Faites glisser les photos de votre choix sur la barre en bas de la fenêtre Cliquez sur Suivant Le programme ArcSoft Print Creations est automatiquement lancé Choisissez une catégorie puis un modèle dans l application Pour ce faire double cliquez sur le modèle de votre choix ...

Страница 89: ...e est déchargée Rechargez la batterie Le caméscope s éteint soudainement La batterie rechargeable est déchargée Rechargez la batterie Le caméscope s éteint soudainement La fonction d extinction automatique est activée Vérifiez les réglages voir page 48 Le caméscope ne répond pas et ne peut pas être éteint Retirez la batterie rechargeable pendant quelques secondes et insérez la à nouveau Impossible...

Страница 90: ...ttoyage Utilisez un chiffon doux et non pelucheux N utilisez aucun produit de nettoyage ou solvant ils risqueraient de pénétrer dans le boîtier et d endommager irrémédiablement l appareil Veuillez lire la section Nettoyage après utilisation sous l eau à la page 43 Réglementation environnementale et informations sur la mise au rebut Les appareils portant ce symbole sont soumis à la directive europé...

Страница 91: ...ez à prendre les précautions nécessaires afin d éviter les courts circuits Avis de conformité Cet appareil ainsi que ses accessoires fournis ont été testés et certifiés conformes aux exigences de base et autres règlements de la directive sur la compatibilité électromagnétique 2004 108 EC et de la directive concernant les appareils basse tension 2006 95 EC en vigueur La Déclaration de conformité co...

Страница 92: ...eurs les piles rechargeables ou les pièces en verre Cette garantie est invalidée si le produit est endommagé est utilisé ou entretenu de manière inappropriée Pour assurer une utilisation conforme du produit toutes les instructions indiquées dans le mode d emploi doivent être soigneusement respectées Les utilisations et manipulations non conseillées dans le mode d emploi ou qui font l objet d un av...

Страница 93: ...ique en fonction de l origine de la panne Service technique Téléphone 01 712 302 83 E Mail service FR targa online com Téléphone 02 700 16 43 E Mail service BE targa online com Téléphone 800 24 14 3 E Mail service LU targa online com Téléphone 044 511 82 91 E Mail service CH targa online com IAN 79938 Fabricant Important l adresse suivante n est pas l adresse de notre service technique Contactez d...

Страница 94: ...bung 102 Wasserdichtheit 103 Hinweis zur Netztrennung 103 Kinder und Personen mit Einschränkungen 103 Ladegerät und Akku 104 Achtung Explosionsgefahr 104 Kabel 105 Bedienelemente 106 Vorderseite 106 Oberseite 106 Rückseite 106 Linke Seite 107 Rechte Seite 107 Unterseite 107 Vor der Inbetriebnahme 108 Aufladen des Akkus im Ladegerät 108 Aufladen des Akkus im Camcorder 110 Einlegen des Akkus 111 ...

Страница 95: ... Uhrzeit 120 Aufnahme 121 Aufnehmen von Videos 121 Das Display im Videobetrieb 122 Der Makromodus 124 Porträt Landschaftsaufnahmen 124 Aufnehmen von Fotos 124 Das Display im Fotobetrieb 125 Wiedergabe 126 Wiedergabe von Videos 126 Das Display im Video Wiedergabemodus 127 Wiedergabe von Fotos 129 Das Display im Foto Wiedergabemodus 130 Unterwasserbetrieb 131 Einstellungen für den Unterwasserbetrieb...

Страница 96: ...deomenü 142 Die Symbole des Videomenüs 142 Weißabgleich 143 Auflösung 144 Effekt 145 Qualität 145 Stabilisator 146 Videolampe 147 EV Belichtungskorrektur 148 Endlosaufnahme 149 Bewegungserkennung 150 Datumsaufdruck 151 Pre record 151 Zeitraffer Video 152 Das Videowiedergabemenü 153 Die Symbole des Videowiedergabemenüs 153 Eine Videoaufnahme löschen 153 Alle Videoaufnahmen löschen 154 Eins schützen...

Страница 97: ... Eins schützen 162 Alles schützen 162 Diashow 162 DPOF eins 162 DPOF alle 163 Anschlüsse 164 Aufnahmen über ein Fernsehgerät ansehen 164 Anschluss über das HDMI Kabel 164 Anschluss über das USB AV Kabel 165 Aufnahmen auf einen Computer überspielen 165 Verwenden des USB Anschlusses 166 Verwenden eines Kartenlesers 167 Die Software 167 Systemanforderungen 167 Die Software installieren 168 Die Softwa...

Страница 98: ...leiste 173 Importieren 173 Video Zusammenfügung 173 AVCHD Disk erstellen 174 Videoclips schneiden 175 Hochladen auf YouTube 175 Hochladen auf Facebook 175 Fotoalbum 176 Albumseite 176 Fehlerbehebung 177 Wartung Reinigung 178 Wartung 178 Reinigung 178 Umwelthinweise und Entsorgungsangaben 178 Konformitätsvermerke 179 Hinweise zu Garantie und Serviceabwicklung 179 ...

Страница 99: ...bar ist Der Camcorder ist hervorragend für den mobilen Einsatz geeignet So können Sie jederzeit schöne Erlebnisse festhalten Bestimmungsgemäße Verwendung Der Camcorder ist ein Gerät der Unterhaltungstechnik und dient ausschließlich der Aufnahme und Wiedergabe von Videos und Fotos Jede andere Verwendung ist nicht bestimmungsgemäß Das Gerät darf nur zu privaten und nicht zu industriellen und kommerz...

Страница 100: ...W 5 00 B2 Ladegerät HWAN CHYUN ENTERPRISE CO LTD DJ04V20500A 2 Stück Akku FUJI Electronics Shenzhen Co Ltd CA NP 40 Netzkabel USB AV Kabel HDMI Kabel SD Speicherkarte 4GB ohne Abbildung CD Rom ohne Abbildung Tasche ohne Abbildung Bedienungsanleitung ohne Abbildung ...

Страница 101: ...x240 WVGA 30fps 848x480 WVGA 60fps 848x480 720p 30fps 1280x720 720p 60fps 1280x720 1080p 30fps 1920 x 1080 Digitalzoom im Fotobetrieb 10 fach bis zu Faktor 2 fach verlustfrei danach herkömmlicher Digitalzoom Digitalzoom im Videobetrieb 10 fach bis zu Faktor 2 fach verlustfrei danach herkömmlicher Digitalzoom bei 1080p nur 8 fach herkömmlicher Digitalzoom Dateiformat Video H 264 als AVI Foto JPEG W...

Страница 102: ...7 V 1200 mAh Hersteller FUJI Electronics Shenzhen Co Ltd Ladegerät Hersteller HWAN CHYUN ENTERPRISE CO LTD Modell DJ04V20500A Eingangsspannung 100 240 V 50 60Hz 0 07A Ausgangsspannung 4 2 V 500 mA Betriebstemperatur 0 C 35 C Betriebsluftfeuchtigkeit max 85 rel Feuchte Mikrofon Integriert Lautsprecher Integriert Abmessungen 55 x 67 5 x 121 mm B x H x T ohne Handschlaufe Gewicht ca 289g ohne Akku Än...

Страница 103: ...und Reparaturen dürfen nur von qualifiziertem Fachpersonal durchgeführt werden Visieren Sie nicht die Sonne oder andere intensive Lichtquellen an Anderenfalls können Sie Ihre Augen schädigen Lösen Sie das Blitzlicht niemals in der Nähe der Augen von Personen oder Tieren aus Dies gilt insbesondere für Kinder Das Blitzlicht stellt eine Gefahr für das Augenlicht dar Halten Sie einen Mindestabstand vo...

Страница 104: ...n beschädigt werden das Akku Speicherkartenfach sowie die Abdeckung der Anschlüsse niemals unter Wasser geöffnet wird Hierdurch kann das Gerät sowie bereits gespeicherte Bilddaten beschädigt werden Betriebsumgebung Dieses Gerät kann bei Temperaturen von 0 C bis 35 C benutzt werden Halten Sie das Gerät und sein Zubehör von Staub Hitze und direkter Sonneneinstrahlung fern und vermeiden Sie Vibration...

Страница 105: ...l aus der Netzsteckdose Die Netzsteckdose an die das Gerät angeschlossen ist muss leicht zugänglich sein damit Sie das Netzkabel im Notfall umgehend herausziehen können Ziehen Sie vor einem anstehenden Gewitter oder wenn Sie das Gerät über einen längeren Zeitraum nicht verwenden z B wenn Sie in den Urlaub fahren das Netzkabel aus der Netzsteckdose um die Gefahr von Bränden zu vermeiden Fassen Sie ...

Страница 106: ... mit einem baugleichen oder vom Hersteller empfohlenen Typ Tauschen Sie die Akkus niemals in einer potentiell explosionsgefährdeten Umgebung aus Während des Einsetzens oder Entfernens der Akkus kann es zu einem Funkenschlag kommen und eine Explosion verursachen Explosionsgefährdete Bereiche sind oft aber nicht immer eindeutig ausgewiesen Dazu zählen Tankbereiche wie z B unter Deck bei Booten Kraft...

Страница 107: ...bel und achten Sie darauf dass diese nicht geknickt werden insbesondere am Stecker und an den Anschlussbuchsen Machen Sie niemals einen Knoten in ein Kabel und binden Sie es nicht mit anderen Kabeln zusammen Alle Kabel sollten so gelegt werden dass niemand darauf tritt oder behindert wird Ein beschädigtes Netzkabel kann einen Brand oder elektrischen Schlag verursachen Prüfen Sie das Netzkabel von ...

Страница 108: ...utsch Bedienelemente Vorderseite 1 Objektiv 2 LED Licht Oberseite 3 Zoom Lautstärketaste 4 Mikrofon Rückseite 5 Betriebsleuchte 6 Navigations Tasten 7 Aufnahme Taste Auslöser 8 Tauchmodus Taste 9 HDMI Ausgang USB AV und Ladeanschluss ...

Страница 109: ...schalter 11 Handschlaufe Rechte Seite 12 Ein Aus Taste 13 Wiedergabe Taste PLAYBACK 14 Menü Taste MENU 15 Modus Taste MODE 16 Display Taste DISP 17 Display Unterseite 18 Stativanschluss 19 Akku Speicherkarten fach 20 Entriegelung Akku Speicherkartenfach LOCK ...

Страница 110: ...t dieser Akku nicht aufgeladen Bitte laden Sie den Akku vor dem ersten Gebrauch des Gerätes auf Verwenden Sie für den Betrieb der Kamera nur den wieder aufladbaren Lithium Ionen Akku FUJI Electronics Shenzhen Co Ltd CA NP 40 Aufladen des Akkus im Ladegerät Legen Sie den Akku in das Ladegerät sodass die Kontaktbezeichnungen und auf dem Akku und am Ladegerät übereinstimmen ...

Страница 111: ...rwärmen sich Akku und Ladegerät Dies stellt keine Fehlfunktion dar Die Kontrollleuchte an der Ladeschale leuchtet orange solange der Akku geladen wird Wenn der Ladevorgang abgeschlossen ist leuchtet die Kontrollleuchte grün Sie können den Akku dann entnehmen und in den Camcorder einsetzen Abhängig vom Ladepegel des Akkus dauert der Ladezyklus bis zu 3 Stunden Falls nach dem Einlegen des Akkus die ...

Страница 112: ...te 12 um den Camcorder auszuschalten Die Betriebsleuchte 5 leuchtet während des Ladevorgangs orange Wenn der Ladevorgang abgeschlossen ist erlischt die Betriebsleuchte Manche Computer schalten die Spannungsversorgung der USB Anschlüsse ab wenn sie ausgeschaltet sind Wenn die Betriebsleuchte des Camcorders nicht aufleuchtet stellen Sie sicher dass Ihr Computer eingeschaltet ist Zusätzlich zu den zu...

Страница 113: ...sen Sie vor dem Öffnen der Abdeckung des Akku Speicherkartenfach unbedingt warten bis der Camcorder vollständig getrocknet ist Halten Sie beim Öffnen der Abdeckung ein saugfähiges Tuch bereit und entfernen Sie damit Wasser und Schmutz rund um die Abdeckungen Das Akku Speicherkartenfach 19 öffnet sich sodass Sie den Akku hineinlegen können Achten Sie darauf dass die Kontaktbezeichnungen und auf dem...

Страница 114: ...Sie es nieder bis die Verriegelung hörbar einrastet Überprüfen Sie dass das Akku Speicherkartenfach 19 richtig verschlossen ist um sicherzustellen dass das Gerät wasserdicht ist richtig verschlossen nicht richtig verschlossen Einlegen einer Speicherkarte Durch die mitgelieferte SD Speicherkarte erhöhen Sie den Speicherplatz des Camcorders um Ihre Videos und Fotos zu speichern Wenn eine Speicherkar...

Страница 115: ...enfach 19 in Pfeilrichtung nach links schieben siehe Abbildung Wenn der Camcorder unter Wasser betrieben wurde müssen Sie vor dem Öffnen der Abdeckung des Akku Speicherkartenfach unbedingt warten bis der Camcorder vollständig getrocknet ist Halten Sie beim Öffnen der Abdeckung ein saugfähiges Tuch bereit und entfernen Sie damit Wasser und Schmutz rund um die Abdeckungen Legen Sie dann eine Speiche...

Страница 116: ...kku Speicherkartenfach 19 zu und drücken Sie es nieder bis die Verriegelung hörbar einrastet Überprüfen Sie dass das Akku Speicherkartenfach 19 richtig verschlossen ist um sicherzustellen dass das Gerät wasserdicht ist richtig verschlossen nicht richtig verschlossen Bei voller Speicherkarte oder vollem internen Speicher wird die Meldung Speicher voll auf dem Display 17 angezeigt Das gegenwärtig au...

Страница 117: ...st siehe rechte Abbildung unten können Sie bestehende Videos und Fotos nur ansehen jedoch nicht löschen oder bearbeiten Auch neue Videos und Fotos können auf der Karte nicht mehr abgespeichert werden Schreibschutz deaktiviert Schreibschutz aktiviert Wenn eine Speicherkarte mit aktiviertem Schreibschutz eingelegt wird erscheint auf dem Display 17 die Meldung SD Karte ist geschützt ...

Страница 118: ...edarf in die gewünschte Position Ist das Display 17 im 90 Winkel geöffnet kann dieses in beide Richtungen gedreht werden Sie können das Display 17 auch nach vorne drehen die Orientierung der Displayanzeige bzw Bildausrichtung wird dabei automatisch angepasst Das um 180 gedrehte Display lässt sich an das Kameragehäuse klappen ...

Страница 119: ...r linken rechten Navigationstaste können Sie im Menü Elemente auszuwählen Drücken Sie die mittlere Navigationstaste um die Auswahl zu bestätigen Im Video Fotomodus verwenden Sie die hoch runter Tasten um die Belichtungs korrektur EV einzustellen Drücken Sie die mittlere Navigationstaste um Ihre Auswahl zu bestätigen Aufnahme Taste 7 Im Videomodus wird durch Drücken dieser Taste eine Aufnahme gesta...

Страница 120: ... Sie die Ein Aus Taste 12 um den Camcorder einzuschalten Die Betriebsleuchte 5 leuchtet grün Drücken Sie die Ein Aus Taste 12 um den Camcorder abzuschalten Die Betriebsleuchte 5 erlischt Beim Aufklappen des Displays 17 schaltet sich der Camcorder automatisch ein Wenn der Deckel wieder geschlossen wird schaltet das Gerät ab sofern keine Videoaufzeichnung läuft In der folgenden Tabelle finden Sie ei...

Страница 121: ...len der Menüsprache Klappen Sie das Display 17 des Camcorders auf Das Gerät schaltet sich automatisch ein Drücken Sie die Modus Taste 15 zweimal Daraufhin erscheint das Einrichtungsmenü Setup Das erste Symbol Sprache ist markiert Drücken Sie die mittlere Navigationstaste 6 um die Auswahl zu bestätigen Wählen Sie mit der rechten bzw linken Navigationstaste 6 die gewünschte Menüsprache aus Drücken S...

Страница 122: ...en Sie die mittlere Navigationstaste 6 um die Auswahl zu bestätigen Sie können nun das Jahr einstellen Stellen Sie mit den hoch runter Navigationstasten 6 den gewünschten Wert ein Drücken Sie rechte Navigationstaste 6 um zwischen Jahr Monat Tag Stunde und Minute umzuschalten Beachten Sie dass die Uhrzeit im 24 Stunden Format eingegeben werden muss Jeden einzelnen Wert Jahr Monat Tag Stunde und Min...

Страница 123: ...das Motiv wieder verkleinert Während der Aufnahme können Sie durch Drücken der Wiedergabe Taste 13 bis zu 3 Fotos Momentaufnahmen aufnehmen Sie können eine Videoaufnahme durch Drücken der Menü Taste 14 pausieren und durch erneutes Drücken fortsetzen Drücken Sie die Aufnahme Taste 7 um die Aufnahme zu stoppen Die Betriebsleuchte 5 leuchtet danach dauerhaft grün Während der Aufnahme können auf dem D...

Страница 124: ...4 Nr Symbol Beschreibung 21 Zoomanzeige 22 freier Speicherplatz Angabe in verwendeter Speicher 23 Anzahl der gespeicherter Aufnahmen Anzahl aufgezeichneter Momentaufnahmen 1 24 Videoqualität 25 Datumsaufdruck 26 Endlosaufnahme Pre record Zeitraffer Video 27 Bewegungserkennung 28 Aufnahmezeit 29 Belichtungskorrektur ...

Страница 125: ...uflösung 31 Akkukapazität 32 Makromodus 33 Videolampe 34 Stabilisator 35 Effekt 36 Weißabgleich 37 Betriebsart Videomodus Die Symbole können sich je nach gewählter Einstellung verändern 1 Die Anzahl der Momentaufnahmen wird nur während einer Videoaufnahme angezeigt ...

Страница 126: ...n Fotomodus zu gelangen drücken Sie Modus Taste 15 einmal Über den Makroschalter 10 können Sie zwischen Nahaufnahmen Makromodus und Porträt Landschaftsaufnahmen umschalten Bei Bedarf können Sie über die Zoom Lautstärketaste 3 den Bildausschnitt vergrößern bzw verkleinern Mit der Zoom Taste T Tele das Motiv vergrößert und mit der Zoom Taste W Wide das Motiv wieder verkleinert Drücken Sie die Aufnah...

Страница 127: ... 48 44 Nr Symbol Beschreibung 41 Zoomanzeige 42 freier Speicherplatz Angabe in verwendeter Speicher 43 Anzahl der gespeicherter Aufnahmen verbleibende Aufnahmen 44 Bildqualität 45 Datumsaufdruck 46 Sequenzaufnahme 47 Gesichtserfassung 48 Selbstauslöser 49 Belichtungskorrektur 50 Auflösung 51 Akkukapazität ...

Страница 128: ...plays 17 zeigt Ihnen an dass Sie sich im Video Wiedergabemodus befinden Ein erneuter Druck auf die Wiedergabe Taste 13 wechselt zum Videomodus zurück Im Wiedergabemodus werden auf dem Display 17 verschiedene Symbole dargestellt die Ihnen Auskunft über aktuelle Einstellungen geben Durch Drücken der Display Taste 16 können die Symbole ein ausgeblendet werden Wird die Display Taste gedrückt werden zu...

Страница 129: ...lay im Video Wiedergabemodus 65 61 62 63 64 Nr Symbol Beschreibung 61 Wiedergabemodus 62 verstrichene Zeit Gesamtzeit Länge der Aufnahme 63 freier Speicherplatz Angabe in verwendeter Speicher 64 aktuelle Videonummer Videos insgesamt 65 Dateischutz ...

Страница 130: ...hrend der Wiedergabe eines Videos stehen folgende weitere Funktionen zur Verfügung Drücken Sie die Menü Taste 14 um die Wiedergabe zu pausieren Durch erneutes Drücken der Menü Taste 14 wird die Wiedergabe fortgesetzt Zum Zurück bzw Vorspulen drücken Sie auf die linke bzw rechte Navigationstaste 6 und halten Sie diese einen kurzen Moment gedrückt Durch erneutes Drücken können Sie die Geschwindigkei...

Страница 131: ... Im Wiedergabemodus haben Sie die Möglichkeit mit der rechten bzw linken Navigationstaste 6 ein Foto auszuwählen Mit der Zoom Lautstärketaste 3 können Sie sich zur Auswahl eine Übersicht mit 4 bzw 9 Bildern anzeigen lassen indem Sie die Zoom Taste W Wide ein bzw zweimal drücken In dieser Übersicht können Sie nun über die Navigationstaste 6 ein Bild auswählen Das ausgewählte Bild ist rot umrandet D...

Страница 132: ...30 Deutsch Das Display im Foto Wiedergabemodus 75 71 72 73 74 Nr Symbol Beschreibung 71 Fotowiedergabe 72 freier Speicherplatz Angabe in verwendeter Speicher 73 aktuelle Fotonummer Fotos insgesamt 74 Akkukapazität 75 Dateischutz ...

Страница 133: ... nutzen Stellen Sie sicher dass der Camcorder keine Beschädigungen aufweist Überprüfen Sie dass das Akku Speicherkartenfach 19 sowie die Abdeckung der Anschlüsse 9 richtig verschlossen sind und sich kein Schmutz oder Sand zwischen den Abdeckungen befindet So stellen Sie sicher dass das Gerät wasserdicht ist richtig verschlossen nicht richtig verschlossen ...

Страница 134: ...t maximal 60 Minuten lang unter Wasser Verwenden Sie den Camcorder nur bei Wassertemperaturen im Bereich von 0 bis 40 C Die Eigenschaft der Wasserdichtheit dieses Camcorders bezieht sich nur auf Süß und Salzwasser sie gilt nicht bei Reinigungssubstanzen Chemikalien oder Wasser aus Badeanstalten etc Derartige Flüssigkeiten müssen umgehend vom Gerät abgewischt werden Vermeiden Sie übermäßige Erschüt...

Страница 135: ... Reinigung nach Unterwasserbetrieb Der Camcorder muss nach jedem Unterwassereinsatz gereinigt werden Stellen Sie sicher dass der Camcorder keine Beschädigungen aufweist Nach der Aufnahme unter Wasser reinigen Sie den Camcorder mit Leitungswasser Tauchen Sie den Camcorder dazu max 10 Minuten lang in Leitungswasser um z B Salzrückstände zu entfernen Trocknen Sie den Camcorder und das Objektiv mit ei...

Страница 136: ...Markierte Symbole werden animiert dargestellt Das Einrichtungsmenü Im Einrichtungsmenü können Sie die grundlegenden Eigenschaften des Camcorders einrichten Klappen Sie das Display 17 des Camcorders auf Das Gerät schaltet sich automatisch ein Drücken Sie die Modus Taste 15 zweimal Daraufhin erscheint das Einrichtungsmenü Wenn Sie alle gewünschten Änderungen vorgenommen haben drücken Sie die Modus T...

Страница 137: ...instellung Standardeinst Wiederherstellung des Auslieferungsstands Werkseinstellung Automatische Abschaltung Auto Strom aus Zur Auswahl einer automatischen Abschaltzeit Frequenz Einstellen der Netzfrequenz Fernsehnorm TV Standard Wahl des TV Standards Signalton Schaltet Signaltöne ein oder aus Information Informationen zu gespeicherten Fotos Videos sowie zum Speicherplatz HDMI Standard Wahl des HD...

Страница 138: ...rechten bzw linken Navigationstaste 6 das Symbol aus Drücken Sie die mittlere Navigationstaste 6 um die Auswahl zu bestätigen Sie können nun das Jahr einzustellen Stellen Sie mit den hoch runter Navigationstasten 6 den gewünschten Wert ein Drücken Sie rechte Navigationstaste 6 um zwischen Jahr Monat Tag Stunde und Minute umzuschalten Beachten Sie dass die Uhrzeit im 24 Stunden Format eingegeben we...

Страница 139: ...ne eingelegt ist Der interne Speicher wird nur formatiert wenn keine Speicherkarte eingelegt ist Zeigt an dass die SD Karte formatiert wird Zeigt an dass der interne Speicher formatiert wird Folgende Einstellungen stehen zur Verfügung Nimmt keine Formatierung vor Formatiert das angezeigte Medium Wählen Sie mit der rechten bzw linken Navigationstaste 6 die gewünschte Einstellung aus Drücken Sie die...

Страница 140: ...Um Energie zu sparen können Sie das Gerät nach vorbestimmter Zeit abschalten lassen Wenn für die eingestellte Zeit keine Bedienung vorgenommen wird schaltet das Gerät selbstständig aus Mit der Ein Aus Taste 12 können Sie den Camcorder dann wieder einschalten Wählen Sie mit der rechten bzw linken Navigationstaste 6 das Symbol aus Drücken Sie die mittlere Navigationstaste 6 um die Auswahl zu bestäti...

Страница 141: ...vigationstaste 6 die gewünschte Einstellung aus Drücken Sie die mittlere Navigationstaste 6 um die Auswahl zu bestätigen Fernsehnorm Unterscheiden Sie zwischen den Fernsehnormen PAL und NTSC NTSC ist der Standard in Amerika und Japan PAL wird in den Ländern Europas verwendet Diese Auswahl betrifft lediglich die Wiedergabe mit dem Video Kabel Wählen Sie mit der rechten bzw linken Navigationstaste 6...

Страница 142: ... bzw linken Navigationstaste 6 die gewünschte Einstellung aus Drücken Sie die mittlere Navigationstaste 6 um die Auswahl zu bestätigen Information Es werden Ihnen Informationen zum Speicherplatz angezeigt Gezeigt wird die Anzahl gespeicherter Fotos Videos sowie Informationen zum Speicherplatz des internen Speichers bzw der SD Karte Wählen Sie mit der rechten bzw linken Navigationstaste 6 das Symbo...

Страница 143: ...Karte an Um die Ansicht zu verlassen drücken Sie die Menü Taste 14 HDMI Standard Wählen Sie den HDMI Standard aus welchen Sie verwenden möchten Wählen Sie mit der rechten bzw linken Navigationstaste 6 das Symbol aus Drücken Sie die mittlere Navigationstaste 6 um die Auswahl zu bestätigen Folgende Einstellungen stehen zur Verfügung 720P 1080i Wählen Sie mit der rechten bzw linken Navigationstaste 6...

Страница 144: ...tät Stabilisator Schaltet den Stabilisator ein bzw aus Videolampe Schaltet die Videolampe ein bzw aus EV Belichtungskorrektur Auswahl der Belichtungskorrektur Endlosaufnahme Schaltet die Endlosaufnahme ein bzw aus Bewegungserkennung Wird die Funktion aktiviert nimmt der Camcorder sobald dieser eine Bewegung erkennt ein Video auf Datumsaufdruck Schaltet den Datumsaufdruck ein bzw aus Pre record Die...

Страница 145: ...n bzw linken Navigationstaste 6 das Symbol aus Drücken Sie die mittlere Navigationstaste 6 um die Auswahl zu bestätigen Folgende Einstellungen stehen zur Verfügung Automatik Tageslicht Bewölkung Leuchtstofflampe Glühlampe Wählen Sie mit der rechten bzw linken Navigationstaste 6 die gewünschte Einstellung aus Drücken Sie die mittlere Navigationstaste 6 um die Auswahl zu bestätigen Der Weißabgleich ...

Страница 146: ... fps Mittlere Auflösung mit 848 x 480 Bildpunkten Bildwiederholrate von 30 Bildern pro Sekunde fps Mittlere Auflösung mit 848 x 480 Bildpunkten Bildwiederholrate von 60 Bildern pro Sekunde fps Hohe Auflösung mit 1280 x 720 Bildpunkten und einer hohen Bildwiederholrate von 30 Bildern pro Sekunde fps Hohe Auflösung mit 1280 x 720 Bildpunkten und einer hohen Bildwiederholrate von 60 Bildern pro Sekun...

Страница 147: ... um die Auswahl zu bestätigen Die Einstellung Sepia erzeugt ein Schwarz Weiß Bild mit einem bräunlichen Farbton Damit wird die Aufnahme künstlich gealtert Qualität Mit der Einstellung der Qualität bestimmen Sie den Grad der Komprimierung des erstellten Videos auf der Speicherkarte bzw im internen Speicher Mit hoher Komprimierung Normale Qualität können Sie daher mehr bzw längere Videos speichern D...

Страница 148: ... Ist der Stabilisator aktiviert verringern Sie das Verwackeln einer Aufnahme Wählen Sie mit der rechten bzw linken Navigationstaste 6 das Symbol aus Drücken Sie die mittlere Navigationstaste 6 um die Auswahl zu bestätigen Folgende Einstellungen stehen zur Verfügung Schaltet den Stabilisator aus Schaltet den Stabilisator ein Wählen Sie mit der rechten bzw linken Navigationstaste 6 die gewünschte Ei...

Страница 149: ... zur Verfügung Schaltet das LED Licht 2 aus Schaltet das LED Licht 2 ein Aktiviert den Nachtmodus Hierbei wird die Lichtempfindlichkeit des Camcorders zusätzlich erhöht Wählen Sie mit der rechten bzw linken Navigationstaste 6 die gewünschte Einstellung aus Drücken Sie die mittlere Navigationstaste 6 um die Auswahl zu bestätigen Die Videolampe kann auch direkt über die rechte Navigationstaste 6 im ...

Страница 150: ...ter Computerbildschirm oder Fernsehgerät oder wenn Sie bei Gegenlicht z B einfallendes Sonnenlicht aufnehmen möchten Wählen Sie mit der rechten bzw linken Navigationstaste 6 das Symbol aus Drücken Sie die mittlere Navigationstaste 6 um die Auswahl zu bestätigen Stellen Sie mit den hoch runter Navigationstasten 6 den gewünschten Wert 2 0 2 0 ein Drücken Sie die mittlere Navigationstaste 6 um die Au...

Страница 151: ...Navigationstaste 6 die gewünschte Einstellung aus Drücken Sie die mittlere Navigationstaste 6 um die Auswahl zu bestätigen Nach 10 Minuten wird automatisch eine neue Datei erzeugt Die Daten werden automatisch überschrieben wenn die Speicherkarte bzw der interne Speicher voll ist Die ältesten Daten werden zuerst überschrieben Falls Sie aufgenommene Daten nicht löschen bzw überschreiben wollen denke...

Страница 152: ...iviert die Bewegungserkennung mit mittlerer Empfindlichkeit Aktiviert die Bewegungserkennung mit hoher Empfindlichkeit Wählen Sie mit der rechten bzw linken Navigationstaste 6 die gewünschte Einstellung aus Drücken Sie die mittlere Navigationstaste 6 um die Auswahl zu bestätigen Schließen Sie ein externes USB Netzteil nicht im Lieferumfang enthalten an wenn Sie diese Funktion aktivieren und über e...

Страница 153: ...wünschte Einstellung aus Drücken Sie die mittlere Navigationstaste 6 um die Auswahl zu bestätigen Ist der Datumsaufdruck aktiviert kann dieser nachträglich aus der Aufnahme nicht entfernt werden Überprüfen Sie daher vor der Aufnahme ob Datum und Uhrzeit korrekt eingestellt sind Pre record Ist diese Funktion aktiviert werden bereits die 3 Sekunden aufgezeichnet bevor die Aufnahme Taste 7 zum Start ...

Страница 154: ... Deaktiviert die Aufnahme im Zeitraffer Es wird jede Sekunde ein Bild aufgezeichnet Es wird immer nur nach 5 Sekunden ein Bild aufgezeichnet Es wird nur alle 30 Sekunden ein Bild aufgezeichnet Wählen Sie mit der rechten bzw linken Navigationstaste 6 die gewünschte Einstellung aus Drücken Sie die mittlere Navigationstaste 6 um die Auswahl zu bestätigen Schließen Sie ein externes USB Netzteil nicht ...

Страница 155: ...öschen Alle Videoaufnahmen schützen Schutz vor versehentlichem Löschen Eine Videoaufnahme löschen Verwenden Sie diese Option um ein einzelnes Video zu löschen Achtung Wenn eine Aufnahme gelöscht ist kann sie nicht wiederhergestellt werden Wählen Sie mit der rechten bzw linken Navigationstaste 6 das Symbol aus Drücken Sie die mittlere Navigationstaste 6 um die Auswahl zu bestätigen Wählen Sie mit d...

Страница 156: ...n Videoaufzeichnungen löschen Aufgenommene Fotos bleiben von diesem Löschvorgang unberührt Achtung Gelöschte Aufnahmen können nicht wiederhergestellt werden Wählen Sie mit der rechten bzw linken Navigationstaste 6 das Symbol aus Drücken Sie die mittlere Navigationstaste 6 um die Auswahl zu bestätigen Folgende Einstellungen stehen zur Verfügung Nimmt keine Änderungen vor Löscht alle Videoaufnahmen ...

Страница 157: ...wird mit dem Symbol auf dem Display 17 gekennzeichnet Alles schützen Hier können Sie alle Aufnahmen schützen um ein versehentliches Löschen auszuschließen Wählen Sie mit der rechten bzw linken Navigationstaste 6 das Symbol aus Drücken Sie die mittlere Navigationstaste 6 um die Auswahl zu bestätigen Folgende Einstellungen stehen zur Verfügung Nimmt keine Änderungen vor Schützt alle Videoaufnahmen H...

Страница 158: ...gationstaste 6 um die Auswahl zu bestätigen Folgende Einstellungen stehen zur Verfügung Deaktiviert die Diashow Funktion Aktiviert die Diashow Funktion Wählen Sie mit der rechten bzw linken Navigationstaste 6 die gewünschte Einstellung aus Drücken Sie die mittlere Navigationstaste 6 um die Auswahl zu bestätigen Durch Drücken der Menü Taste 14 können Sie die Wiedergabe pausieren und durch Drücken d...

Страница 159: ...ilisator Schaltet den Stabilisator ein bzw aus Sequenzenaufnahme Schaltet die Sequenzenaufnahme ein bzw aus Selbstauslöser Verzögerung der Aufnahmefunktion Datumsaufdruck Schaltet den Datumsaufdruck ein bzw aus Gesichtserfassung Schaltet die Gesichtserfassung ein bzw aus Die Einstellungsmöglichkeiten im Fotomodus sind in vielen Funktionen identisch mit den Einstellungen im Videomodus Siehe Kapitel...

Страница 160: ...280 x 960 Mittlere Auflösung von 1920 x 1080 Mittlere Auflösung von 2592 x 1944 Höhere Auflösung von 3648 x 2052 interpoliert Hohe Auflösung von 4616 x 3462 interpoliert Wählen Sie mit der rechten bzw linken Navigationstaste 6 die gewünschte Einstellung aus Drücken Sie die mittlere Navigationstaste 6 um die Auswahl zu bestätigen Sequenzaufnahme Mit dieser Funktion können Sie drei aufeinander folge...

Страница 161: ...ahme nach Drücken der Aufnahme Taste 7 um die eingestellte Zeit Damit haben Sie die Möglichkeit sich selbst zum Motiv zu bewegen z B für eine Gruppenaufnahme Wählen Sie mit der rechten bzw linken Navigationstaste 6 das Symbol aus Drücken Sie die mittlere Navigationstaste 6 um die Auswahl zu bestätigen Folgende Einstellungen stehen zur Verfügung Keine Selbstauslöserfunktion Das Bild wird 2 Sekunden...

Страница 162: ...Navigationstaste 6 um die Auswahl zu bestätigen Ist der Datumsaufdruck aktiviert kann dieser nachträglich aus der Aufnahme nicht entfernt werden Überprüfen Sie daher vor der Aufnahme ob Datum und Uhrzeit korrekt eingestellt sind Gesichtserfassung Diese Funktion erkennt Gesichter und optimiert die Aufnahme entsprechend Wählen Sie mit der rechten bzw linken Navigationstaste 6 das Symbol aus Drücken ...

Страница 163: ...hützen Schutz vor versehentlichem Löschen Alle Fotos schützen Schutz vor versehentlichem Löschen Autom Wiedergabe Alle Fotos hintereinander anzeigen lassen Druckeigenschaften für ein Foto festlegen Legen Sie die Anzahl der Ausdrucke für ein Foto fest Druckeigenschaften für alle Fotos festlegen Legen Sie die Anzahl der Ausdrucke für alle Fotos fest Ein Foto löschen Hier können Sie ein einzelnes Fot...

Страница 164: ...56 DPOF eins DPOF Digital Print Order Format ermöglicht es Ihnen ein Foto auszuwählen und im Voraus mit dem Camcorder die Anzahl der zu druckenden Kopien festzulegen Wählen Sie mit der rechten bzw linken Navigationstaste 6 das Symbol aus Drücken Sie die mittlere Navigationstaste 6 um die Auswahl zu bestätigen Wählen Sie mit der rechten bzw linken Navigationstaste 6 das gewünschte Foto aus Drücken ...

Страница 165: ...en Kopien auf alle Fotos anzuwenden bzw die hinterlegten Einstellungen für alle Fotos zu löschen Wählen Sie mit der rechten bzw linken Navigationstaste 6 das Symbol aus Drücken Sie die mittlere Navigationstaste 6 um die Auswahl zu bestätigen Folgende Einstellungen stehen zur Verfügung Nimmt keine Änderungen vor Löscht die hinterlegten Einstellungen für alle Fotos Übernimmt die zuvor eingestellte A...

Страница 166: ...uss dazu über einen passenden Videoeingang verfügen Abhängig von den Anschlussmöglichkeiten Ihres Fernsehgerätes können Sie das USB AV Kabel oder das HDMI Kabel verwenden Das HDMI Kabel übermittelt digitale Bild und Tonsignale und liefert die beste Qualität Bedienen Sie das Gerät in gewohnter Weise Aktivieren Sie z B das automatische Abspielen Diashow um automatisch alle Bilder anzeigen zu lassen ...

Страница 167: ... Es können keine Daten vom Computer auf den Camcorder übertragen werden Die Kopierfunktion gestattet nur das Übertragen der Daten vom Camcorder zum Computer Vorsicht beim Umbenennen der Verzeichnisse und Dateien Verändern Sie Verzeichnis oder Dateinamen des Gerätes nicht mit einem Computer Andernfalls können die darauf enthaltenen Dateien unter Umständen nicht mehr mit dem Camcorder wiedergegeben ...

Страница 168: ...rest SCAW 5 00 B2 166 Deutsch Verwenden des USB Anschlusses Schließen Sie den Camcorder über das mitgelieferte USB Kabel an Ihren Computer an wie es auf der Skizze abgebildet ist Schalten Sie den Camcorder ein ...

Страница 169: ...talliert ist Öffnen Sie den Arbeitsplatz auf Ihrem Computer und führen einen Doppelklick auf das Laufwerk des Kartenlesegerätes aus Innerhalb des Laufwerks sind alle Aufnahmen in einem Unterordner des Verzeichnisses DCIM abgelegt Kopieren Sie jetzt Aufnahmen vom Camcorder in ein Verzeichnis Ihrer Wahl auf die Festplatte des Computers Die Software Mit der beigelegten Software können Sie die erstell...

Страница 170: ...zu verbinden Schalten Sie den Camcorder dann ein Legen Sie die beigelegte CD Rom in das CD oder DVD Laufwerk Ihres Computers ein Die CD startet automatisch Folgen Sie den Anweisungen um die Installation durchzuführen Sollte der automatische Start der Installation nicht funktionieren oder versehentlich abgebrochen sein starten Sie die Datei TotalMedia HDCam exe manuell Die Software deinstallieren U...

Страница 171: ...Software verändern Klicken Sie im Hauptfenster Options Optionen Preferences Voreinstellungen Wählen Sie eine Sprache aus der Liste aus und bestätigen Sie dann durch Klicken auf OK Die Software meldet dass ein Neustart erforderlich ist Bestätigen Sie die Meldung mit OK Starten Sie dann die Anwendung erneut Aufnahmen bearbeiten Aufnahmen betrachten Verwenden Sie das USB Verbindungskabel um den Camco...

Страница 172: ...ter anzuzeigen führen Sie einen Doppelklick darauf aus In dem Anzeigefenster können Sie durch Klicken auf die Pfeilsymbole oder mit den Pfeiltasten der Tastatur die nächste oder vorhergehende Aufnahme aufrufen Um eine Videoaufnahme anzusehen führen Sie einen Doppelklick darauf aus Im Videofenster stehen die Symbole Stopp Wiedergabe und Pause zur Verfügung Mit den Pfeilsymbolen oder mit den Pfeilta...

Страница 173: ...ie von dem ausgewählten Laufwerk importieren möchten und klicken dann auf Importieren in der Symbolleiste am unteren Fensterrand Es erscheint ein Fenster mit Abfrage Um die ausgewählten Aufnahmen zu importieren wählen Sie die Option Ausgewählte Szenen importieren Sie können optional alle oder nur alle neuen Aufnahmen importieren Geben Sie bei Bedarf einen Ordnernamen ein oder belassen Sie den vorg...

Страница 174: ...es Computers aufgelistet Dadurch können Sie z B Aufnahmen eines CD Rom Laufwerks aufrufen Das Vorschaufenster Im Vorschaufenster haben Sie mehrere Möglichkeiten die Aufnahmen zu sortieren oder zu bearbeiten Zeigt alle Aufnahmen in der Reihenfolge der Bewertung an Zeigt alle Aufnahmen an die noch nicht importiert wurden Hier können Sie unterscheiden ob Sie nur Fotos nur Videoaufnahmen oder alle Auf...

Страница 175: ...nladungskarte aus Ihren Fotos Das Symbol mit dem Titel YouKu verweist auf ein asiatisches Videoportal und ist für die Nutzung in europäischen Ländern nicht geeignet Importieren Siehe Seite 171 Aufnahmen importieren Video Zusammenfügung Mit der Video Zusammenfügung können Sie mehrere Videoclips zu einem Film zusammenfassen Klicken Sie auf das Symbol Video Zusammenfügung um die Zeitleiste für die Vi...

Страница 176: ... Disks Legen Sie eine DVD R DVD R DL DVD RW oder eine DVD RAM Disk in Ihr DVD Laufwerk Klicken Sie auf das Symbol AVCHD Disk erstellen um den Arbeitsbereich für die Disk Zusammenstellung aufzurufen Ziehen Sie alle gewünschten Videoclips mit gehaltener linker Maustaste in die Zeitleiste am unteren Fensterrand Klicken Sie auf die Schaltfläche Nächste um den Prozess zu starten Wählen Sie das Laufwerk...

Страница 177: ... ein neuer Clip ohne den Ausschnitt erzeugt Hochladen auf YouTube Klicken Sie auf das Symbol Hochladen auf YouTube Ziehen Sie die gewünschte Videoaufnahme mit gehaltener linker Maustaste in die Leiste am unteren Fensterrand Klicken Sie auf Nächste Geben Sie den Benutzernamen und das Passwort Ihres Zugangs an und klicken Sie dann auf Anmelden Folgen Sie den weiteren Anweisungen von YouTube Hochlade...

Страница 178: ...nwendung eine Kategorie und dann eine Vorlage Führen Sie dazu einen Doppelklick auf die jeweilige Vorlage aus Albumseite Mit dieser Funktion können Sie aus einem oder mehreren Fotos eine Albumseite erstellen Dafür stehen zahlreiche Vorlagen zur Verfügung Klicken Sie auf das Symbol Albumseite Ziehen Sie die Fotos die Sie für die Seite verwenden möchten mit gehaltener linker Maustaste in die Leiste ...

Страница 179: ...auf Der Camcorder schaltet sich plötzlich aus Akku ist leer Laden Sie den Akku auf Der Camcorder schaltet sich plötzlich aus Die automatische Ausschaltfunktion ist aktiviert Überprüfen Sie die Einstellung siehe Seite 138 Der Camcorder reagiert nicht mehr und lässt sich nicht ausschalten Entnehmen Sie den Akku für einen kurzen Moment und legen Sie ihn wieder ein Der Bewegungsmodus lässt sich nicht ...

Страница 180: ...n nur von qualifiziertem Fachpersonal durchführen Reinigung Verwenden Sie zur Reinigung ein weiches trockenes Tuch Verwenden Sie keine Reinigungs oder Lösungsmittel oder gar Verdünner da sie in das Gehäuse gelangen und dauerhafte Schäden verursachen können Beachten Sie die Hinweise zur Reinigung nach Unterwasserbetrieb auf Seite 133 Umwelthinweise und Entsorgungsangaben Die mit diesem Symbol geken...

Страница 181: ...hälter für Geräte Altbatterien gegeben werden dürfen bzw bei nicht vollständig entladenen Batterien Vorsorge gegen Kurzschlüsse getroffen werden muss Konformitätsvermerke Das Gerät und das mitgelieferte Zubehör erfüllen die grundlegenden Anforderungen und anderen relevanten Vorschriften der EMV Richtlinie 2004 108 EC sowie der Richtlinie für Niederspannungsgeräte 2006 95 EC Die dazugehörige Konfor...

Страница 182: ...r Fabrikationsfehler Diese Garantie erstreckt sich nicht auf Produktteile die normaler Abnutzung ausgesetzt sind und daher als Verschleißteile angesehen werden können oder für Beschädigungen an zerbrechlichen Teilen z B Schalter Akkus oder die aus Glas gefertigt sind Diese Garantie verfällt wenn das Produkt beschädigt nicht sachgemäß benutzt oder gewartet wurde Für eine sachgemäße Benutzung des Pr...

Страница 183: ...achweis für den Kauf bereit Für den Fall dass eine telefonische Lösung nicht möglich ist wird durch unsere Hotline in Abhängigkeit der Fehlerursache ein weiterführender Service veranlasst Service Telefon 0049 0 211 547 69 93 E Mail service DE targa online com Telefon 0043 0 1 79 57 60 09 E Mail service AT targa online com Telefon 0041 0 44 511 82 91 E Mail service CH targa online com IAN 79938 Her...

Страница 184: ...92 Water resistance 193 Note on mains disconnection 193 Children and persons with disabilities 193 Charger and battery pack 194 Warning risk of explosion 194 Cables 195 Controls and buttons 196 Front 196 Top 196 Back 196 Left side 197 Right side 197 Bottom 197 Before you start 198 Charging the battery in the charger 198 Charging the battery pack while in the camcorder 200 Inserting the battery pac...

Страница 185: ...ng the menu language 209 Setting the date and time 210 Recording 211 Recording movies 211 Movie mode display 212 Macro mode 214 Portrait landscape recordings 214 Taking pictures 214 The Photo Mode Display 215 Playback 216 Movie playback 216 The Movie Playback Mode Display 217 Photo playback 219 The Photo Playback Mode 220 Using under water 221 Settings for use under water 223 Cleaning after using ...

Страница 186: ...e menu 232 Movie menu icons 232 White Balance 233 Resolution 234 Effect 235 Quality 235 Stabilizer 236 Video lamp 237 EV Exposure compensation 238 Traffic mode loop recording 239 Motion detect 240 Date Stamp 241 Pre record 241 Lapse video 242 Movie playback menu 243 Movie playback menu icons 243 Deleting a movie 243 Deleting all movie recordings 244 Lock One 245 Lock All 245 Slideshow 246 ...

Страница 187: ...2 Lock One 252 Lock All 252 Slideshow 252 DPOF one 252 DPOF All 253 Connectors and Sockets 254 Viewing recordings on a television 254 Connecting via the HDMI Cable 254 Connecting via the USB AV Cable 255 Transferring recordings to a computer 255 Using the USB port 256 Using a card reader 257 Software 257 System Requirements 257 Installing the software 258 Uninstalling the software 258 The main scr...

Страница 188: ...63 Import 263 Merge videos 263 Creating an AVCHD Disk 264 Cutting video clips 265 Upload to YouTube 265 Upload to Facebook 265 Photo album 265 Album page 266 Troubleshooting 267 Maintenance cleaning 268 Maintenance 268 Cleaning 268 Environmental regulations and disposal information 268 Conformity Notes 269 Warranty and service information 269 ...

Страница 189: ...to 270 The camcorder is perfect for mobile use It allows you to capture wonderful memories at any time Intended Use Your camcorder is a Consumer Electronics device and is designed exclusively for recording and playing back movies and pictures Any use other than that mentioned above does not correspond to the intended use The device may only be used for private purposes not for industrial or commer...

Страница 190: ...nts SCAW 5 00 B2 camcorder HWAN CHYUN ENTERPRISE CO LTD DJ04V20500A charger 2 FUJI Electronics Shenzhen Co Ltd CA NP 40 battery packs Power cable USB AV cable HDMI cable SD memory card 4GB not shown CD ROM not shown Bag not shown User manual not shown ...

Страница 191: ...Movie mode resolutions QVGA 30fps 320x240 WVGA 30fps 848x480 WVGA 60fps 848x480 720p 30fps 1280x720 720p 60fps 1280x720 1080p 30fps 1920 x 1080 Digital zoom in Photo mode 10x up to 2x lossless then conventional digital zoom Digital zoom in Movie mode 10x up to 2x lossless then conventional digital zoom for 1080p 8x digital zoom only File format Movie H 264 as AVI Photo JPEG White Balance Automatic...

Страница 192: ...V 1200 mAh Manufacturer FUJI Electronics Shenzhen Co Ltd Charger Manufacturer HWAN CHYUN ENTERPRISE CO LTD Model DJ04V20500A Input voltage AC 100 240V 50 60Hz 0 07A Output voltage 4 2 V 500 mA Operating temperature 0 C 35 C Operating humidity max 85 rel humidity Microphone Built in Speaker Built in Dimensions 55 x 67 5 x 121 mm W x H x D without hand strap Weight approx 289g without battery The te...

Страница 193: ...and repairs should only be carried out by qualified technicians Do not point the camcorder at the sun or other sources of intense light Doing so could damage your eyesight Never activate the flash near the eyes of persons or animals This is especially dangerous for children The flash is dangerous to the eyesight When using the flash stand at least one metre 3 feet away from your subject Only use t...

Страница 194: ...ding This could damage any images already recorded the battery memory card compartment or the ports cover is never opened while under water This could damage the device and any images already recorded Operating Environment This device can be used at temperatures between 0 C and 35 C Keep the device and its accessories away from dust heat and direct sunlight and avoid any exposure to vibration and ...

Страница 195: ...rger from the mains completely unplug the power cord from the wall outlet The wall outlet where the device is connected must be easily accessible so that the power cord can be pulled out quickly in the event of an emergency Unplug the power cord from the mains when there is the possibility of a thunderstorm or if you will not be using the device for a while e g when you go on holiday in order to p...

Страница 196: ...d cause explosions or leaks Only replace the battery pack with an identical model or a type recommended by the manufacturer Never replace batteries in an explosion sensitive environment Inserting or removing the batteries could cause a spark which could trigger an explosion Explosion sensitive areas are normally but not always labelled These include fuel storage areas such as below deck on a boat ...

Страница 197: ...r heavy objects on the cable and make sure that the cord does not get trapped especially near the plug and sockets Never tie knots in the cable and do not tie it to other cables All cables should be laid so that nobody can trip over them or be obstructed by them A damaged power cord can cause a fire or electric shock Check the power cord from time to time Do not use adapters or extension cables th...

Страница 198: ...nglish Controls and buttons Front 1 Lens 2 LED light Top 3 Zoom Volume adjustment button 4 Microphone Back 5 Power indicator 6 Navigation buttons 7 Recording button shutter 8 Diving mode button 9 HDMI output USB AV and charger port ...

Страница 199: ...itch 11 Hand strap Right side 12 On Off button 13 Playback button PLAYBACK 14 Menu button MENU 15 Mode button MODE 16 Display button DISP 17 Display Bottom 18 Tripod mount 19 Battery memory card compartment 20 Battery memory card compartment unlock catch LOCK ...

Страница 200: ... is not charged Please charge the battery pack before using the device for the first time To operate the camera only use the CA NP 40 rechargeable lithium ion battery pack from FUJI Electronics Shenzhen Co Ltd Charging the battery in the charger Insert the battery pack in the charger cradle so that the and contacts match on the battery pack and charger cradle ...

Страница 201: ...attery pack and charging device become warm This is not a malfunction The status light on the charging cradle is orange while the battery is charging When the charging process is complete the status light goes green You can then insert the battery pack into the camcorder Depending on the charge level the battery pack can take up to 3 hours to charge If the light stays green when you insert the bat...

Страница 202: ... will not recharge If necessary press the On Off button 12 to switch the camcorder off The power indicator 5 goes orange during charging The power indicator goes out when the charging process is complete Some computers do not supply USB power while they are turned off If the camcorder power light does not come on make sure your computer is switched on In addition to the options above you can also ...

Страница 203: ...ng the camcorder under water before opening the battery memory card compartment and or the ports cover wait for the camcorder to dry completely Have an absorbent cloth ready when opening the covers and remove any water and dirt around the covers The battery memory card compartment 19 opens up so you can insert the battery pack Make sure that the and contact markings on the battery pack and in the ...

Страница 204: ...cover and press it downwards until it clicks in place Check that the battery memory compartment has been closed properly to make sure it is water resistant closed properly not closed properly Inserting a memory card Using the SD memory card supplied you can increase the camcorder s storage capacity for your movies and photos If a memory card is inserted all the content recorded is saved onto ...

Страница 205: ...h LOCK 19 to the left in the direction of the arrow see figure If you have been using the camcorder under water before opening the battery memory card compartment and or the ports cover wait for the camcorder to dry completely Have an absorbent cloth ready when opening the covers and remove any water and dirt around the covers Then insert the memory card with the metal contacts facing forwards int...

Страница 206: ...Close the battery memory card compartment 19 cover and press it downwards until it clicks in place Make sure that the battery memory compartment has been closed properly in order for the device to be water resistant closed properly not closed properly If the memory card or the internal memory is full the message Memory full appears on the display 17 The movie currently being recorded is saved and ...

Страница 207: ...on is enabled see the figure below right you can only view existing movies and pictures not delete or edit them It is also not possible to record any new movies or pictures onto the memory card Write protection disabled Write protection enabled When you insert a write protected memory card the message Sd card is locked appears on the display 17 ...

Страница 208: ...en rotate it into the required position Once the display 17 is folded out 90 it can be rotated in both directions You can also rotate the display 17 so it faces forwards The picture orientation is adjusted automatically When rotated about 180 display can be folded back flush against the camera casing ...

Страница 209: ...djust the playback volume Navigation buttons 6 Press the left right navigation button to select a menu item Press the centre navigation button to confirm your selection In Movie Photo mode press the up down buttons to set the Exposure correction EV Press the centre navigation button to confirm your selection Record button 7 Press this button in Movie mode to start or stop recording Press this butt...

Страница 210: ...n Off button 12 to switch the camcorder on The power light 5 goes green Press the On Off button 12 to switch the camcorder off The power light 5 then goes out When you open the display 17 the camcorder switches itself on automatically When you close the cover it switches itself back off again providing you are not recording a movie The following table shows an overview of the different statuses of...

Страница 211: ...ew is disabled and only the menu is visible Setting the menu language Open the camcorder display 17 The device switches on automatically Press the Mode button 15 twice The Setup menu appears The first icon Language is highlighted Press the centre navigation button 6 to confirm your selection Use the right or left navigation button 6 to select the menu language you want Press the centre navigation ...

Страница 212: ...icon Press the centre navigation button 6 to confirm your selection Next you can set the year Press the up down navigation buttons 6 to set the desired value Press the right navigation button 6 to toggle between the year month day hours and minutes fields Please note that you will have to enter the time in 24 hour format Each value year month day hours and minutes can be set using the up down navi...

Страница 213: ...n telephoto to enlarge the subject or press the W zoom button wide angle to make it smaller While recording you can press the Playback button 13 to capture up to 3 pictures snapshots You can pause a movie recording by pressing the Menu button 14 and resume it by pressing the button again Press the Record button 7 to stop recording The power light 5 goes green During recording different icons may a...

Страница 214: ...30 36 25 24 No Icon Description 21 Zoom indicator 22 free memory expressed in used memory 23 Number of recordings saved Number of snapshots saved 1 24 Movie quality 25 Date Stamp 26 Traffic mode loop recording Pre record Time lapse video 27 Motion detect 28 Time recorded 29 Exposure compensation ...

Страница 215: ...ion 30 Resolution 31 Battery capacity 32 Macro mode 33 Video lamp 34 Stabilizer 35 Effect 36 White Balance 37 Operating mode Movie mode The icons may vary depending on the selected setting 1 The number of snapshots is only displayed during movie recording ...

Страница 216: ...s in Movie mode automatically Press the Mode button 15 once to toggle to Photo mode The macro switch 10 lets you toggle between close up recordings macro mode and portrait landscape captures Use the zoom volume adjustment button 3 to zoom in or out of the picture view Press the T zoom button telephoto to enlarge the subject or press the W zoom button wide angle to make it smaller Press the Record ...

Страница 217: ... 41 42 49 47 50 55 45 48 44 No Icon Description 41 Zoom indicator 42 free memory in used memory 43 Number of recordings saved remaining 44 Picture quality 45 Date Stamp 46 Continuous Shooting 47 Face Detection 48 Self timer 49 Exposure compensation 50 Resolution 51 Battery capacity ...

Страница 218: ...con in the top left corner of the display 17 indicates that movie playback mode is selected Press the playback button 13 again to return to Movie mode In playback mode different icons may appear on the display 17 informing you about the current settings You can show or hide these icons by pressing the Display button 16 If you press the Display button additional information such as the resolution a...

Страница 219: ...nglish 217 The Movie Playback Mode Display 65 61 62 63 64 No Icon Description 61 Playback mode 62 Elapsed time total recording time 63 free memory in used memory 64 current movie number total number of movies 65 File protection ...

Страница 220: ...use the zoom volume adjustment button 3 to adjust the playback volume The following functions are available during movie playback Press the Menu button 14 to pause playback Press the Menu button 14 again to resume playback For rewind or fast forward press and hold the left or right navigation button 6 for a moment Pressing the button again gradually increases the speed to max 8x To stop playback p...

Страница 221: ... mode Use the right or left navigation buttons 6 in playback mode to select a picture You can use the zoom volume button 3 to show a 4 or 9 picture thumbnail view of the selected photos by pressing the W zoom button wide angle twice Next you can select a picture from this thumbnail view by pressing the navigation buttons 6 The selected image is outlined in red Press the centre navigation button 6 ...

Страница 222: ...AW 5 00 B2 220 English The Photo Playback Mode 75 71 72 73 74 No Icon Description 71 Photo playback 72 free memory in used memory 73 current photo number total number of photos 74 Battery capacity 75 File protection ...

Страница 223: ...ter e g when diving Make sure that your camcorder does shows no signs of damage Double check that the battery memory card compartment 19 and the ports cover 9 are properly closed and that there is no dirt or sand between the covers This ensures that the device is water resistant closed properly not closed properly ...

Страница 224: ...t use the camcorder for longer than 60 minutes under water at a time Only use the camcorder in water of temperatures of between 0 and 40 C The water resistance of this camcorder applies to salt and fresh water only It does not apply to any cleaners chemicals solvents or water in public swimming pools Liquids of this kind must be wiped off the camcorder immediately Avoid excessive vibration or shak...

Страница 225: ... and Video modes Cleaning after using under water Clean the camcorder after every time it is used under water Make sure that your camcorder shows no signs of damage After using the camcorder under water clean it with tap water To do this submerge in tap water for about 10 minutes to remove for example salt residues Then use a soft cloth to dry the camcorder and the lens Place the camcorder in a co...

Страница 226: ...tion The icons show the settings selected Any highlighted icons are animated Setup Menu The setup menu lets you adjust the camcorder preferences Open the camcorder display 17 The device switches on automatically Press the Mode button 15 twice The setup menu is then displayed When you have made all the changes you want press the Mode button 15 to quit the setup menu and return to recording mode To ...

Страница 227: ...Default Restores the factory default settings Auto power off To select an automatic power off timeout Frequency To set the electrical power supply AC frequency TV standard To select the TV standard Beep To turn the acoustic signals on or off Information Shows information about saved photos movies and about the memory HDMI Standard To select the HDMI standard ...

Страница 228: ... follows Use the right or left navigation button 6 to select the icon Press the centre navigation button 6 to confirm your selection Next you can set the year Press the up down navigation buttons 6 to set the desired value Press the right navigation button 6 to toggle between the year month day hours and minutes fields Please note that you have to enter the time in 24 hour format Each value year m...

Страница 229: ...e memory card if one is inserted It is only possible to format the internal memory if there are no memory cards inserted Indicates that the SD card will be formatted Indicates that the internal memory will be formatted The following settings are available Does not format Formats the indicates storage medium Use the right or left navigation button 6 to select the desired setting Press the centre na...

Страница 230: ...o power off You can get the device to power off automatically after a certain time to save battery If no buttons are pressed during the preset time the device powers off automatically To switch the camcorder back on press the On Off button 12 Use the right or left navigation button 6 to select the icon Press the centre navigation button 6 to confirm your selection The following settings are availa...

Страница 231: ...r left navigation button 6 to select the desired setting Press the centre navigation button 6 to confirm your selection TV Standard Choose between the PAL or NTSC television standards NTSC is the standard used in America and Japan PAL is used in Europe This setting only applies for playback via the video cable Use the right or left navigation button 6 to select the icon Press the centre navigation...

Страница 232: ...tton 6 to select the desired setting Press the centre navigation button 6 to confirm your selection Information Shows information about storage space The number of stored photos movies and information about the internal memory and SD card status is shown Use the right or left navigation button 6 to select the icon Press the centre navigation button 6 to confirm your selection The following setting...

Страница 233: ...enu button 14 to exit the view HDMI Standard Select the HDMI standard that you would like to use Use the right or left navigation button 6 to select the icon Press the centre navigation button 6 to confirm your selection The following settings are available 720P 1080i Use the right or left navigation button 6 to select the setting you want Press the centre navigation button 6 to confirm your selec...

Страница 234: ...bilizer Toggles the stabilizer on or off Video lamp Switches the video lamp on or off EV Exposure compensation To select the exposure compensation Traffic mode loop recording Switches the loop recording on or off Motion detect If this function is enabled the camcorder will start recording a movie as soon as it detects movement Date Stamp Toggles the date stamp function on or off Pre record The rec...

Страница 235: ...left navigation button 6 to select the icon Press the centre navigation button 6 to confirm your selection The following settings are available Automatic Daylight Cloudy Fluorescent Tungsten Use the right or left navigation button 6 to select the setting you want Press the centre navigation button 6 to confirm your selection It is also possible to adjust the white balance by pressing the left navi...

Страница 236: ...ilable Low resolution of 320 x 240 pixels and 30 fps frame rate Medium resolution of 848 x 480 pixels 30 frames per second fps frame rate Medium resolution of 848 x 480 pixels 60 frames per second fps frame rate High resolution of 1280 x 720 pixels and a high 30 fps frame rate High resolution of 1280 x 720 pixels and a high 60 fps frame rate High resolution of 1920 x 1080 pixels and a high 30 fps ...

Страница 237: ...button 6 to confirm your selection The Sepia setting creates a black and white picture with a brown colour tint This makes the picture look older Quality The Quality setting determines the compression ratio of the movie recorded when saved onto the memory card or internal memory You can store more movies or longer ones with a higher compression rate normal quality You can record using the quality ...

Страница 238: ...your selection Stabilizer You can enable the stabilizer to reduce shaky pictures Use the right or left navigation button 6 to select the icon Press the centre navigation button 6 to confirm your selection The following settings are available Disables the stabilizer Enables the stabilizer Use the right or left navigation button 6 to select the setting you want Press the centre navigation button 6 t...

Страница 239: ...ng settings are available Switches the LED light 2 off Switches the LED light 2 on Enables Night mode This increases the camcorder s light sensitivity Use the right or left navigation button 6 to select the setting you want Press the centre navigation button 6 to confirm your selection It is also possible to switch on the video lamp by pressing the right navigation button 6 in recording mode The v...

Страница 240: ...ous e g a computer or a television screen or when recording in backlit e g front on sunlight conditions Use the right or left navigation button 6 to select the icon Press the centre navigation button 6 to confirm your selection Press the up down navigation buttons 6 to set the value you want 2 0 2 0 Press the centre navigation button 6 to confirm your selection It is also possible to set the expos...

Страница 241: ...ght or left navigation button 6 to select the setting you want Press the centre navigation button 6 to confirm your selection A new file is automatically created after 10 minutes Data is overwritten automatically as soon as the memory card or the internal memory is full The oldest data is overwritten first If you do not wish to delete or overwrite any recorded data please make a backup copy or swa...

Страница 242: ...ivity Enables motion detect with medium sensitivity Enables motion detect with high sensitivity Use the right or left navigation button 6 to select the setting you want Press the centre navigation button 6 to confirm your selection Please connect an external USB power adapter not supplied when enabling this function if you intend to record for an extended period To do this you will need the USB AV...

Страница 243: ...centre navigation button 6 to confirm your selection After the date stamp has been enabled it is not possible to remove it from the recording You should therefore check if the date and time are properly set prior to recording Pre record If this function is enabled recording starts 3 seconds before you press the Record button 7 to start recording Use the right or left navigation button 6 to select ...

Страница 244: ...cording The device records one image per second The device records one image every 5 seconds The device records one image every 30 seconds Use the right or left navigation button 6 to select the setting you want Press the centre navigation button 6 to confirm your selection Please connect an external USB power adapter not supplied when enabling this function if you intend to record over an extende...

Страница 245: ...inst accidental deletion Protect all movie recordings Protects your recordings against accidental deletion Deleting a movie Use this option to delete a single movie Warning Once a recording has been deleted it cannot be restored Use the right or left navigation button 6 to select the icon Press the centre navigation button 6 to confirm your selection Use the right or left navigation button 6 to se...

Страница 246: ...ings All saved movies can be deleted in one go This does not delete any photos you have taken Warning Once a recording is deleted it cannot be restored Use the right or left navigation button 6 to select the icon Press the centre navigation button 6 to confirm your selection The following settings are available Does not apply any changes Deletes all movies Use the right or left navigation button 6...

Страница 247: ...tection Protected movies appear with a icon on the display 17 Lock All Here you can protect all recordings to avoid accidental deletion Use the right or left navigation button 6 to select the icon Press the centre navigation button 6 to confirm your selection The following settings are available Does not apply any changes Protects all movies Unlocks all previously protected movie recordings Use th...

Страница 248: ...on Press the centre navigation button 6 to confirm your selection The following settings are available Disables slideshow Enables slideshow Use the right or left navigation button 6 to select the setting you want Press the centre navigation button 6 to confirm your selection You can press the Menu button 14 to pause playback and the centre navigation button 6 to stop it ...

Страница 249: ...he recording quality Stabilizer Toggles the stabilizer on or off Continuous Shooting Switches continuous shooting on or off Self timer To delay the recording Date Stamp Toggles the date stamp function on or off Face Detection Switches face detection on or off Most function settings in Photo mode are identical to those in Movie mode see the chapter Movie Menu starting from page 232 Therefore in the...

Страница 250: ...280 x 960 pixels Medium resolution of 1920 x 1080 pixels Medium resolution of 2592 x 1944 pixels Higher resolution of 3648 x 2052 pixels interpolated High resolution of 4616 x 3462 pixels interpolated Use the right or left navigation button 6 to select the setting you want Press the centre navigation button 6 to confirm your selection Continuous Shooting This function allows you to take three cons...

Страница 251: ...apture for a preset time after the Record button 7 is pressed This allows you to participate in the photo e g for a group photo Use the right or left navigation button 6 to select the icon Press the centre navigation button 6 to confirm your selection The following settings are available Self timer disabled The photo is taken 2 seconds after the shutter button is pressed The photo is taken 10 seco...

Страница 252: ...entre navigation button 6 to confirm your selection After the date stamp has been enabled it is not possible to remove it from the recording You should therefore check if the date and time are properly set prior to recording Face Detection This function detects faces and optimises the capture accordingly Use the right or left navigation button 6 to select the icon Press the centre navigation butto...

Страница 253: ...ne Protects your pictures against accidental deletion Lock All Protects your pictures against accidental deletion Autoplay Plays all pictures as a slideshow Set printing properties for one picture Set number of printouts for a photo Set printing properties for all photo Set number of printouts for all photos Delete one photo This allows you to delete a single photo This function works in the same ...

Страница 254: ... playback see page 246 DPOF one DPOF Digital Print Order Format allows you to select an image to be printed from your camcorder and then specify how many prints you would like Use the right or left navigation button 6 to select the icon Press the centre navigation button 6 to confirm your selection Use the right or left navigation button 6 to select the photo you want Press the centre navigation b...

Страница 255: ...sly set number of printouts to all photos or to delete the settings assigned for all photos at once Use the right or left navigation button 6 to select the icon Press the centre navigation button 6 to confirm your selection The following settings are available Does not apply any changes Deletes the assigned settings for all photos Applies the previously set number of printouts to all photos Use th...

Страница 256: ... The television set needs to have an appropriate Video In connector Depending on the connectors available on the television you can use the USB AV cable or the HDMI cable The HDMI cable provides digital images and sound and therefore the best quality Simply operate the device as usual For instance enable the Autoplay slideshow function to view all photos in sequence Connecting via the HDMI Cable ...

Страница 257: ... a card reader It is not possible to transfer data from a computer to the camcorder The copy function only allows data transfer from the camcorder to the computer Be careful when renaming any folders and files Do NOT try to change the folder or file names stored on the device from the computer or you may not be able to play back any files contained here on your camcorder Once you have copied your ...

Страница 258: ...SilverCrest SCAW 5 00 B2 256 English Using the USB port Use the USB cable supplied to connect your camcorder to the computer as shown in the diagram Switch the camcorder on ...

Страница 259: ...My Computer Open My Computer on your PC and double click on the drive representing the card reader All recorded files can be found in a subfolder of the folder DCIM on this drive Now you can copy the recorded files from the camcorder into a folder of your choice on the computer s hard disk Software The software supplied allows you to edit and play your recordings System Requirements Operating syst...

Страница 260: ... Then switch the camcorder on Insert the CD ROM supplied into the CD or DVD drive of your computer The CD will launch automatically Then follow the on screen instructions to install If the setup programme does not start automatically or you accidentally cancel it you can launch the file TotalMedia HDCam exe manually Uninstalling the software To uninstall the software please use the Uninstall Wizar...

Страница 261: ...guage You can change the language of the software interface From the main dialog click Options Preferences Select the language you want from the list and click OK to confirm A message appears that a restart is required Click OK to confirm the message Then start the application again Editing recordings Viewing recordings Use the USB cable to connect the camcorder to your computer Then switch the ca...

Страница 262: ...ion on the current recording To display a recording in a new window double click on it In the display window click the arrow icons or use the arrow keys on your keyboard to display the previous or next recording To view a movie recording double click on it The video window contains Stop Play and Pause icons Click the arrow icons or use the arrow keys on your keyboard to display the previous or nex...

Страница 263: ...to view them Select all recordings that you want to import from the drive selected and click Import on the bottom toolbar A window with a user prompt appears To import the selected recordings select the Import selected scenes option You can choose to import all or only all new recordings If necessary enter a folder name or use the default name Click OK to confirm Depending on the number of recordi...

Страница 264: ...rives installed on your computer For example this allows you to access any recordings stored on a CD ROM Preview window The preview window gives you various options for sorting and editing your recordings Shows all recordings according to their rating Shows all recordings that have not been imported yet Here you can filter to display only pictures only movies or all recordings Drag the slider to a...

Страница 265: ...album from your pictures Album page Creates a page e g an invitation card from your pictures The icon entitled YouKu links to an Asian video portal and is not suitable for use in European countries Import See page 261 Importing recordings Merge videos Merge videos lets you merge multiple video clips to make a film Click the merge videos icon to show the video editing timeline Drag the video clips ...

Страница 266: ...evision set Not all players support playback from self recorded AVCHD disks Insert a DVD R DVD R DL DVD RW or DVD RAM disk into your DVD drive Click the Create AVCHD Disk icon to open the disk compilation workspace Drag the video clips you want onto the timeline at the bottom of the window Click the Next button to start the process Select the drive and folder from your hard disk and click OK To us...

Страница 267: ...ine at the bottom of the window Click Next Enter your username and password and then click Login Follow the YouTube on screen instructions Upload to Facebook Click on the Facebook upload icon Drag the video recording you want onto the timeline at the bottom of the window Click Next Enter your e mail address and password and click Login Then follow the Facebook on screen instructions Photo album Th...

Страница 268: ...os There are also several templates that you can use Click the Album page icon Drag the pictures you want onto the bar at the bottom of the window Click Next The programme ArcSoft Print Creations launches automatically Choose a category and then a template from the application To do this double click on the template you want ...

Страница 269: ...camcorder on The battery pack is empty Recharge the battery The camcorder suddenly powers off The battery pack is empty Recharge the battery The camcorder suddenly powers off Auto power off is enabled Check the settings see page 228 The camcorder fails to respond and cannot be switched off Remove the battery pack for a few seconds and re insert it Unable to disable motion detect The device is stil...

Страница 270: ...for cleaning Do not use any cleaners detergents or solvents as these may enter the housing and cause permanent damage to the product Please read the notes on Cleaning after using under water usage on page 223 Environmental regulations and disposal information Devices marked with this symbol are subject to European Directive 2002 96 EC All electrical and electronic devices must be disposed of separ...

Страница 271: ...basic and other relevant requirements of the EMC Directive 2004 108 EC as well as the Low voltage Directive 2006 95 EC The corresponding Declaration of Conformity can be found at the end of this User Manual Warranty and service information Warranty of TARGA GmbH Dear Customer This device is sold with three years warranty from the date of purchase In the event of product defects you have legal righ...

Страница 272: ...maged incorrectly used or serviced To ensure correct use of the product always comply fully with all instructions contained in the user manual The warnings and recommendations in the user manual regarding correct and incorrect use and handling of the product must always be observed and complied with The product is solely designed for private use and is not suitable for commercial applications The ...

Страница 273: ...e Phone 0207 36 50 744 E Mail service GB targa online com Phone 01 242 15 83 E Mail service IE targa online com Phone 800 62 175 E Mail service MT targa online com Phone 800 92 496 E Mail service CY targa online com IAN 79938 Manufacturer Please note that the following address is not a service address First contact the service point stated above TARGA GmbH Coesterweg 45 59494 Soest Germany ...

Страница 274: ......
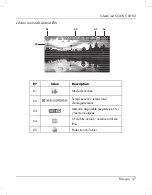
Отзывы: