Operating manual
Twister II NA
Copyright Silca S.p.A. 2015
17
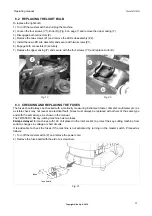
8.2 REPLACING THE LIGHT BULB
To replace the light bulb:
1) Turn off the master switch and unplug the machine.
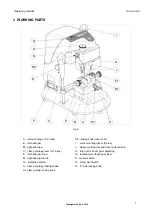
2) Loosen the four screws (Y1), knob (R) (Fig. 6 on page 7) and remove the upper casing (Y).
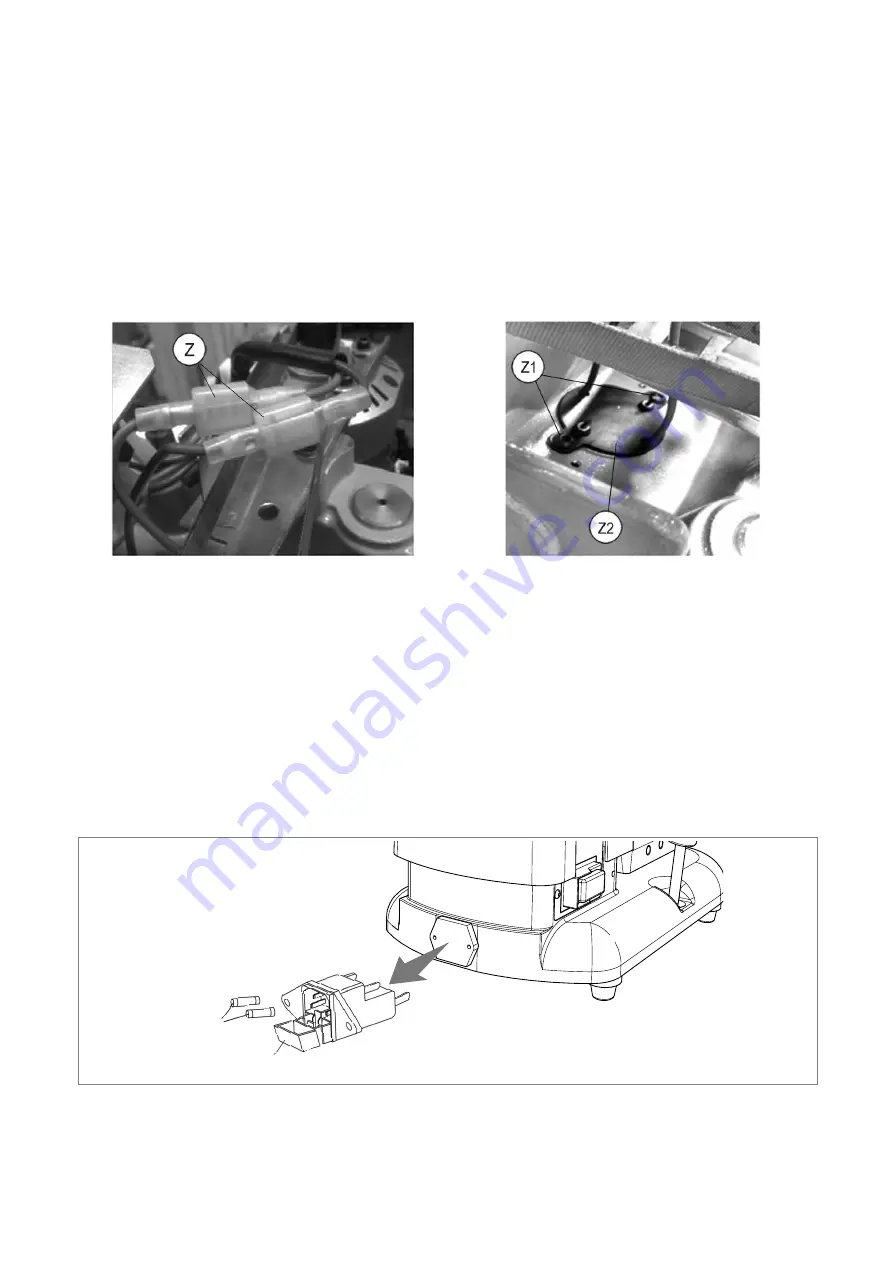
3) Disengage both connectors (Z).
4) Remove the two screws (Z1) and remove the LED sub assembly (Z2).
5) Install the new LED sub assembly and secure with two screws (Z1).
6) Engage both connectors (Z) securely.
7) Replace the upper casing (Y) and secure with the four screws (Y1) and replace knob (R).
Fig. 19
Fig. 20
8.3 CHECKING AND REPLACING THE FUSES
The fuses should always be checked with a continuity measuring instrument (tester, ohmeter, multimeter etc.) as
a visible check may not reveal an electrical fault. Fuses must always be replaced with others of the same type
and with the same Amps, as shown in the manual.
The TWISTER II NA key-cutting machine has two fuses:
8 Amps delayed
for machines with 120 Volt placed in the inlet socket, to protect the key-cutting machine from
sudden changes in voltage or short circuits.
It is advisable to check the fuses if the machine is not activated by turning on the master switch. Proceed as
follows:
1) Turn off the master switch (P) and remove the power cord.
2) Remove the fuse board with the aid of a screwdriver.
fuses
fuse board
Fig. 21
Содержание Twister II NA
Страница 1: ...Twister II NA Operating Manual Original Instructions D445453XA vers 1 0 EN...
Страница 4: ......

